- Home
- Drawing Tutorials
- Drawing Faces
Drawing Faces:
Shading a Realistic Portrait
Shading, or rendering, is one of my favorite stages of drawing faces. It is so rewarding to see your portrait slowly become three-dimensional, and come to life. That is exactly what I'll work on in this second half of the portrait drawing tutorial!
Return to Portrait Drawing Tutorial Part 1: Blocking in a Portrait here.
Before you begin adding value to your drawing, remember that your block-in is of the utmost importance. Take as much time as you need to make sure that it is accurate. You shouldn't have to make any drastic changes to the proportions, shadow shapes or structure of the picture during the value stage!
Rendering your portrait will progress smoothly if ...
- the head and features are well placed and constructed (learn how to draw eyes, lips and ears here)
- you have closely observed and drawn in the shadow shapes, and
- you have a good understanding of value
Free Video Course on Essential Drawing Concepts
Throughout this tutorial I refer to essential drawing concepts such as values, edges, and more. Learn about these in my free video course to get the most out of this lesson on drawing faces!
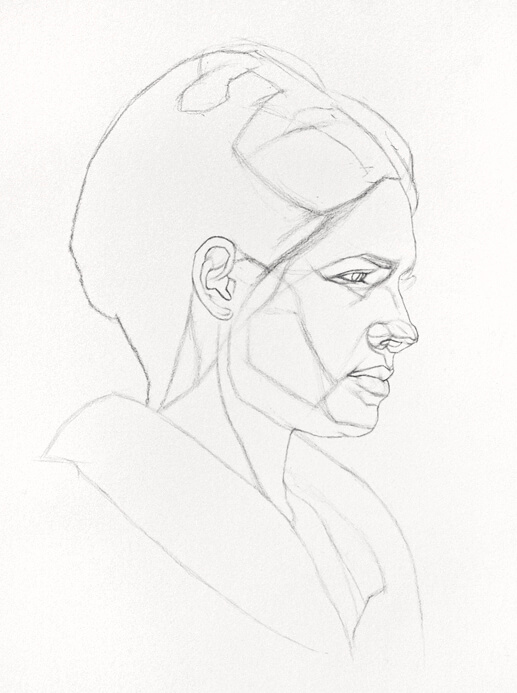
Let's pick up where I left off in the first half of this portrait drawing tutorial.
As I start drawing in the values, my initial goal is to cover the white of the paper as quickly as possible. Why? Because we can only judge the accuracy of a value by comparing it to its surrounding values!
Values are relational, meaning that what surrounds a value greatly affects how we perceive it. A value surrounded by white can look much darker than a value surrounded by darker values.
In order to accurately gauge the value relationships in our drawing, we must first establish some general value relationships throughout our image, and cover up the white of the paper where it's not needed.
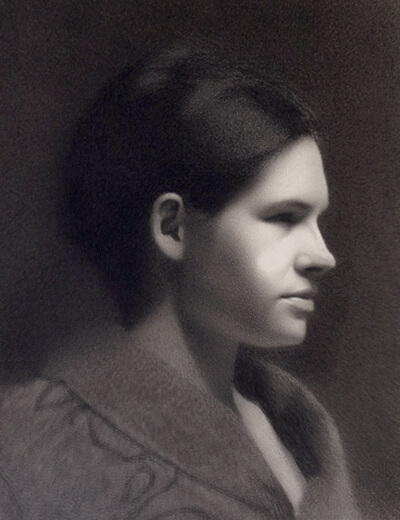
So, after the block-in, the next step in drawing faces is to mass in the values.
Drawing Faces: Adding Tone to your Drawing
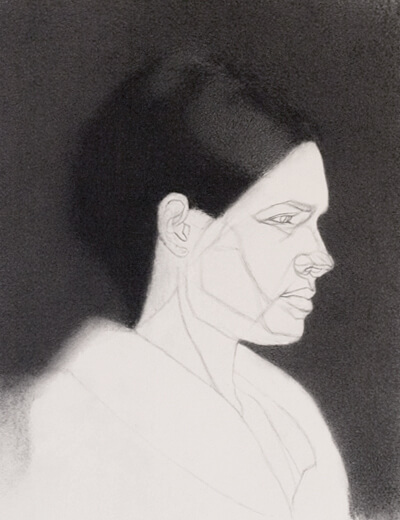
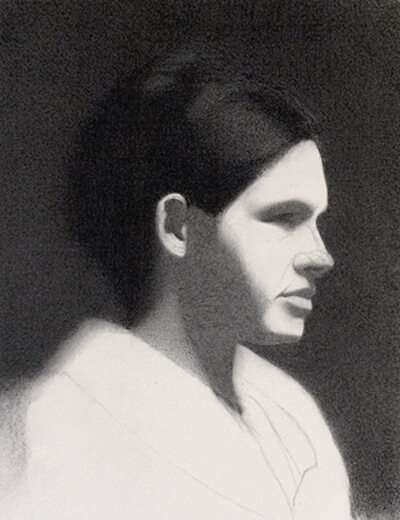
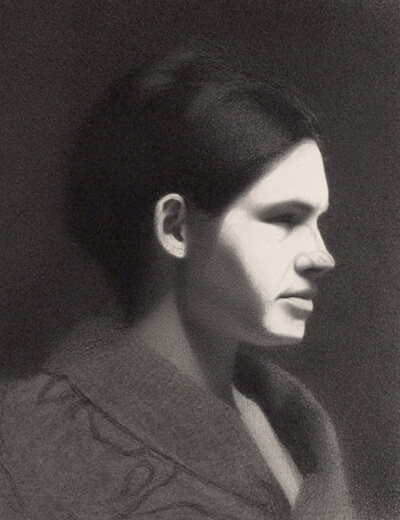
Although I covered a lot of area in this step, it was actually very simple.
All I did was mass in three values: a value for the background, a value
for the dark shape of the hair, and a value for the light shape in the
hair.
It is already beginning to look three-dimensional because of the very
soft edge that merges the hair shape with the background: soft edges
recede, and sharp edges come forward.
Learn all about edges in Lesson 6 of my free Mini-Course.
I mass in the shadow shapes on the face with
one or two values at most, and I darken the eye and nostril just so I
don't completely lose the shapes.
In this beginning stage of drawing in tone, I make the values even enough to compare them, but am not concerned with rendering any gradations or specifics yet. My values are simply 'blocked in', not rendered, meaning that they are not very evenly drawn yet.
This is because as I continue the drawing and notice what changes have to be made, I
will have to modify the values, so it doesn't make sense to spend time
beautifully rendering them at this point.
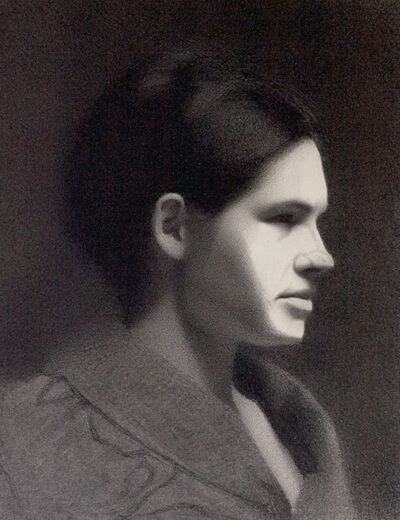
I continue drawing in the general value masses.
Here I have laid in an approximate value for the light shape on the neck.
I have also worked on the shadow portion below the ear, softening the edge where the hairline meets the neck.
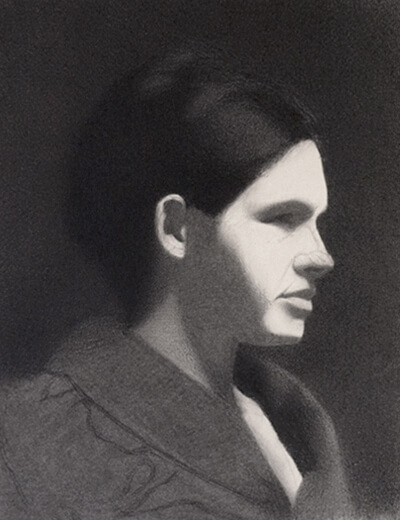
Although this tutorial is about drawing faces, addressing the background and clothing can "complete the illusion".
Treat the clothing as you would any other area of your drawing: by first massing in the general values.
Once I have done this, I have reached an important stage in the drawing:
the only area where I can still see the white of the paper is the light
area on the face, and the chest and collarbone area.
I can now focus on comparing and modifying my values.
Drawing Faces: Analyzing the Values of the Face
There are so many interesting tonal differences happening within the shadows on the face!
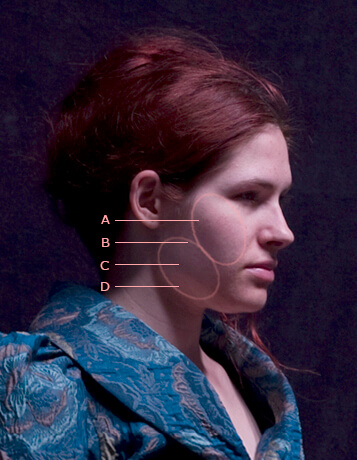
There are two core shadows: at points A and C.
This is happening because there are two forms on the side plane
of the face: the cheekbone area, and the jaw area, both of which can be
thought of as egg-shaped forms (as I have indicated).
The light is perpendicular to the form where you see the highlight on
the cheek. It then becomes darker until it can no longer reach the form
(this is the top core shadow, or Point A). The form of the jaw
then begins at point B. It catches a sliver of light from the light
source before turning away at point C, which is the second core shadow.
Point D is much lighter than the rest of the shadow due to reflected light. Light is reflected off of the model's chest, and bounces back up into the shadow under the chin. Before you begin developing the tonal differences in the shadow on the cheek and jaw, notice how much information is lost when you squint at this area. In order to create the illusion of three-dimensionality, you must preserve the contrast between the light and dark value groups in your picture.
To create enough difference between the light and the dark value groups, draw only what you see when you squint! Notice how dark I made the reflected light in my drawing, even though it appeared to be quite light on the model.

Next, I find and draw the 'darkest dark values', or darkest accents, within the shadows on the face. In this case the 'darkest darks' on the face are: the eye, the nostril, and just where the upper lip turns away and meets the lower lip.
I have also started rendering the forms of the ear. Notice how much more of a sense of depth it has gained since the last step! All from indicating the helix and anti-helix of the ear. Learn about the structure of the ear in my ear drawing tutorial.
Don't miss these tutorials on drawing the features of the face:
- How to Draw Realistic Eyes Step by Step
- How to Draw Realistic Lips Step by Step
- How to Draw an Ear on Toned Paper
Drawing Faces: Rendering
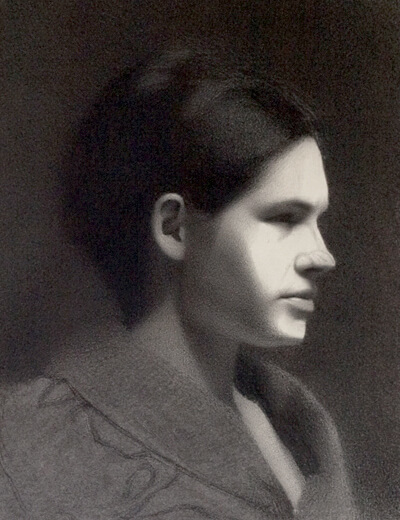
Begin rendering the half-tone values of the face with a value or edge that seems easy and obvious to you.
For example, I began shading by softening the edge of the hairline against the face.
I then started drawing the gradation on the temple, from the eyebrow to the hairline.
I continue 'turning the form', or softening the edges from the shadows into the half-tones of the face.
More specifically, I'm working on rendering the edge from the shadow on the cheek towards the eye, creating a rounded form that flattens out at the temple.
Watch Lesson 6 of my free mini-course to view four shading techniques for softening edges!
Since the last step I have also toned down the light area of the ear, as it is far from the lightest value in this portrait, and I don't want it to draw attention away from the face.
Some schools teach that you should begin rendering on one side of the face and shade until you reach the other side. While this is a perfectly valid method, I personally prefer to render different areas around the face. I work from dark to light, or I draw the values that are most clear to me and work towards the more subtle ones.
For example, you can ask yourself: what is the darkest value on the light shape of the face? (What is the 'darkest light'?)
Perhaps that bottom lip. Furthermore, that value may be fairly easy to draw accurately because I can compare it to the value of the shadow just below it, and to the upper lip.
Once I establish the value of the bottom lip, it becomes another variable that I can compare the rest of the values to.
(View a step by step lip drawing tutorial here!)
From the lip, I move on to rendering the chin.
I also begin drawing the different edge qualities of the eyebrow, and from there, begin rendering the forehead.
I continue rendering the face.
Constantly refer to the model as you render, asking yourself questions such as:
- What is the lightest area on the face?
- Are there highlights on the face, and if yes, where are they?
- Where is the sharpest edge on the face?
- Where is the softest edge on the face?
- Is my eye drawn to my intended focal point when I look at my drawing?
Remember to step back from your picture regularly when drawing faces. Looking at it from afar will help you to notice what is working and what is not.
I want the focal point of the picture to be the face, but when I look at my drawing, I notice that the face isn't attracting and holding enough of my attention.
Instead, I notice that my eye quickly drops to the light shape on the chest. Referring back to the model, I realize that I have slightly overmodelled the face. Overmodelling occurs when there is not enough contrast between the light and dark value families. (A synonym for overmodelling could be "over-shading".)
Essentially the light values in the face are not light enough. The highlights in particular could be considerably brighter.
This weakens the value structure, and causes the drawing to look less believable. This is a common drawing problem to watch out for, particularly when drawing faces.
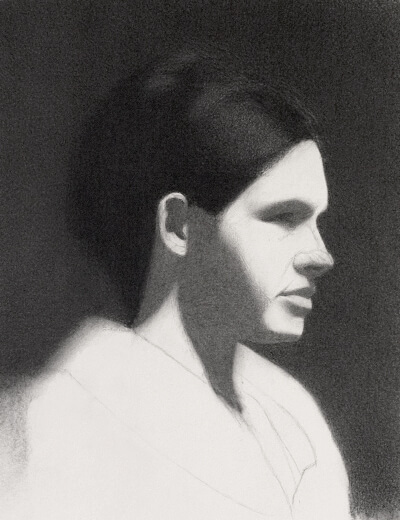
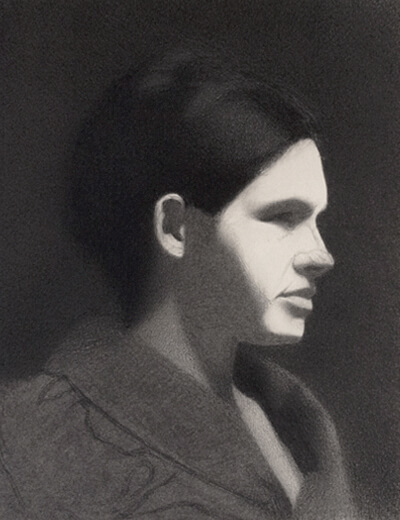
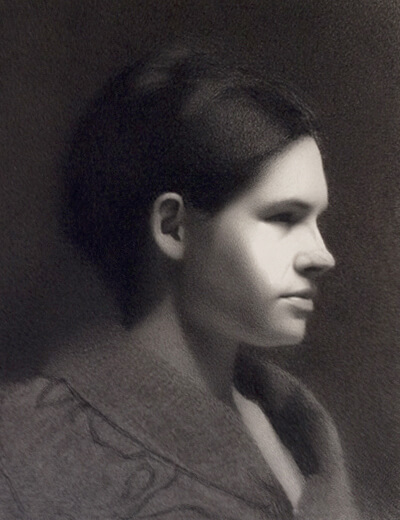
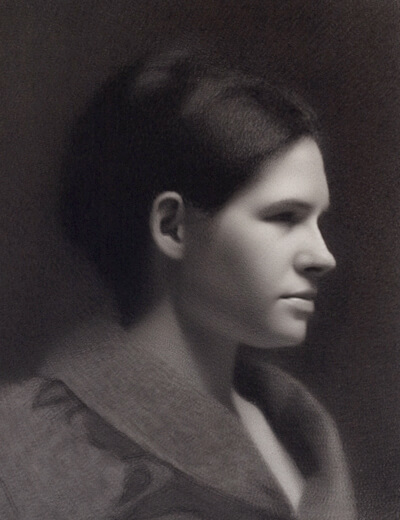
Here I have brightened the light areas on the face, and put in the finishing touches: the highlights on the nose and the lip.
The clothing is drawn simply, so as not to detract from the focal point of the image: the face.
And here is my finished portrait drawing!
I hope you enjoyed this tutorial on shading a portrait drawing! Missed the first page on blocking in the portrait? Return to Page 1 of the Portrait Drawing Tutorial here.
What next?
Why not learn how to draw the features of the face, such as the eyes, lips and ears?
Before you go, don't miss the downloadable Infographic of this tutorial below.
Happy Drawing!
F R E E D O W N L O A D
Get a free Infographic on Shading the Portrait
(plus, get a weekly newsletter and access to the Members-Only Drawing Resource Library)!
Enjoyed this page? Please share it!
Share buttons and pinnable image below:

If you enjoyed this page on drawing faces, you might also be interested in:
Related Pages
8 Most Common Eye Drawing Mistakes (and how to avoid them!)
How to Draw an Ear on Toned Paper
5 Proportions of the Face to Know
Return to Portrait Drawing from Drawing Faces
Return to Drawing Tutorials from Drawing Faces
Return to the Home Page from Drawing Faces
Search the site:


Improve your drawing skills with the free 6 Stages of a Realistic Drawing Mini-Course!
By Marina Fridman COPYRIGHT © 2023 The Drawing Source. All Rights Reserved.