Cast Drawing Tutorial
|
|
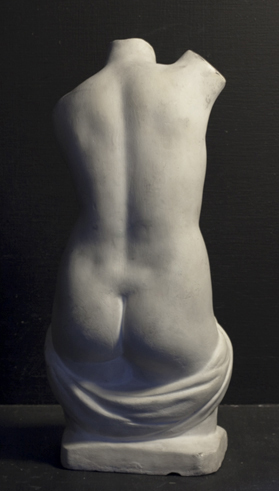
Cast drawing wonderfully bridges still life and figure drawing. It is an opportunity to become familiar with the figure drawing process before facing the challenges of drawing a model.
For example, a pose that a model takes is bound to change to some degree as he or she settles into it.
Other poses are extremely difficult to sustain for extended periods of
time and require frequent breaks, which can disrupt your concentration.
With experience these challenges can become opportunities.
It can be exciting to see the subtle change of an expression, to notice
which muscles engage as the model moves, and observe how the pose
changes over time.
|
However, when learning to draw the figure there
are so many variables to keep in mind that it is helpful to remove a
few for a short time. This is where cast drawing comes in!
Beginning the Cast Drawing
|
|
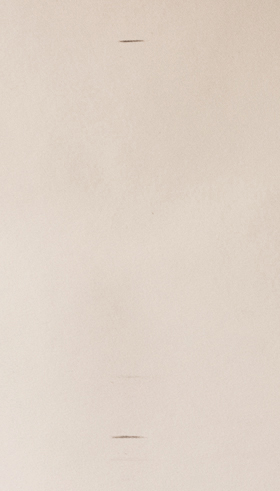
Let's begin by considering the composition, and how large we want our drawing to be on the page. Thumbnails are efficient ways to test out several compositions and choose the one that best suits the drawing. In this case my composition is quite simple. My main consideration is where to place the cast on the page, and how much room to leave on all sides.
However, "simple" does not mean "easy"!
If I neglect the planning stages of my drawing, I may later find that my subject does not fit on my page.
Determining an arrangement and sticking to it is a very useful skill
that you will use more and more as you draw increasingly more complex
compositions.
|
|
|
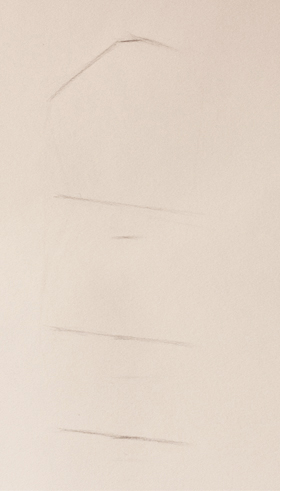
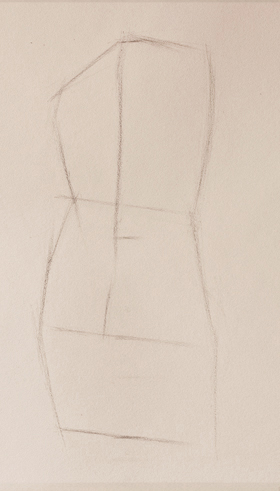
To continue the cast drawing, I find the next largest proportion to divide the figure into. For example the midpoint of the cast, dividing it into two halves. Why?
Because it is an easy point of reference to find, both on my drawing and on the cast itself. I can now look to see what goes through that point, and what is near it.
At this stage you are looking for easy measurements. There is no single "correct answer"!
I chose the mid-point, but you may choose a measurement that seems clearer to you.
|
Drawing is problem-solving, and there are always many possible solutions!
|
|
Drawing Principle:
Work from General to Specific This means that we begin by finding the larger, more evident information
such as a gesture line, largest proportions and major angles first.
General information creates a framework upon which we can then build the smaller details. This principle also makes the drawing process smoother and easier.
For example, beginning your drawing with something specific like the
model's hand would make it much more difficult to capture the correct
gesture than if you began with a generalized gesture line. This would establish the idea of the pose from the very beginning of the drawing.
|
|
|
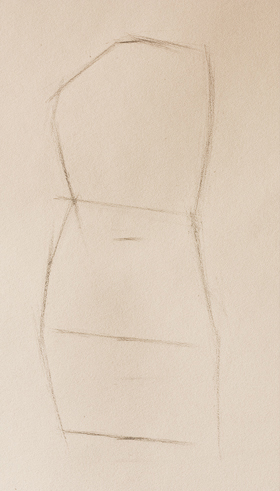
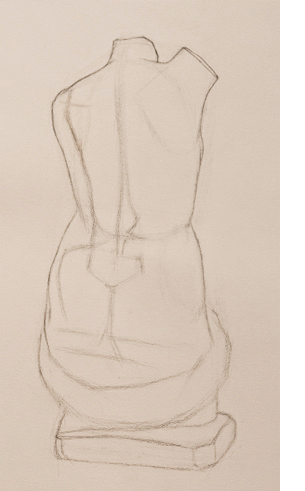
I plot the general angles of the cast, using light, easily erasable lines.
In these early stages of the cast drawing, take the time to really observe and familiarize yourself with what you are drawing.
It may not be the most visually impressive stage of the drawing, but
resist the temptation to rush through to the "good stuff", such as
rendering.
No amount of rendering will make up for a lack of a sound foundation or structure in your drawing!
|
|
|
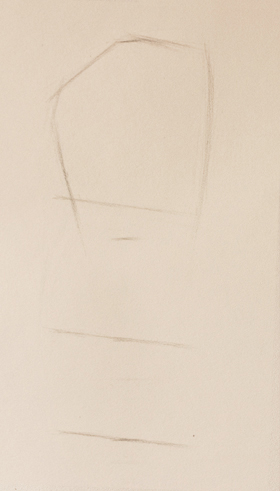
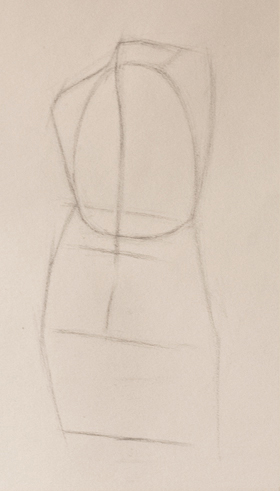
Sketch in the general "peanut shape", just as you would if you were drawing the figure. At this point, take a few steps back from your cast drawing, and evaluate:
1) The general proportions of the cast.
When the general proportions of your drawing are correct, you will find
that the more subtle ones, such as the S curve of the spine, will easily
fall into place.
2) The gesture of the pose.
Where does the pose stretch, and where does it compress?
Does your drawing have a similar gesture to the cast itself?
3) The accuracy of the angles.
|
|
|
Drawing Principle: Work on the interior and exterior of the form simultaneously Try not to perfect the contour before moving on to drawing the interior forms!
We tend to think of the inside information and outside contour as being separate from one another. But the interior and exterior cannot be separate!
Just think of what a "contour line" really is: it shows us the edge, or end, of an interior form. The exterior relies entirely on the interior, and vice versa.
The quicker we begin to think of the interior and exterior as being
dependent on one another, the quicker our drawings will improve.
|
|
|
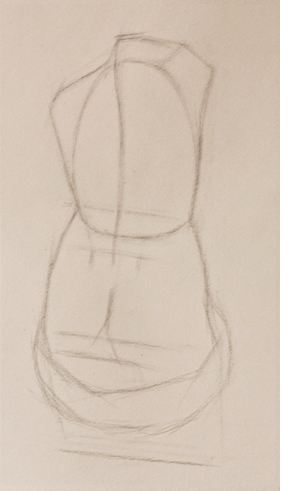
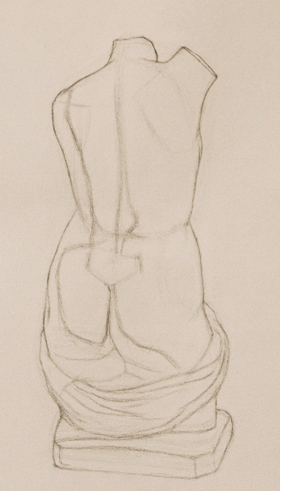
I begin mapping the major forms of the body, such as the rib cage and the pelvis.
You can think of each element that you draw as a map piece. Each element helps you find the next bit of information until you reach your destination: the completed cast drawing.
For example, the major angles help you find the silhouette.
The silhouette then guides you in placing the major forms of the body,
the rib cage and pelvis, which are the underlying structures of the
body.
Establishing the major forms will then allow you to find the smaller
anatomical features that lie on top of the underlying structures.
|
|
|
When establishing the form of the pelvis, you can draw in a box shape to represent it, or suggest it using landmarks as I have.
Landmarks of the pelvis include:
1) The posterior superior iliac spines, or the "PSIS"
These are the two dimples that you see just below the rib cage. The PSIS indicates the top of the box of the pelvis.
2) The center line, or divide of the buttocks.
3) The bottom of the gluteus maximus marks the bottom of the box of the pelvis.
|
|
|
Creating Three-Dimensionality with Overlaps I am just beginning to get some three-dimensionality in my cast drawing,
mostly by means of overlapping lines.
I continue to seek out interior information, relate it to the contour, and slowly refine the forms.
|
|
|
Line Quality and Shadow Shapes
As I become more confident in the accuracy of my drawing, my focus turns to line quality.
My lines become sharper and darker where necessary.
Move on to this stage only when you feel quite certain of the placement, gesture and proportions of the figure.
You can also begin drawing in shadow shapes.
They give you insight as to what is happening with the interior forms, and
provide you with smaller shapes against which to check your proportions.
|
|
|
We indicate shadow shapes by drawing in the core shadow.
Let's consider the line quality of the core shadow: The sharper the line of the core, the more sudden the turn of the form will appear. So, in order for it to indicate a gradual turning away of the form, it has to be quite soft.
Just as we use comparison to measure proportions and values, we can also use it to determine the quality of our lines.
First we establish the two extremes: the softest and sharpest lines on the cast. We can then compare the rest of our lines to the two extremes.
|
|
|
I have indicated the rest of the shadow shapes, the pedestal and the fabric.
Notice that I left the lines of the fabric quite soft.
This is because sharp lines attract and hold the viewer's attention, and
the fabric is not where we want the viewer's eye to linger.
Instead, we will use the movement and rhythms in the fabric to move the viewer's eye back up into the cast.
And here is the finished block-in for my cast drawing!
|
If you enjoyed this page on cast drawing you might also be interested in:
Related Pages
5 Ways to Start a Figure Drawing
Improve Your Figure Drawings with these 7 Exercises
Step by Step Figure Drawing Tutorial
Directory of Drawing Tutorials
Return to Drawing Tutorials from Cast Drawing Tutorial
Return to the Home Page from Cast Drawing Tutorial