How to Draw an Eclipse
in Pencil in 4 Easy Steps
Learn how to draw an eclipse in pencil, using 4 easy steps, in the video tutorial below!
How to Draw an Eclipse
Supplies & Preparation
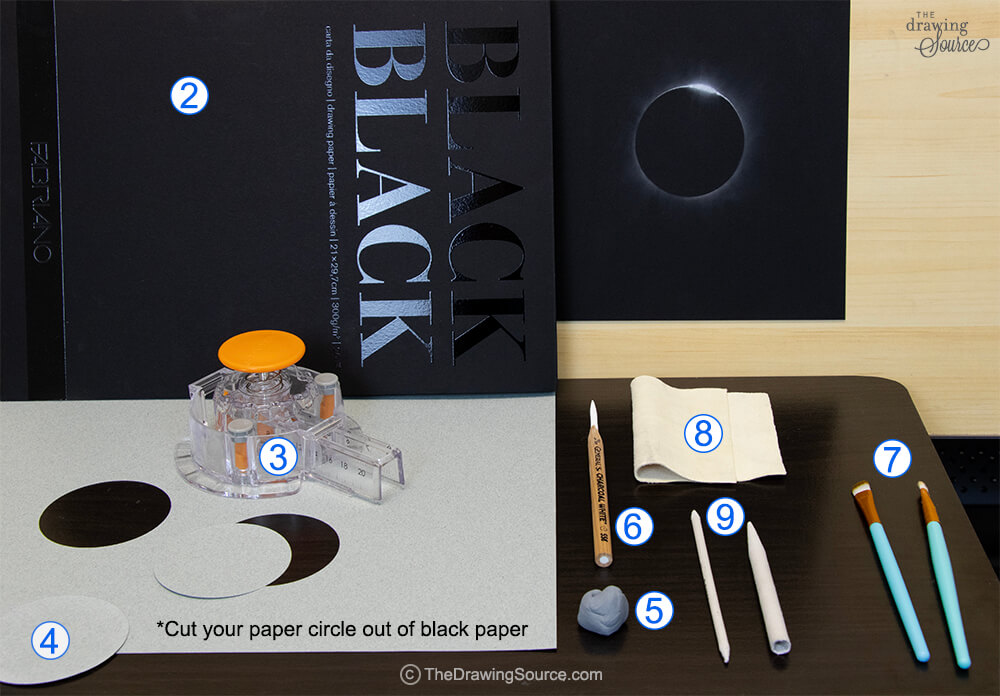
For this tutorial, you will need …
1. The Reference Photo of this eclipse. I’ll be showing you two
eclipse drawings in this tutorial, and you can download both reference photos for
free at the link in the yellow box above.
*Please note that the links below are affiliate links to the supplies that I used in this tutorial.
2.
Black Drawing Paper: https://amzn.to/44bk74c
I’ll be
drawing on the 9" x 12" Fabriano Black paper pictured above, but
there are other great options, such as Strathmore Artagain black paper.
3.
A Method to Cut Out Paper Circles: https://amzn.to/3wcywAe
For this
drawing, we will need a nearly-perfect circle cut out of paper (like this one).
After trying a few methods, I chose to use the Fiskars Circle Cutter. It
was easy to use, and having the nearly-perfect circle made all the
difference in my drawing. I’ll talk more about that later.
4.
Scrap Drawing Paper or Card Stock Paper:
This is the paper that we will cut the circle out of. I suggest using a sheet of the same paper that you'll be drawing on.
**Important Note: Cut
your paper circle out of black paper, instead of the white paper that I used!
I’ll explain why in the tutorial.
5.
Kneaded Eraser: https://amzn.to/4b3vygp
My current favorite brand is Prismacolor, because it keeps its shape better than other brands. Learn 3 effective ways to use a kneaded eraser for realistic drawing in this video.
6. White Drawing Pencil: https://amzn.to/3xFmu2K
I’m using my favorite one - General's White 558 Pencil.
Blending Tools I'll Use to Draw the Solar Eclipse
The following are the blending tools I used for my eclipse drawings, but you
can certainly use others if you've already discovered ones that you enjoy.
I’m using:
7. Inexpensive soft brushes: https://amzn.to/44anvMl
These are essential
to the drawing! I use them extensively as both drawing and erasing tools.
They’re very cheap and I’ve linked to them in the description box below. You’ll
want more than one brush, because we’ll use one as a drawing tool and a
separate one as an erasing tool.
8. Chamois: https://amzn.to/4b0vgqz
This is a
leather cloth.
9.
Small Blending Stump: https://amzn.to/4d46JTk or Tortillion: https://amzn.to/3vRmiND
Finally,
you’ll need drawing essentials, like a:
10.
Sturdy drawing board (I suggest the Helix brand): https://amzn.to/3W1HTxo
11.
Clips to attach your paper to your drawing board: https://amzn.to/49L25qj
12. Pencil sharpening supplies
Supplies to sharpen your pencils, because you will need a
very sharp pencil for parts of this drawing.
How to Draw an Eclipse
The Process &
Components of an Eclipse Drawing
The first step of this tutorial is, in my opinion, one of the most
challenging ones. You’ll need a perfectly cut out circle. Or as close to a
perfect circle as you can get.
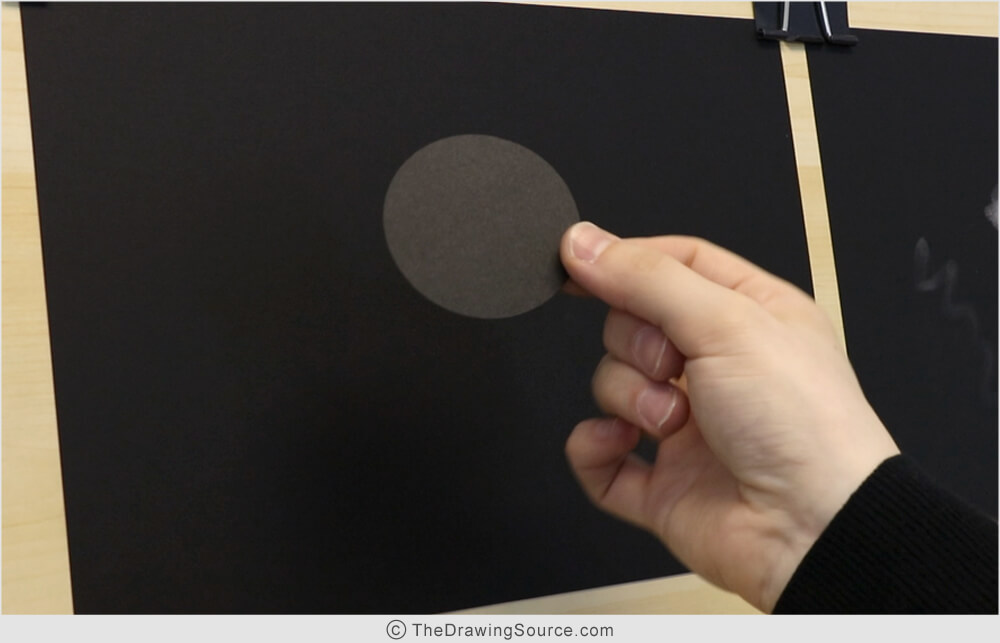
Here’s why:
To
create the most subtle values and gradations of this eclipse quickly and
easily, we’re going to use a brush to drag white pencil dust from this circle
onto the paper. Then, when we remove the paper circle, it will leave a drawn
circle for us, with stunning gradations that would be infinitely more
challenging to draw a different way. I think this is the easiest way to create
the beautiful, hazy effect of light, and that perfect eclipse circle in one
fell swoop.
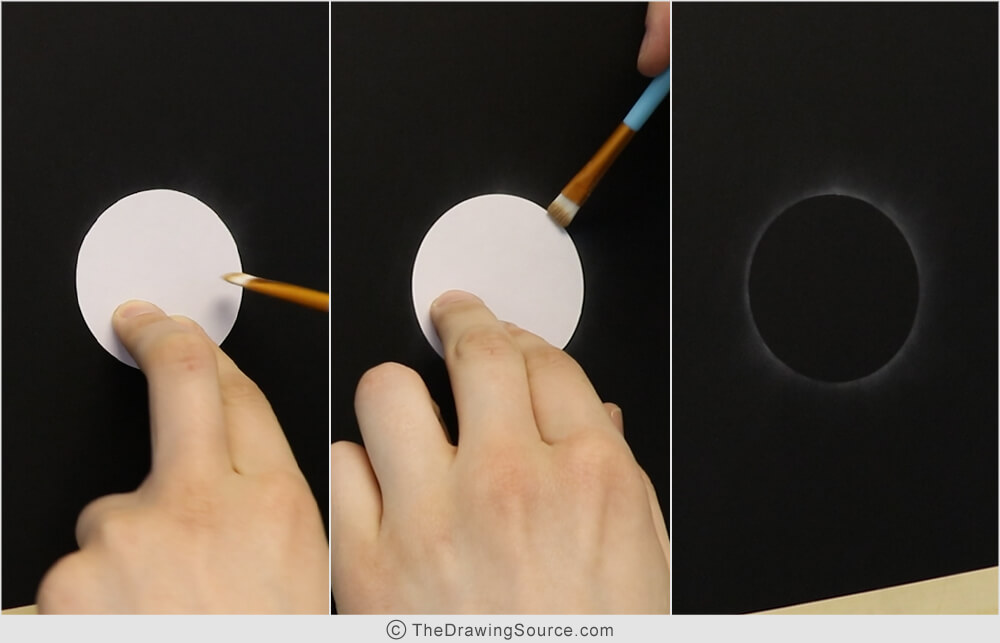
But – if our circle is not close to perfect, it will not read as a
realistic eclipse.
When you have a minimal drawing – a drawing with very few
components – each component becomes extremely important. The less components
there are, the more noticeable each one becomes, and the more care we need to
take to draw each one convincingly.
What are the components of an eclipse drawing?
What’s going to be important for us to notice and pay close
attention to?
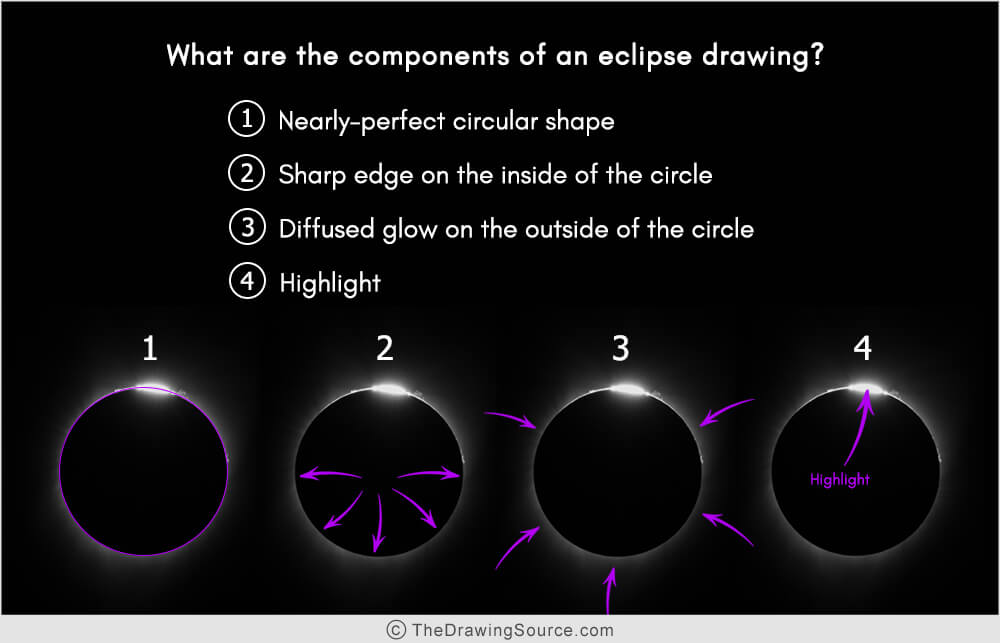
1) The nearly-perfect circular shape: definitely one of the essential
elements that we need to get right
2) The sharp edge on the inside of the circle
3) The delicate, diffused glow on the outside of the circle: it looks so otherworldly and ethereal, but it’s just an extremely soft gradation, starting from around a value 7 at the edge of the circle, and gradually fading into the black value of the paper.
4) And the highlight: the shape of the highlight can vary. What will
be important to notice is the value of the highlight, and its edge qualities –
how quickly or slowly does the value of the highlight transition into the
diffused glow around it, and then fade into the black paper.
If you’re unfamiliar with values and edges, you can take my free mini-course for an introduction to these essential components of drawing. I’ll link to the mini-course in the description box below.
So, four components to this drawing, to this subject – that’s not
very many! As I mentioned, the fewer components there are, the more noticeable
each one is, and the more care we must take to draw them convincingly.
How to Draw an Eclipse
Step
1: Acquire a nearly-perfect paper circle
Our first step is to acquire that nearly-perfect circle. The easiest way I found to cut out a nearly-perfect circle was to use a
circle-cutter.
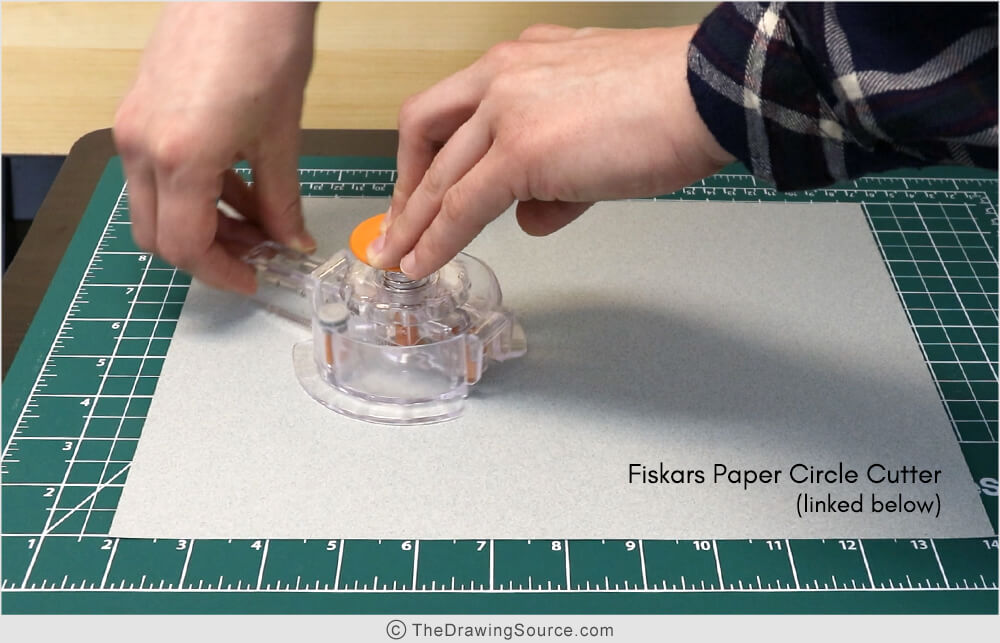
I used the Fiskars paper circle cutter, which made cutting out
circles very easy and effective.
As I’ve mentioned, though I cut my circle out of light paper, I highly recommend that you cut the circle out of black paper instead. It will make judging the values of your drawing much easier once we start drawing.
How to Draw an Eclipse
Step 2: Draw the Diffused
Glow
In drawing, we work from the background to the foreground, and in this subject we can consider the diffused glow to be behind the bright highlight. So, we’ll start by drawing the diffused glow.
Once you have your nearly-perfect circle: place it where you want your eclipse to be on your page.
You’ll need your soft brush for the next step. We’re going to use it as a drawing tool.
First, using the General’s white pencil, I drew a patch of value
on a scrap sheet of paper.
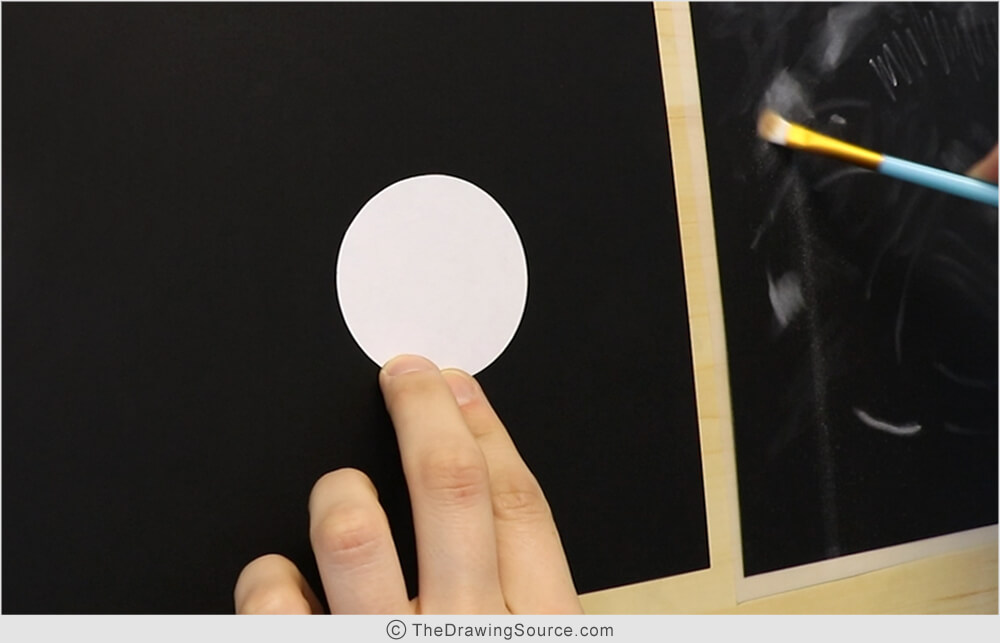
I pick up some of the pencil dust from there with my brush, and I
use two techniques to start creating this diffused glow.
First, I’m dragging pencil dust from the circle outwards onto my
paper. On our reference, notice that the light radiates in all directions, from
the center. We want to mimic that motion, that direction with our brushstrokes.
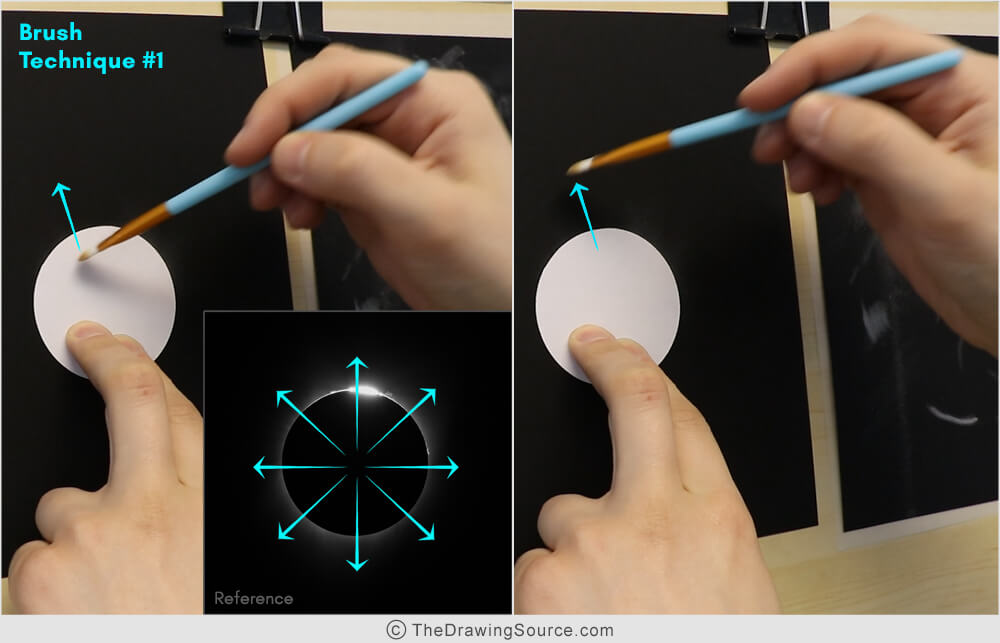
Second, I sometimes carefully brush around the
edges of the circle. This accomplishes two things: it helps create that lighter,
sharp edge along the contour of the circle, and it can blend my previous brush
strokes. This needs to be done carefully, because we don’t want to create a
thick light line around the contour.
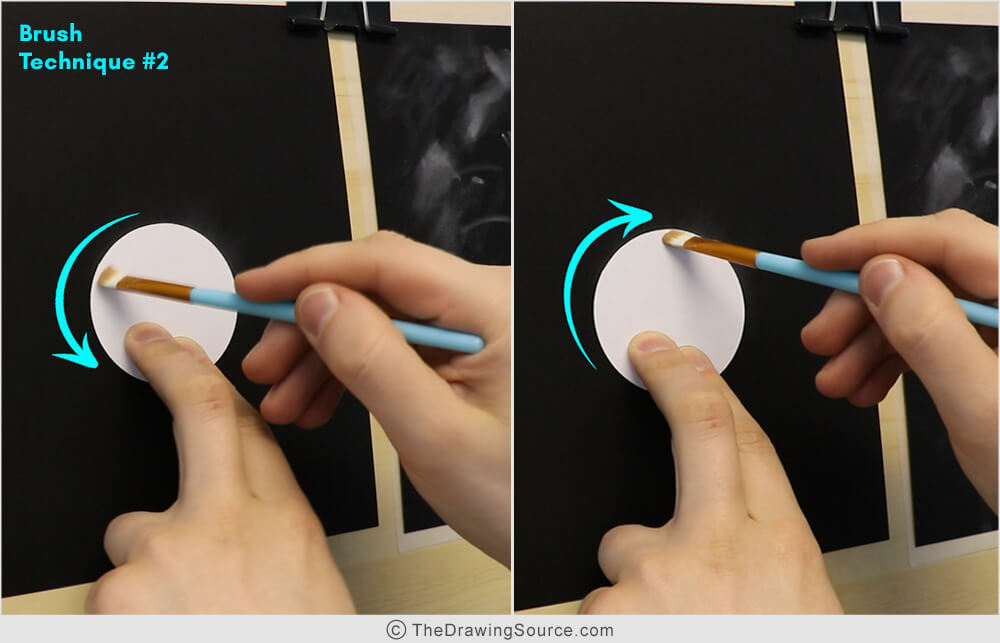
Mostly I use the first technique – picking up pencil dust and
using it in a radiating motion from the center of the circle outwards in all
directions.
In the image above, you can start to see that very soft, diffused glow around the right side of the circle.
However, it would be much more noticeable if the paper circle were black – the same value as my drawing paper. That’s why I strongly recommend cutting out the paper circle out of black paper – so that you can more clearly see what you’re doing.
As I do this, I’m ignoring the brightest highlight for now. Instead, I’m looking at the reference to see: where is the diffused glow brighter? Where is it darker? And I’m trying to create those subtle variations in my drawing.
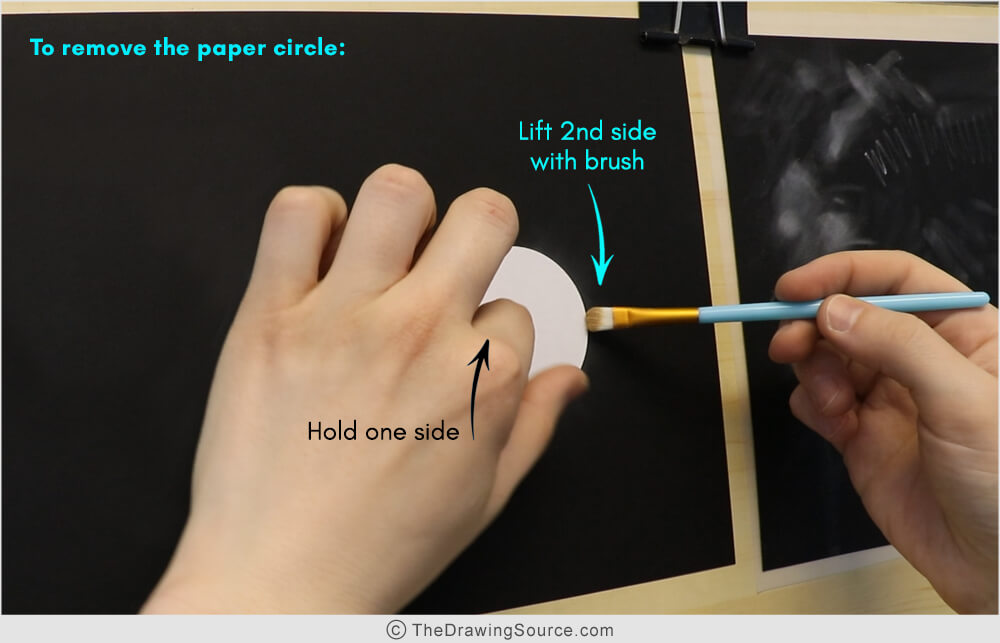
To remove the paper circle, I’m going to hold one side of it with
my finger, use my brush to carefully lift the other side, and then pick up that
lifted portion so that I don’t drag it across the sharp edge that I’ve drawn,
because it can smudge:
In my
second eclipse drawing, my process is very similar to the previous one. But this time, I used a tortillion to pick up some pencil dust
and lightly draw the brighter area around part of the circle contour (watch the video above to see the process).
If
I remove the paper circle, we can see that the tortillion worked fabulously to
brighten the contour in some areas:
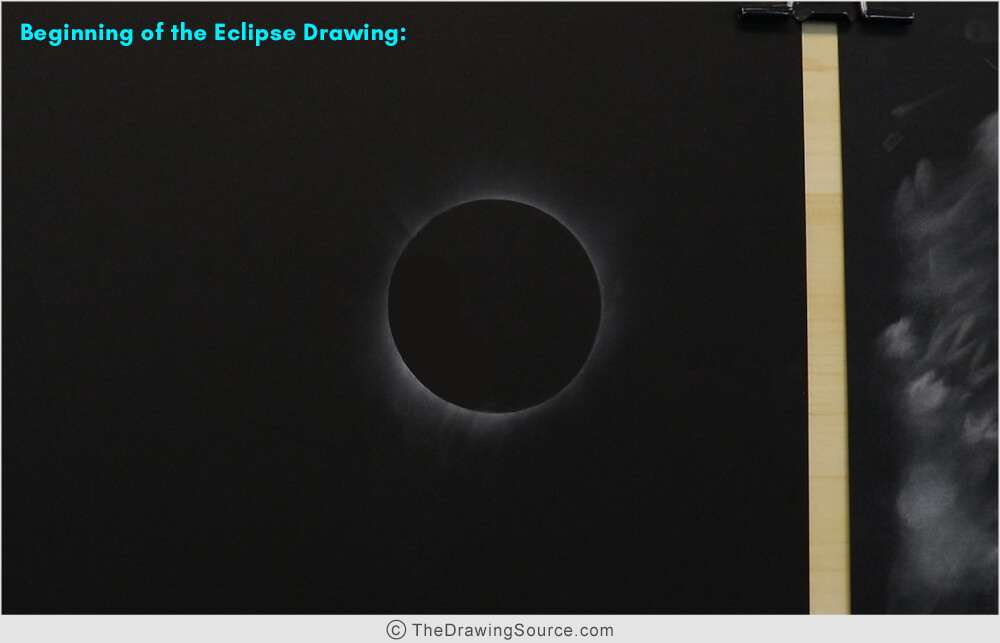
This already looks like a convincing eclipse, right? Because:
- the circle is nearly perfect
- it has that sharp edge on the inside
- and the diffused glow on the outside
- and! Very importantly – there is variation in the diffused glow
If you look at images of an eclipse, notice
that the light is not the same along the contour of the circle. There is
variation.
I have a bonus video for you on analyzing the values and edges in this subject. We can’t draw what we can’t see. Our drawing will only ever be as good as our observation, so taking time to analyze what we see before getting too far into the drawing is absolutely essential for success. You can watch the bonus video, for free, using the link in the description box below.
How to Draw an Eclipse:
B O N U S C O N T E N T
If you like the look of the more subtle eclipse above, you can call
this a finished drawing at this stage. I like it like this, to be honest!
If you search images of eclipses, not all of them are extremely
dramatic. Some can be more subtle, or they at least pass through a more subtle
stage on their way to becoming that dramatic, more typical image of an eclipse
that you might visualize.

If you leave your drawing at this stage – congratulations, you
just drew an eclipse in probably under 2 minutes.
For the sake of showing you how to draw different versions and stages of an eclipse, I’m going to continue my drawings.
I’ll replace the paper circle to bring the diffused glow to
a more finished place before drawing the highlight.
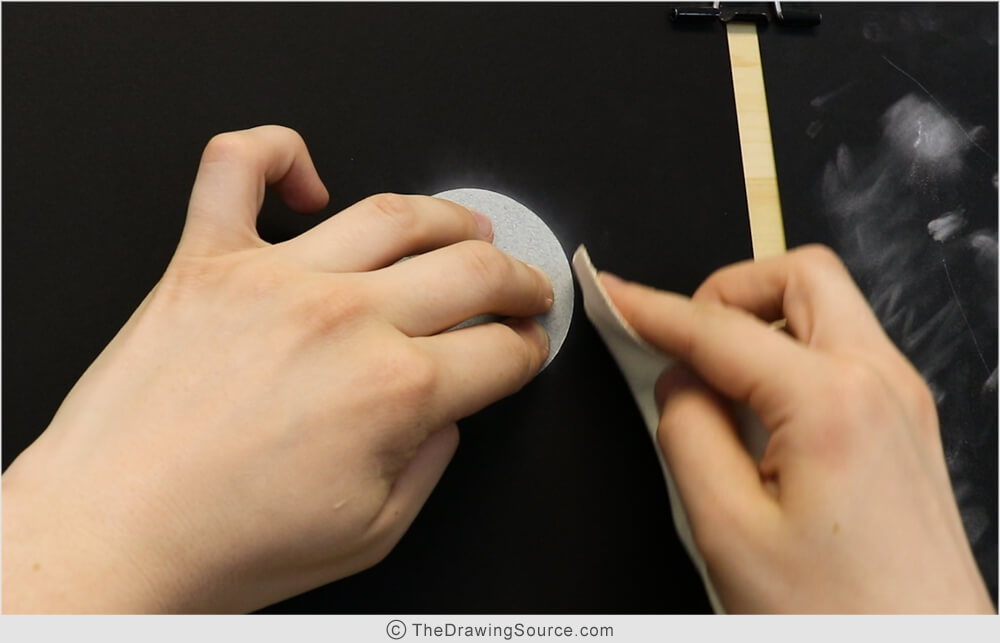 Using a chamois
When learning how to draw an eclipse, we can use a combination of techniques:
- I used a chamois to make some clearer separations between certain areas of the glow. A chamois, or shammy, is a leather cloth, but you can try using tissue paper as well.
- I picked up more pencil dust with my tortillion, and used it to draw a brighter glow around the area where the highlight will be, and a few other spots.
- I used my brush to draw the soft gradations of the diffused glow.
Watch the video to see these processes!
Sometimes I would add what I thought was too much value, and
I would go back in with a chamois. It can be a back and forth process of adding
and subtracting value, as usual.
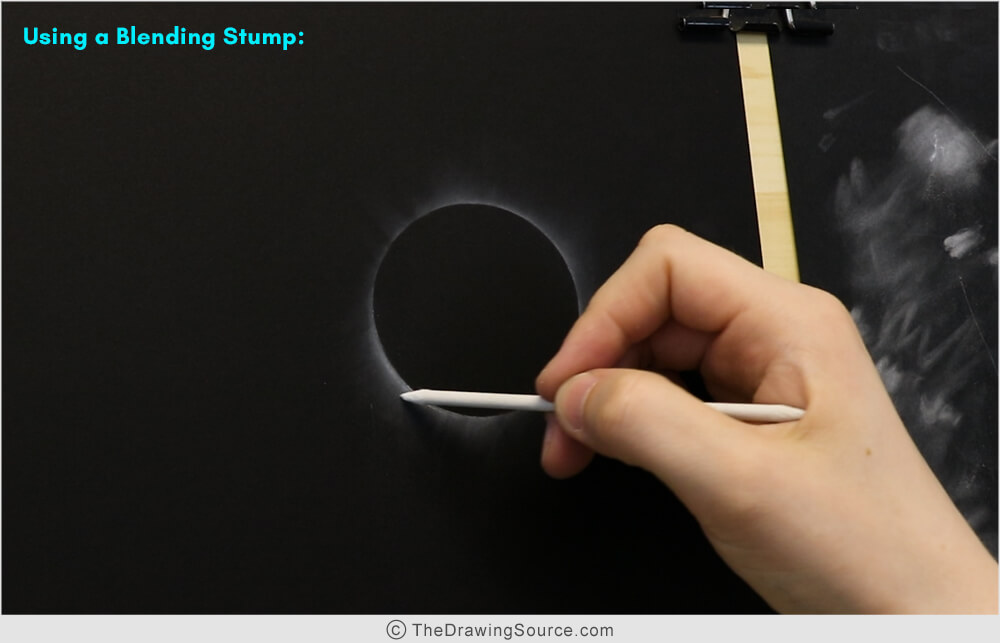
Next, I’ll use a small blending stump as a drawing tool.
With the pencil it’s easy to draw marks that are too sharp or too light for the diffused glow, but this blending tool might be just right. I’m really liking it as more of a drawing tool than a blending tool, particularly with these white pencils.
I can also use a clean brush – completely clean – to soften the transition between the black paper and some areas of the diffused glow. Remember that clean blending tools can be used to erase and smooth in a number of ways.
If I remove too much value, I can switch back to my drawing
brush, place it right on the light ring and drag some value back out.
Another way to add value back to your drawing is to replace
the paper circle, and go back to the first technique we used with the brush.
I’m using a new paper circle, just out of concern that there might be white
dust on my previous one.
How to Draw an Eclipse
Creating Believable Realism
Through Unity and Variety
Does our drawing have to
resemble the reference exactly to depict a convincing eclipse? No, it does not.
This is not like a portrait drawing, where a slight
proportion change can cause your model to look like a caricature. Eclipses are
much more forgiving.
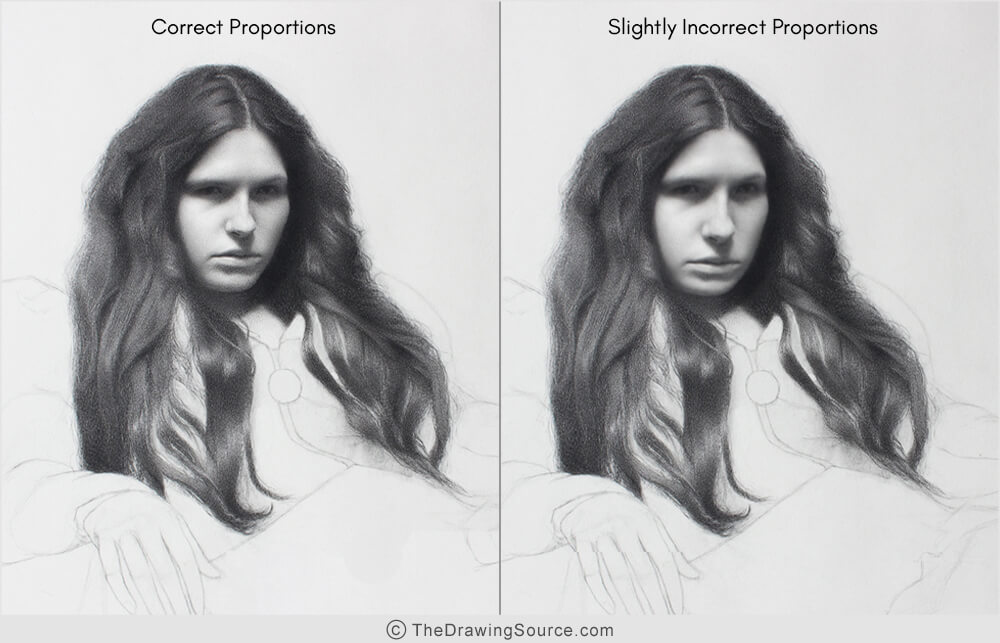
So, why refer to a reference at all? Because I personally don’t think we can imagine the
kind of specificity that exists in nature. Maybe you can, but I don’t feel that
I can.
What kind of specificity am I referring to?
Well, in the eclipse reference, look at the diffused glow around the circle. It’s not the same all the way around.
There are brighter areas, and darker areas. Places where the light reaches farther – this light area is a wider gradation here than it is here. Here it almost becomes a thin line around the edge of the circle.
We don’t have to draw these variations exactly, but we can take inspiration from them to create a more believable eclipse, and to add interest to our drawings.
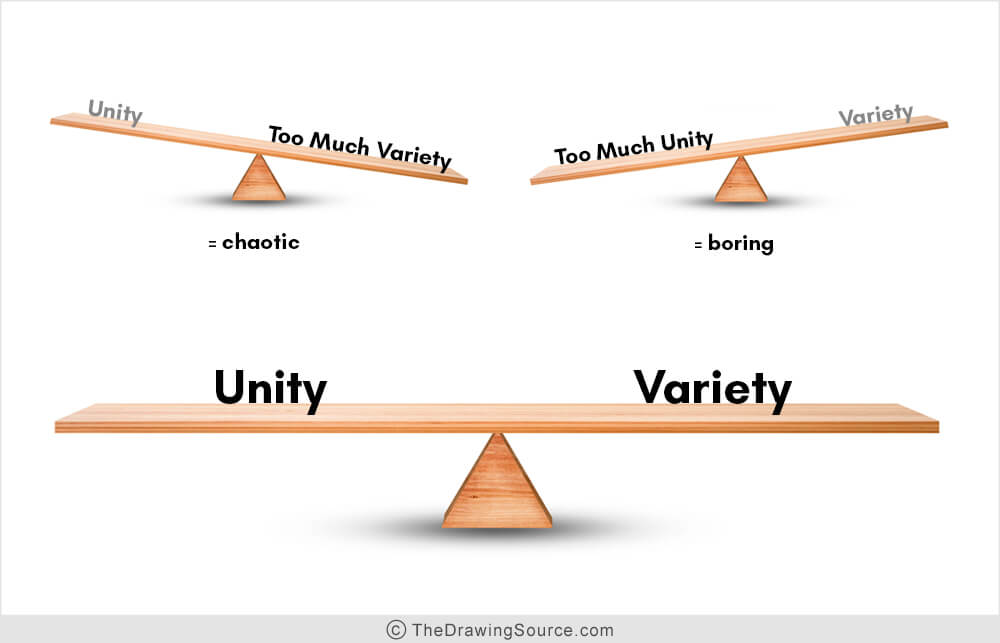
In composition, we want a balance of unity and variety. Too much unity can result in a boring image. Too much variety can result in a chaotic image. We’re looking for that balance in this drawing.
We analyze the variations more closely in the video!
How to Draw an Eclipse
Step 3: Drawing the
Highlight
Returning to my first eclipse drawing, I’m ready to add the
highlight.
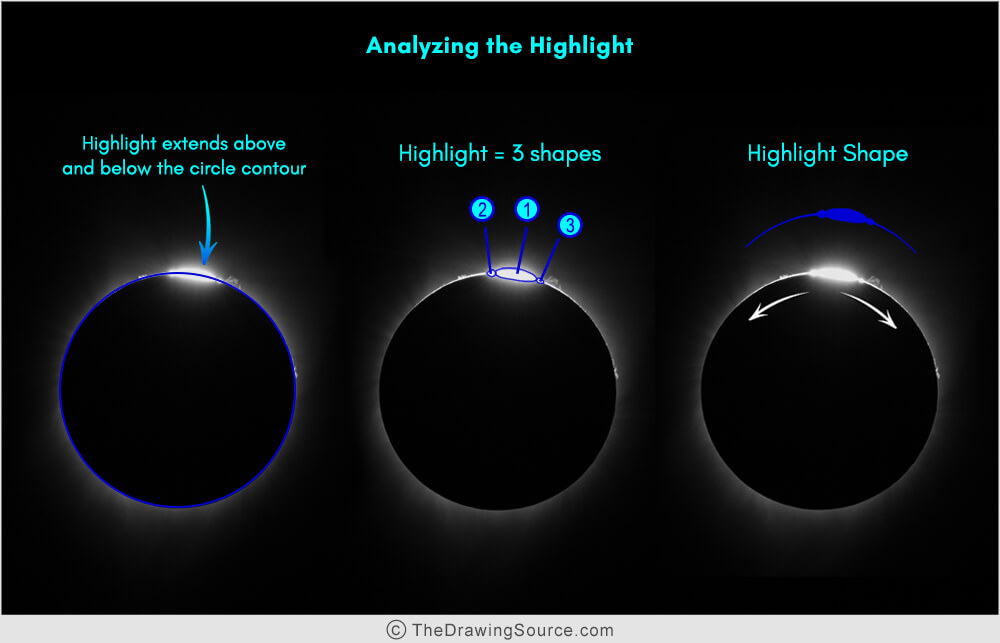
Notice that the shape extends above and below the contour of the circle. And that we could think of it as three shapes – the largest, ovular middle section, the bubble on the left, and the smallest bubble on the right.
The highlight, or lightest value, also extends in a crescent shape
to the right and left around about a quarter of the circle.
I sharpen my pencil and sketch the general shape.
For stability, control and precision here, I’m leaning the outside of the palm of my hand on the drawing board so that most of my weight is there instead of the pencil point. To develop your pencil control, I suggest my Foundations of Drawing Technique course, and my Intro to Smooth Shading course. Both are linked in the description box below.
Once I have the shape of the highlight, I can simply fill it in. It’s
quite a simple, flat value. Meaning that there aren’t any major variations in
value – lightness or darkness.
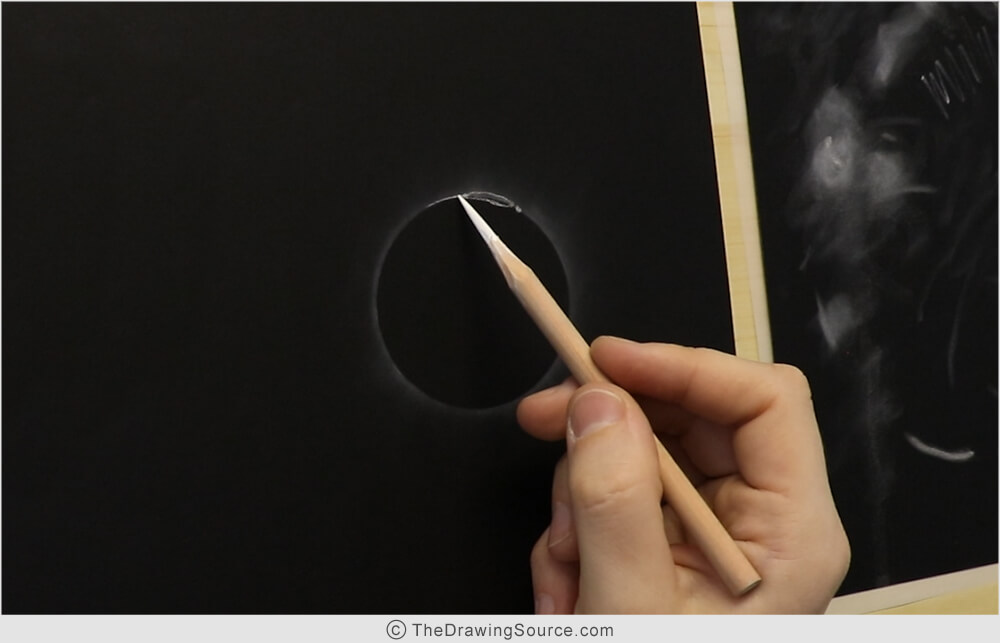
Now, we know that the brightest part of the diffused glow is right
around this highlight, right?
To create that brightest part of the diffused glow, I’m going to
take my brush, and blend from the highlight into the background. I’m massaging
the pencil dust from the highlight outwards in small, circular motions to
create the brightest part of the diffused glow around the highlight.
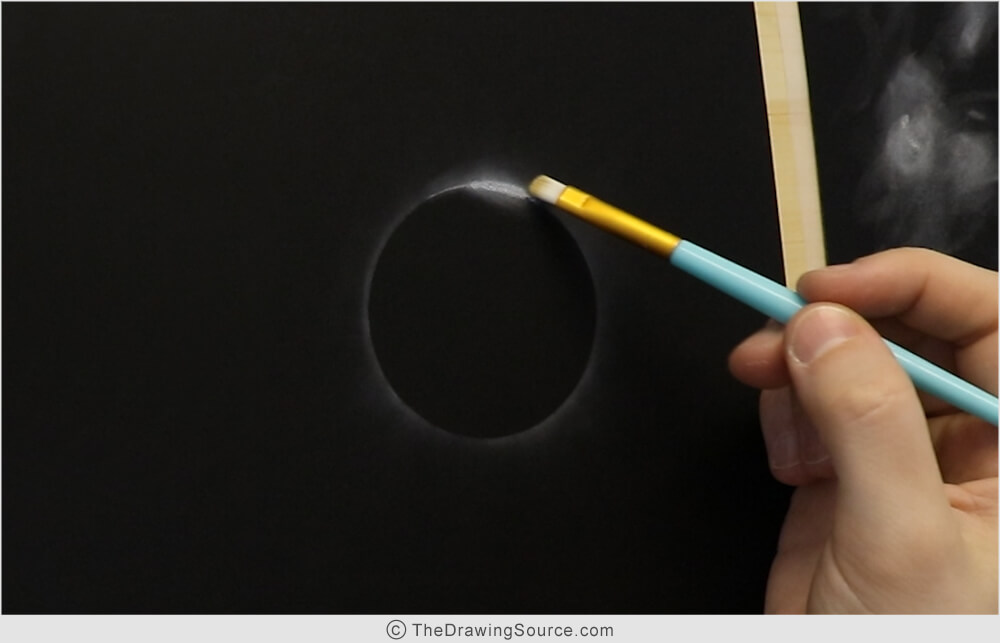
In a drawing, we work from the background to the foreground. In
this subject, we can think of the diffused glow as a background element, and
the highlight as a foreground element.
I’ll go back in with my sharpened pencil to re-establish that
light highlight, since blending it darkened it so much. This will be a back and
forth process of blending the diffused glow from the highlight, and then
re-establishing the highlight.
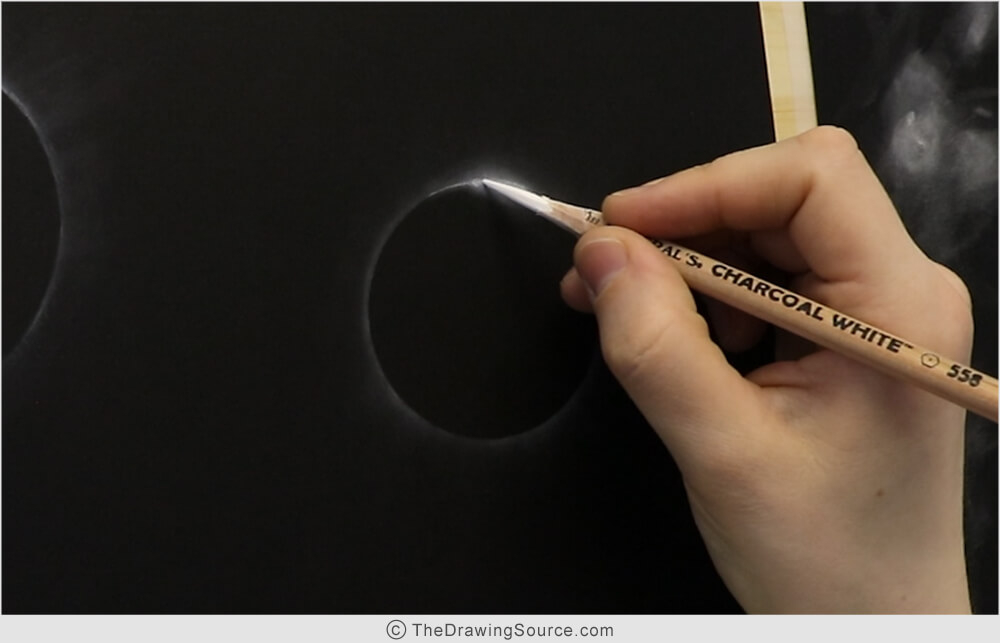
I clean up the inside of the circle to keep it crisp – be careful
not to disturb the circle as you do this, as it can be tricky to re-capture it.
Once I’m happy with the diffused glow in this general area, I use a sharpened pencil to draw the thin, crescent shape of the highlight. My hand is always anchored, especially when drawing around the edge of this circle.
I can create some more variation in the contour of the eclipse, brightening it
in some areas, and making some of the edges of the circle sharper and more
prominent. Remember that the kneaded eraser can be used to soften an edge, and to even out
a value by selectively darkening spots that are too light.
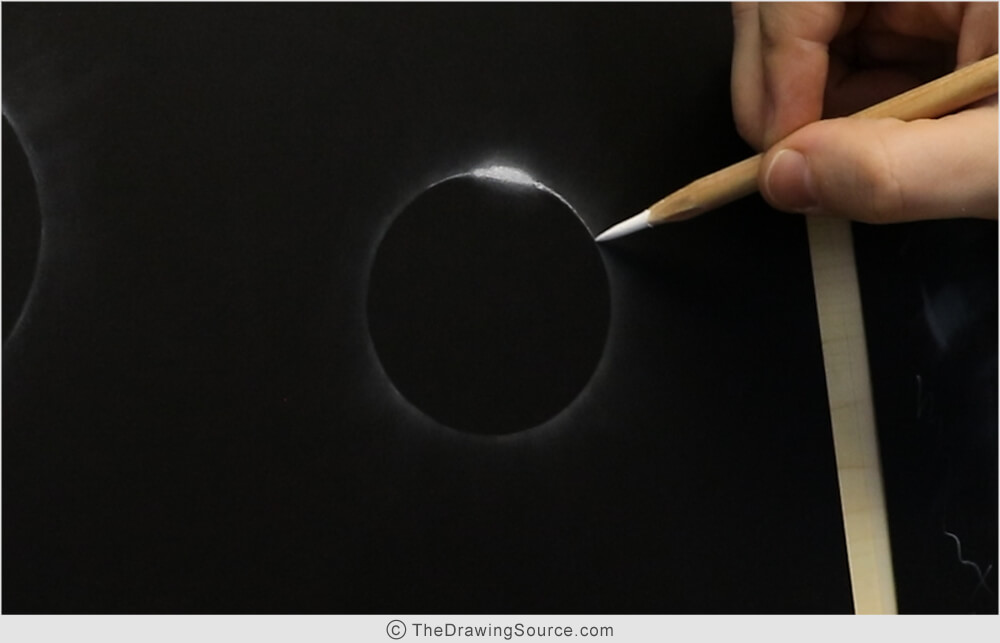
The process was similar when drawing the highlight of the second eclipse. Watch the video at the top of this page for full details!
How to Draw an Eclipse
Step 4: Finishing the
Drawing
To finish the first eclipse drawing, I lightened the value around the highlight to give it more of a glowing effect.
I used my brush to pull some beams of light out of the highlight, gradating them into the value of the paper.
When I create a light beam, I make sure to test the value that my brush is going to produce first, on my scrap sheet of paper. Then I anchor my hand, place the brush on the edge of the circle, and make the brushstroke outwards, so that the beam appears to radiate out from the eclipse.
This can be a back and forth process: using the brush to pull out
some soft beams of light, and then going back in with the pencil point to
re-lighten the highlight.
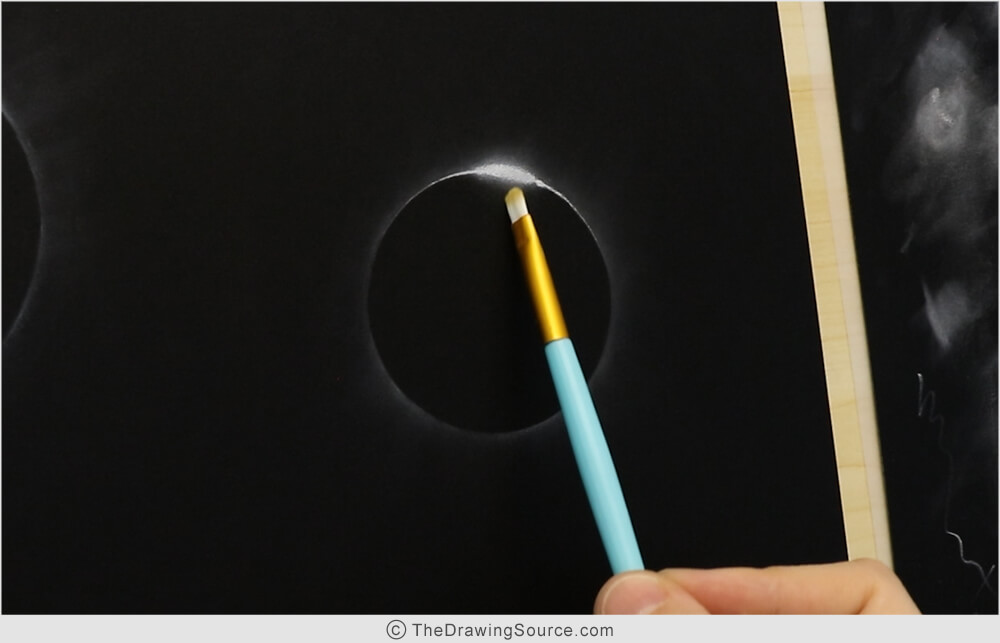
To finish my second eclipse drawing, again I spent more time
adjusting and finessing my values and edges in that push and pull sort of way.
Add a little bit, lean back – take a look – then maybe subtract a little if it
was too much, or notice another minute detail to adjust.
The farther you are the shading process, the more it slows down, because the changes you make become more and more subtle.
Don't miss this part of the video above, where I accidentally drew a light beam with my brush that was far too light, and then show you how to fix it!
How to Draw an Eclipse
The Finished Eclipse Drawings
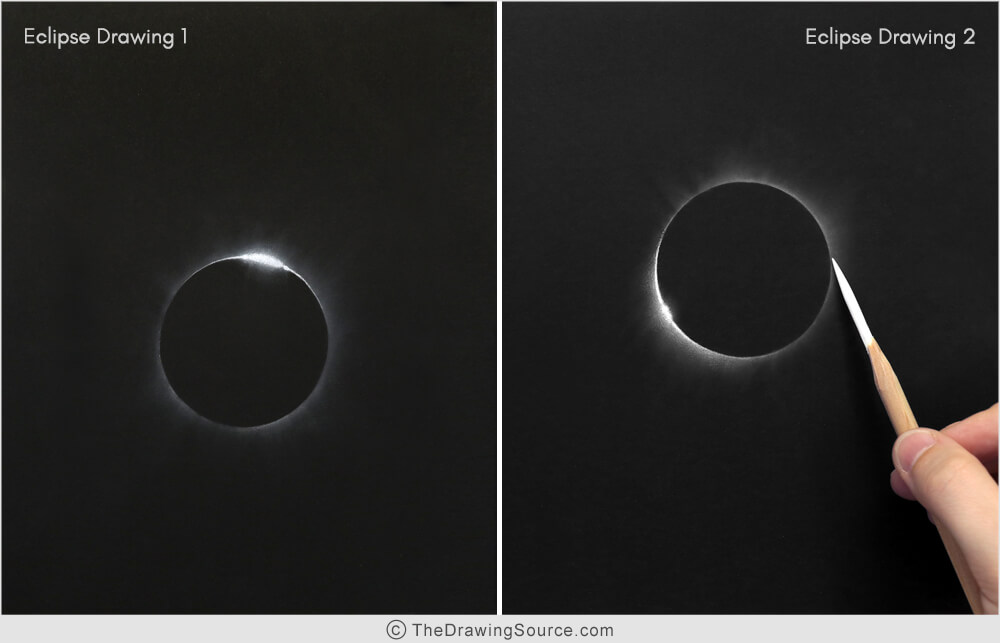
For an advanced eclipse drawing tutorial, and to access my foundational drawing programs, learn more about the Drawing Decoded Membership here.
Happy drawing,

If you enjoyed this page on how to draw an eclipse, you might also be interested in ...
Related Pages
3 Ways to Use White Charcoal Pencils
How to Combine Black and White Charcoal in a Drawing
How to Draw Glass Using White Charcoal on Black Paper
