- Home
- Drawing Tutorials
- How to Draw Glass
How to Draw Glass
Using White Pencils on Black Paper
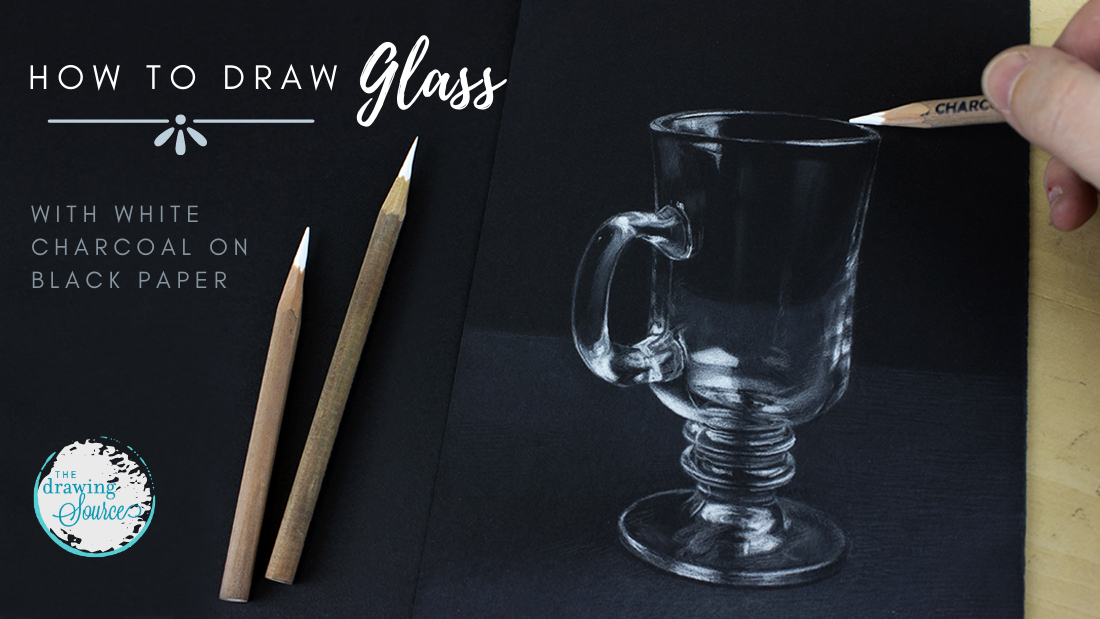
A key to learning how to draw glass is,
interestingly, to forget that you are drawing glass! It's common to perceive this subject matter as 'difficult' due to its many reflections
and highlights, and in your intimidation to think that it needs be
approached differently than other subject matter.
However, most representational drawing requires a similar approach, and similar 'modes of seeing'! As artist Robert Irwin says, "Seeing is forgetting the name of the thing one sees."
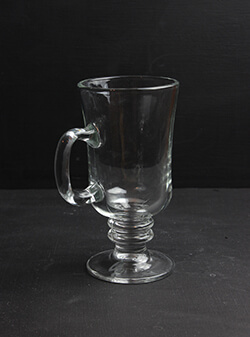
We need to view this glass mug not as a glass mug, but as lines,
shapes, values, and edges. This will help us analyze what stage of the drawing process we're in, and to determine how to move forward.
Another exciting, and perhaps novel, challenge of this particular drawing scenario, is using a white pencil on black paper, as opposed to a dark pencil on light paper.
This may require a considerable shift in your mindset! Where we would normally leave the paper blank where lightest values are needed and add value to darken shadows, here we will leave the paper blank where shadows are needed and add value to create the light areas.
I'm so excited to share this technique with you, and to help you learn how to draw glass. Let's get started!
Why not download the reference photo and infographic below, and draw along with me!
Animated GIF of this Tutorial:
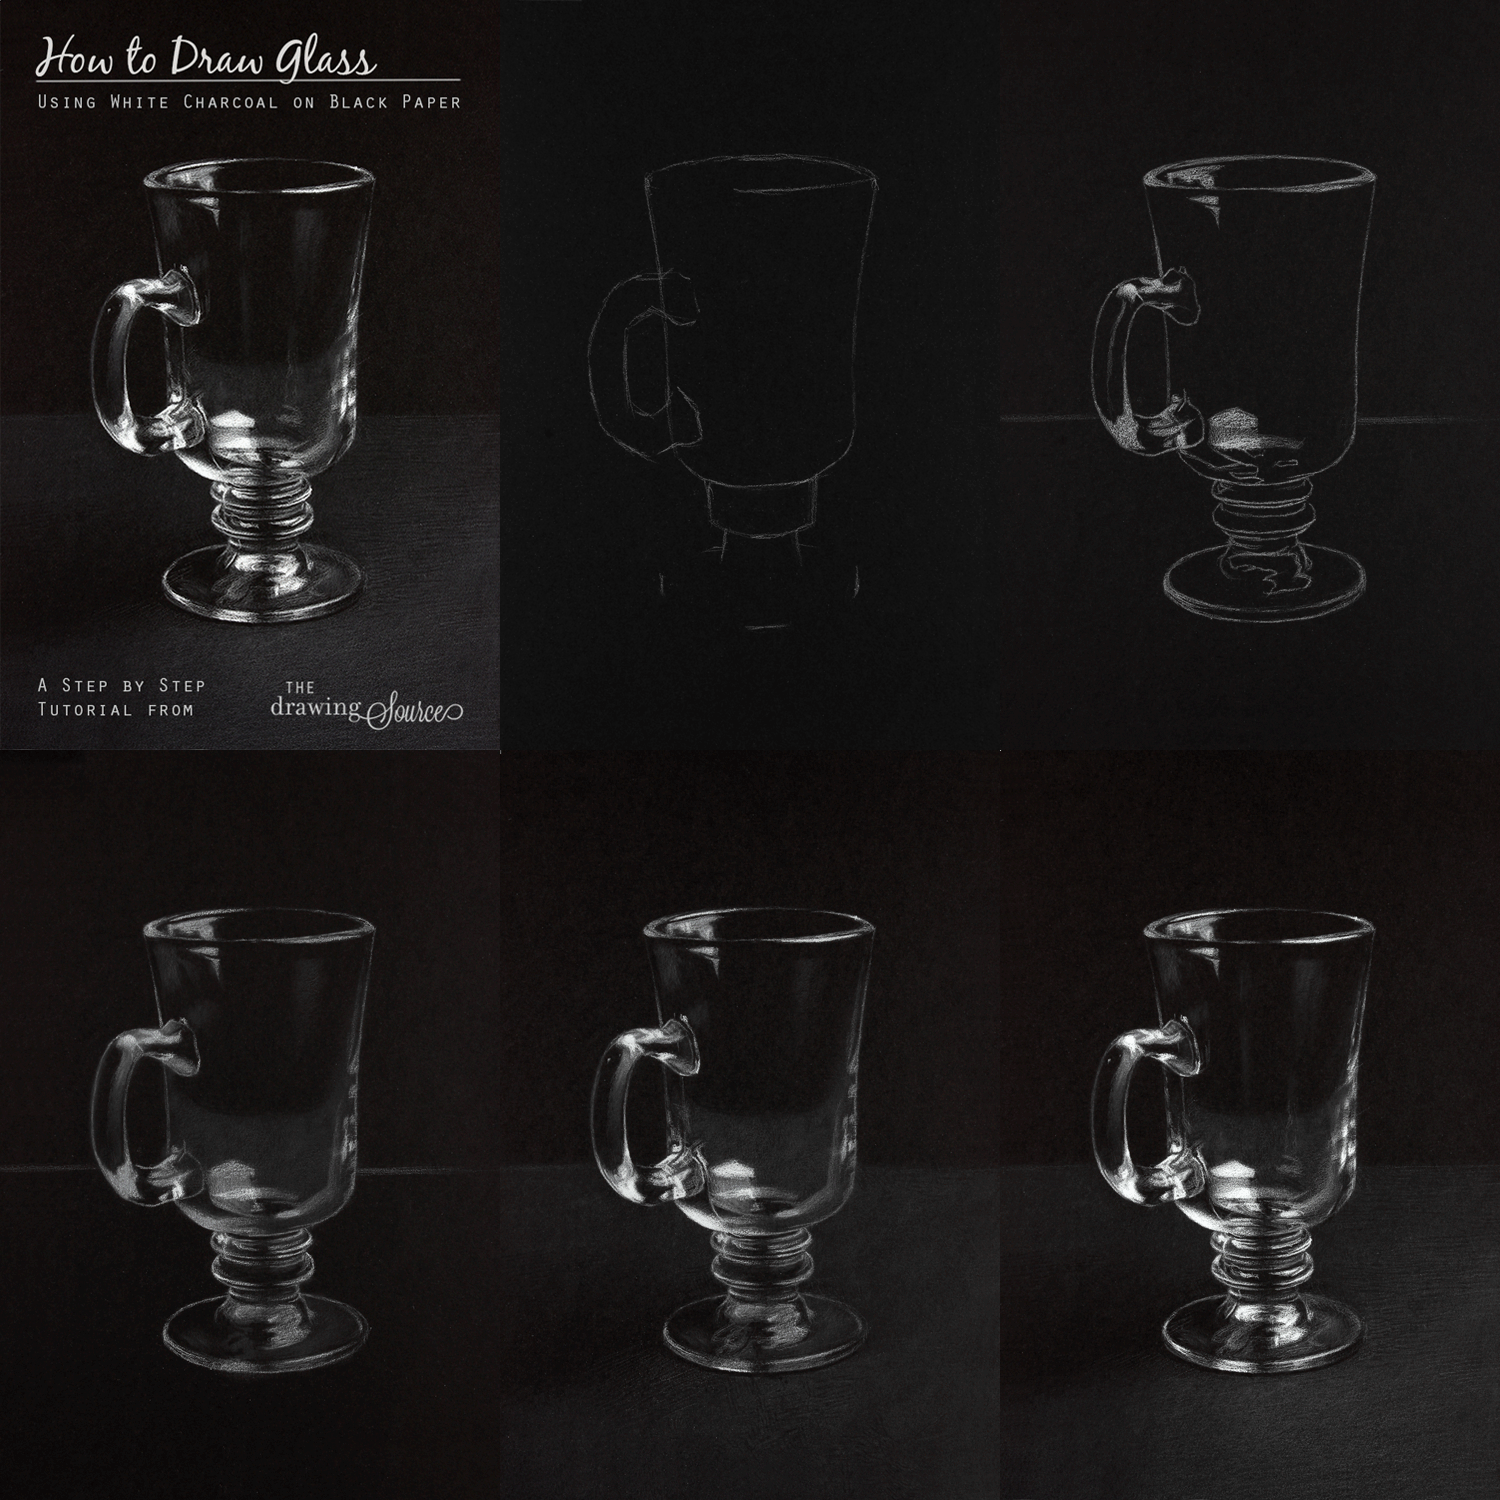 Animated GIF of the tutorial steps
Materials Used in This Tutorial
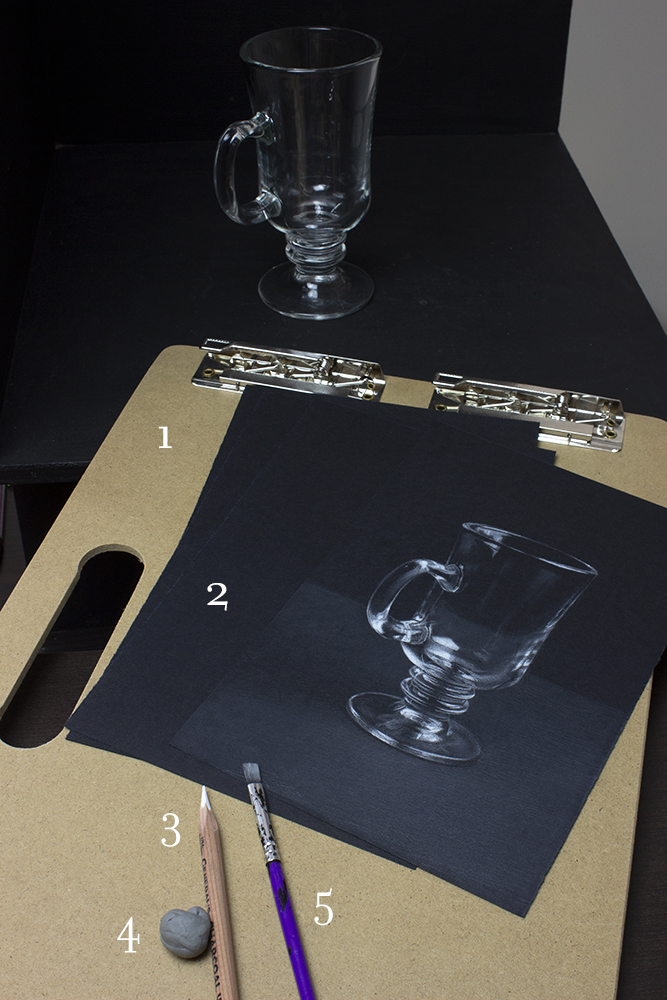
1. Drawing board: A sturdy drawing board is essential! For many years, my favorite drawing boards have been the lightweight ones made by Helix. However, recently I have been enjoying the one pictured above for smaller drawings. It fits comfortably on my lap, and does not bend (a bendy drawing board has to be one of my top 3 pet peeves).
2. Black drawing paper: I generally recommend drawing paper made by Strathmore or Canson.
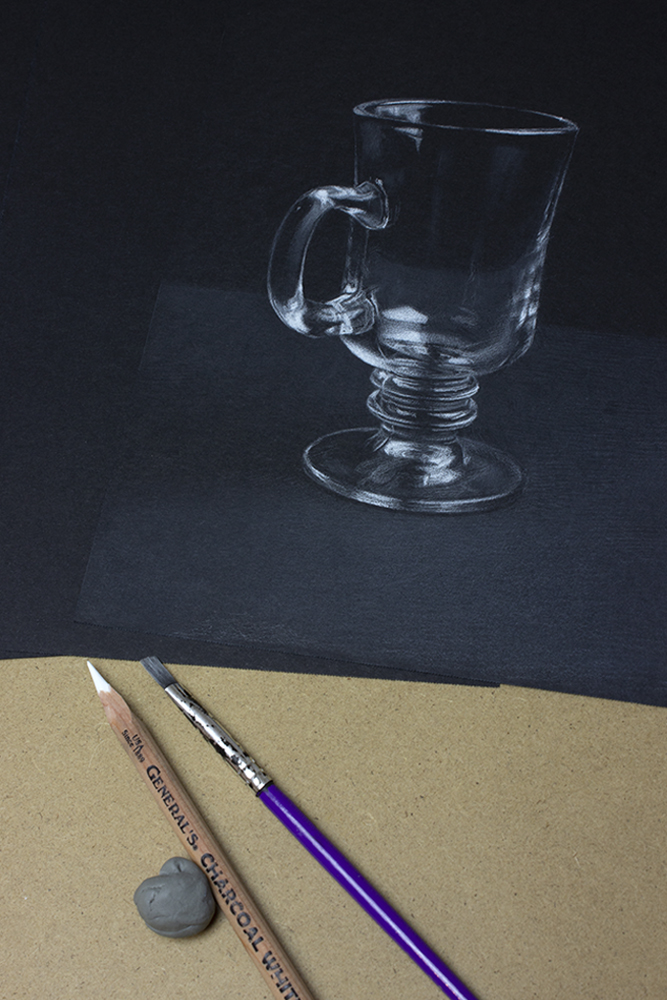
3. White pencil: A single pencil was used in the making of this tutorial! I am using a 'General's Charcoal White 558' Pencil, which should be available at your local art supply store, or online. Interested in other ways to use white charcoal pencils? Check out my article on the subject here!
4. Kneaded eraser: Always incredibly useful, as it can be shaped into different forms depending on your erasing needs. Check out my video tutorial on three ways to use this drawing tool!
5. Soft-bristled paintbrush: This is a very inexpensive paintbrush that I dug out of the recesses of one of my art bins. Please don't spend a lot of money on this tool! As long as it is fairly soft, it will get the job done.
How to Draw Glass: A Step by Step Tutorial
Proportions and Measuring
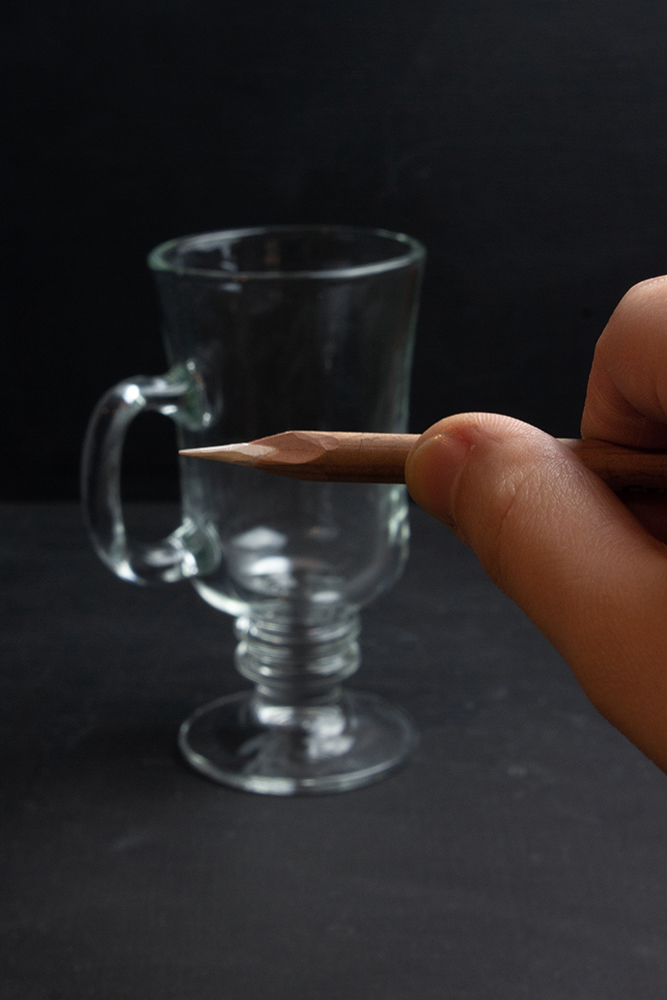
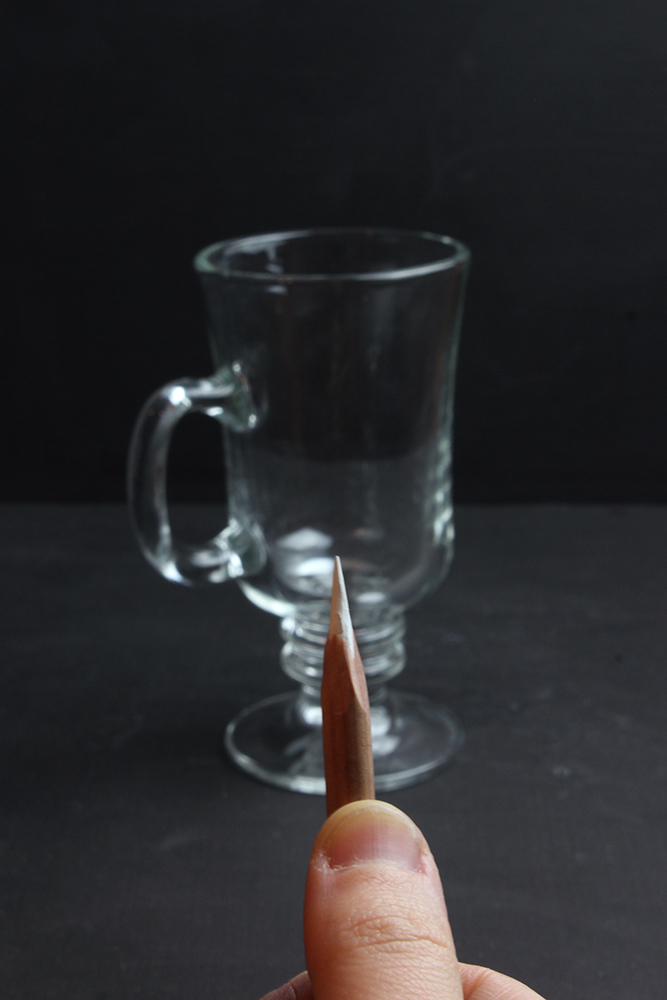
No matter what drawing technique we use, our first priority is always to establish correct proportions.
No amount of shading will improve inaccurate proportions, so even though
these initial steps may not be as exciting as the later stages of
drawing, I give them the time that they require.
Image 1 (above): I begin by using comparative measurement to determine the width to height ratio of my glass mug. I measure the width using my pencil: the pencil point indicates the left boundary of the width, and my finger indicates the right boundary.
Image 2 (above): Keeping my finger on the measurement, I check to see how many widths fit into the height of the mug, working from bottom to top.
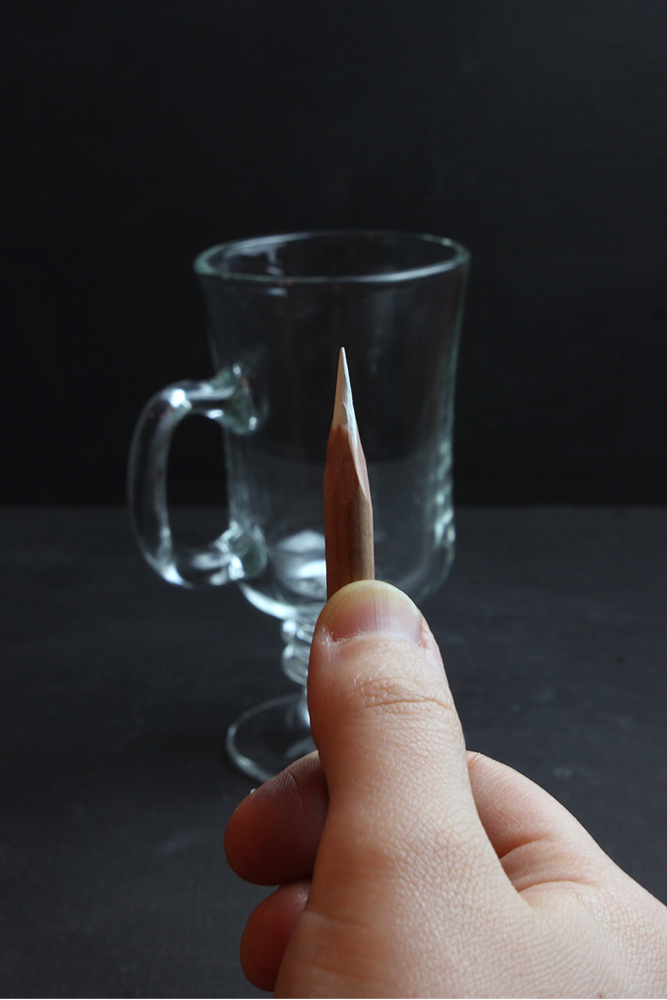
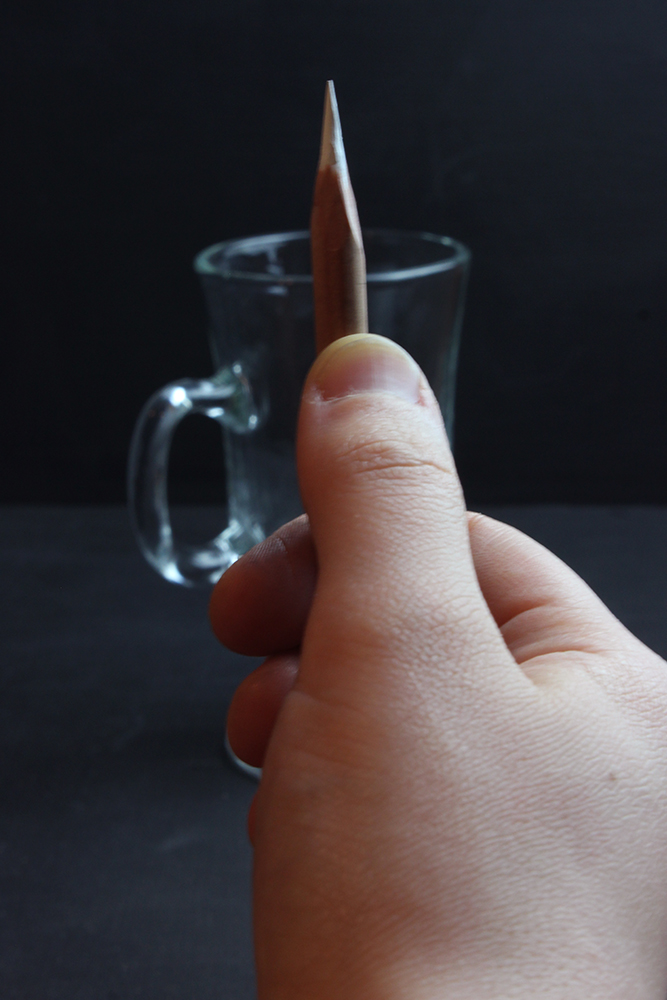
My measurements show that approximately two and a half widths fit into the height of the mug.
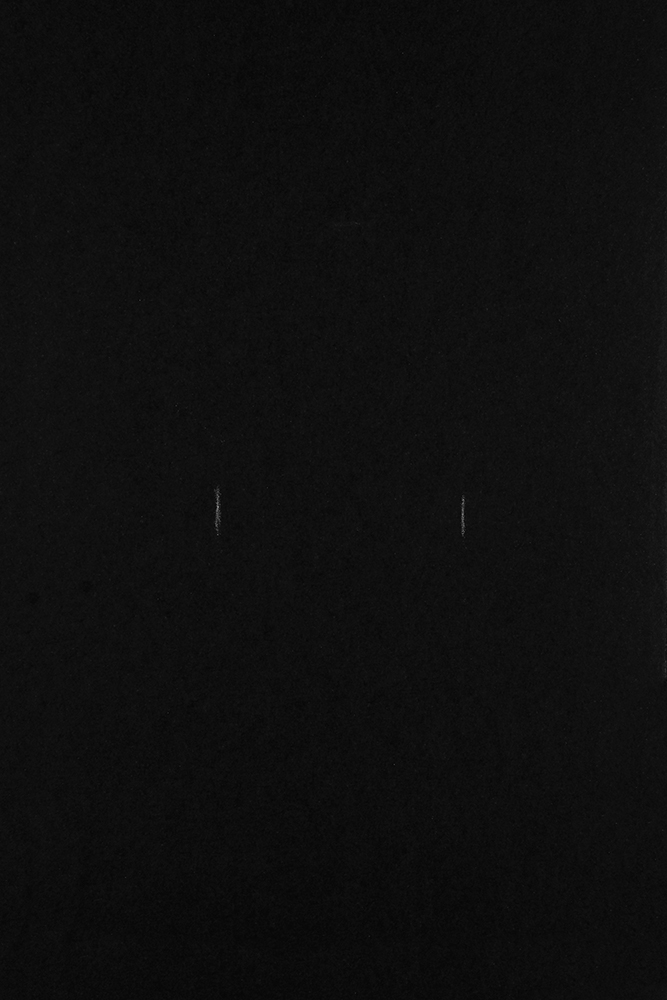
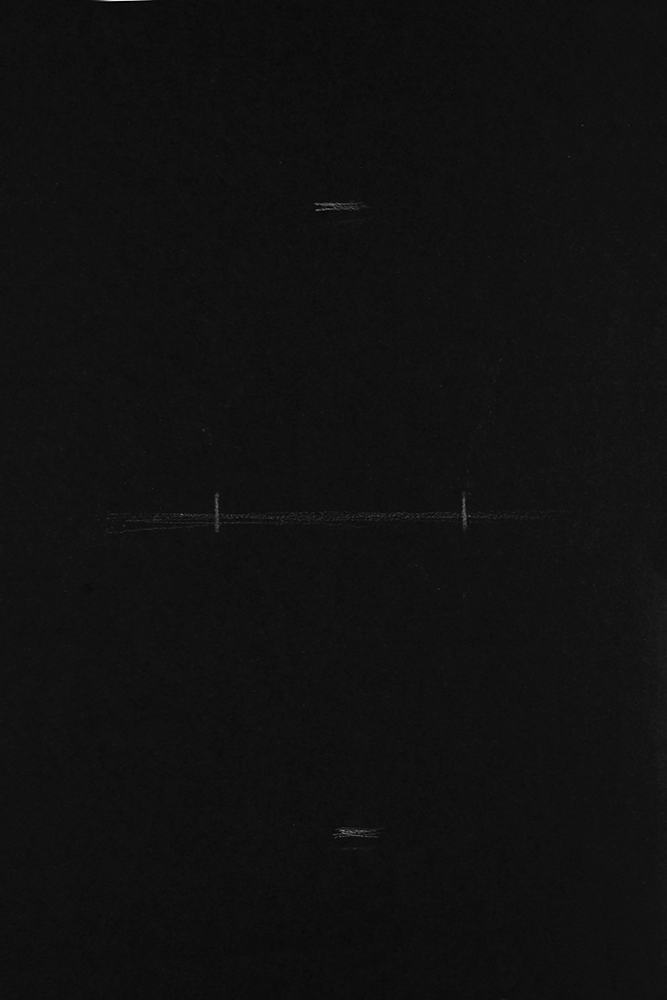
I begin my drawing in the same order as my measurements. I decide approximately how large I want the drawing to be on my page, and indicate the width of my mug (top left image). I draw a horizontal line through the width to remind myself that this is the approximate middle of the mug, and then estimate its height (top right image), before checking that my proportions are correct.
We can make our drawing any size that we want on our page, because comparative measurement allows us to establish correct proportions no matter how much larger or smaller our drawing is than our subject. (There is a video lesson on Comparative Measurement in my free Mini-Course!)
How to Draw Glass: The Block-In
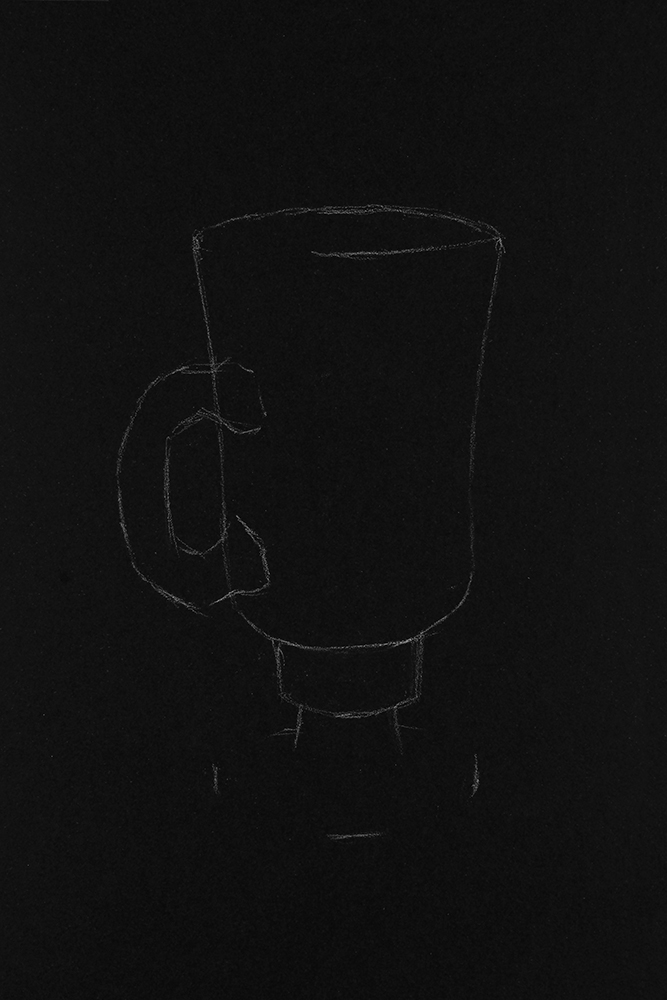
After establishing the height and width of my drawing, I begin blocking in my subject matter with light, sketchy lines, because I fully assume that I will modify them several times during my 'search' for the form of the mug. (You can think of a 'block in' as a blueprint for your drawing.)
I continue using the comparative measurement technique to find important landmarks on my drawing: for example, the width of the handle, and where the bottom of the cup meets the base.
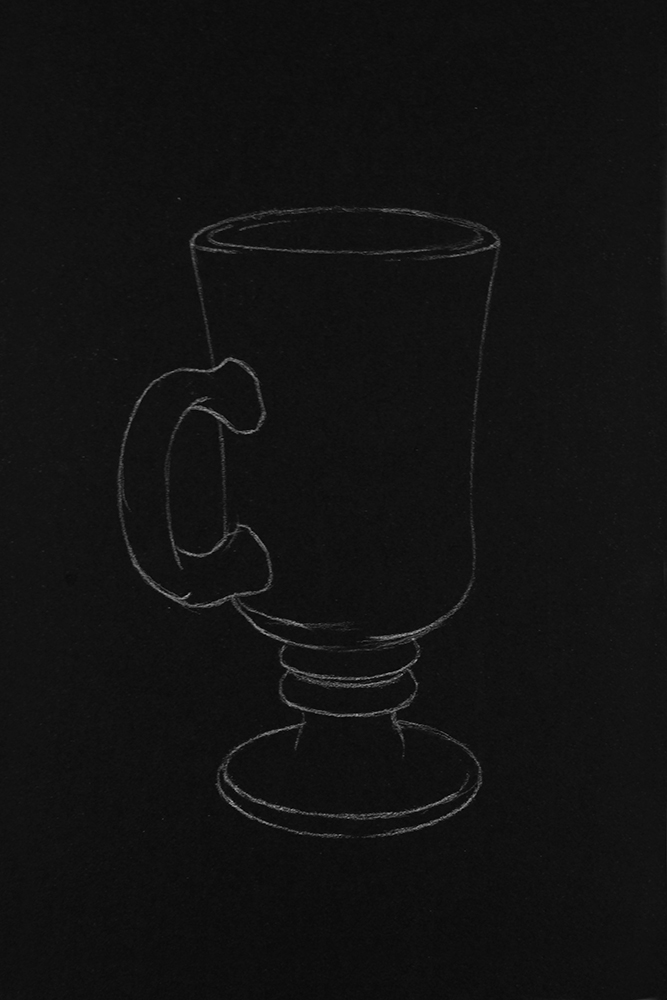
I establish the largest proportions first, and work my way to the smallest ones. For example, after blocking in the general shape of the stem of the mug, I divided its top portion into the two rings that you see above. I also drew in the rest of the 'foot' of the mug, and indicated the separation between its top and side planes.
At this point I also start drawing the overlapping lines that show which parts of the mug are in front of other sections. This begins to create the illusion of depth and dimension in my drawing.
How to Draw Glass:
Analyzing the Value Structure of the Subject
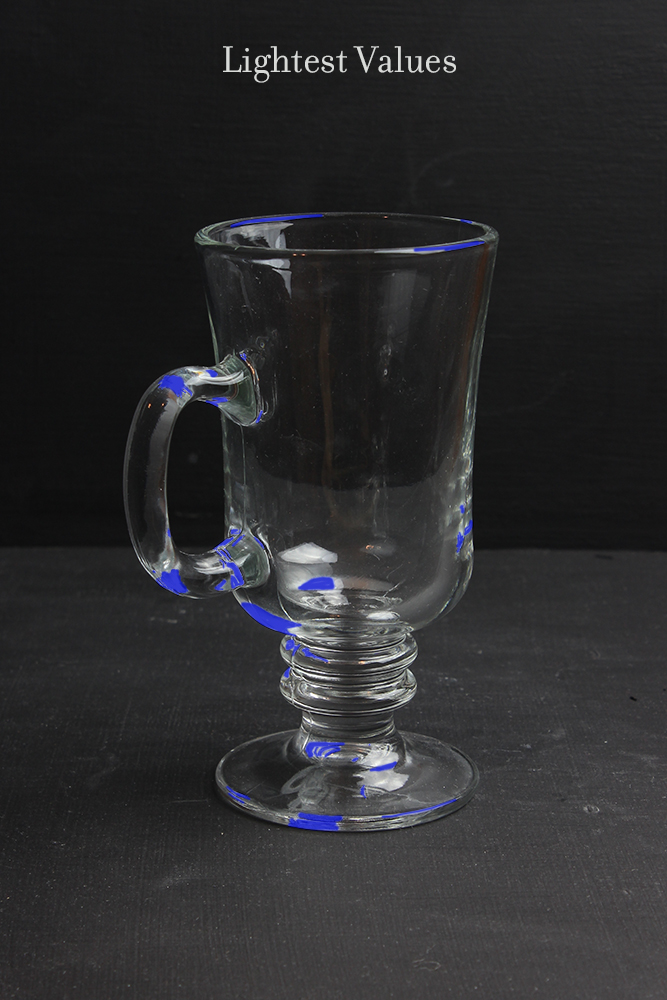
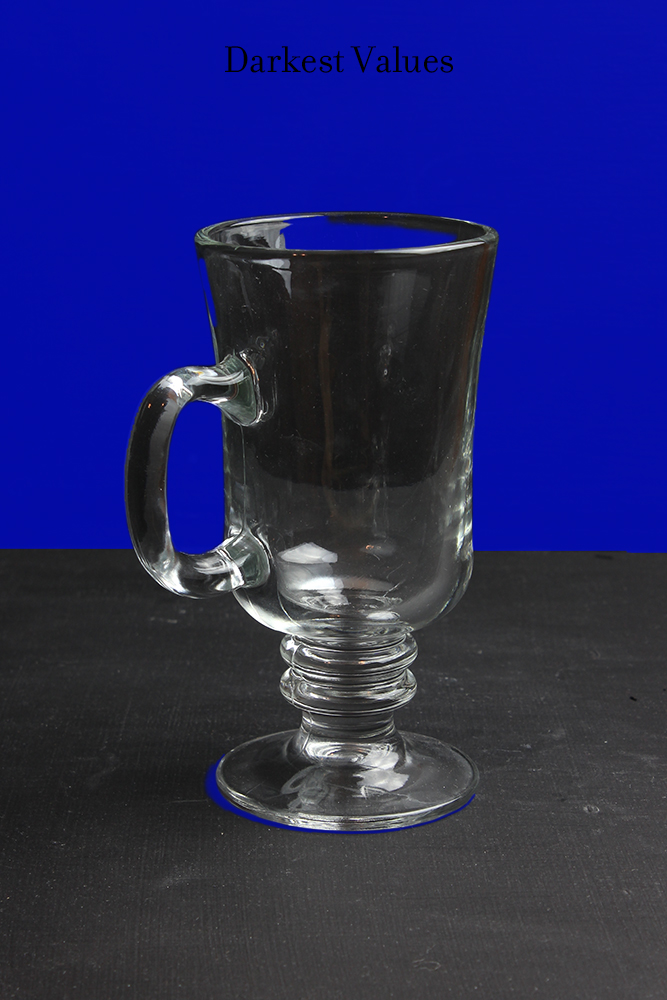
Once I am satisfied with the accuracy of the block-in, or blueprint, for my drawing, I can turn my attention to the value structure of my subject. 'Value structure' refers to where the lightest, darkest, and middle values are located in the image. (Watch a video lesson on value structure in my free Mini-Course!)
To determine where the value extremes are in the scene, I squint at the mug. This heightens the contrast of the scene and makes it clearer which values are the lightest and darkest.
The darkest value that we can achieve is the value of the paper, so the darkest values in the scene will be left blank.
How to Draw Glass: Drawing in the Light Shapes
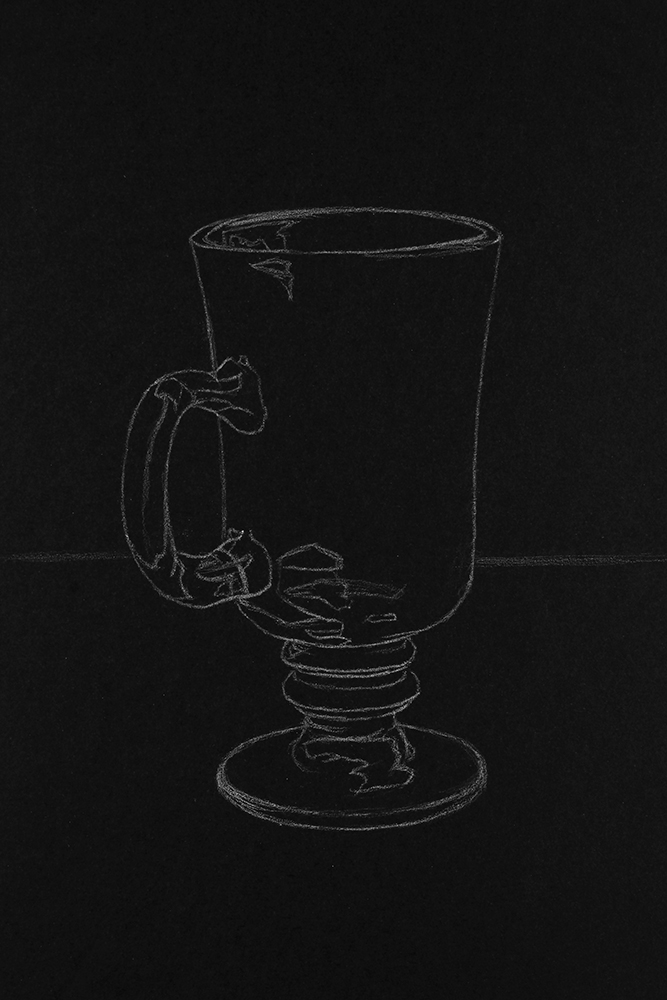
I begin mapping out the shapes that will become the lighter values and highlights of the mug. This is the equivalent of mapping out shadow shapes on white paper.
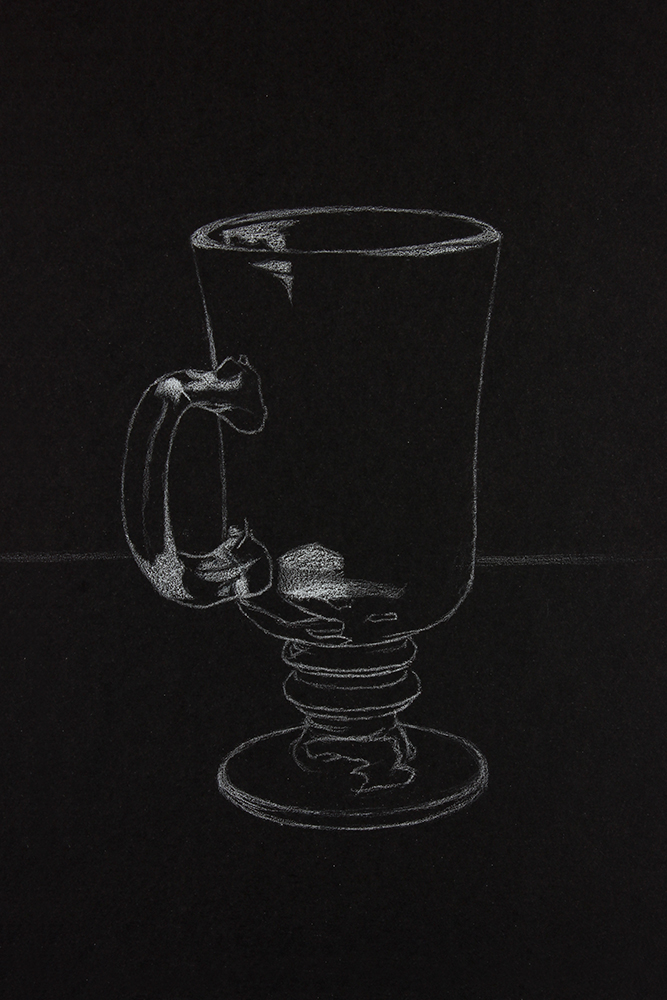
Filling in the light shapes with a flat value helps me judge how accurately I have drawn them. I can then use a kneaded eraser to 'edit' them. I'm not concerned with creating different values in the light areas just yet. In the few areas where I have created lighter and darker areas of light, it was simply to differentiate the shapes and check their accuracy.
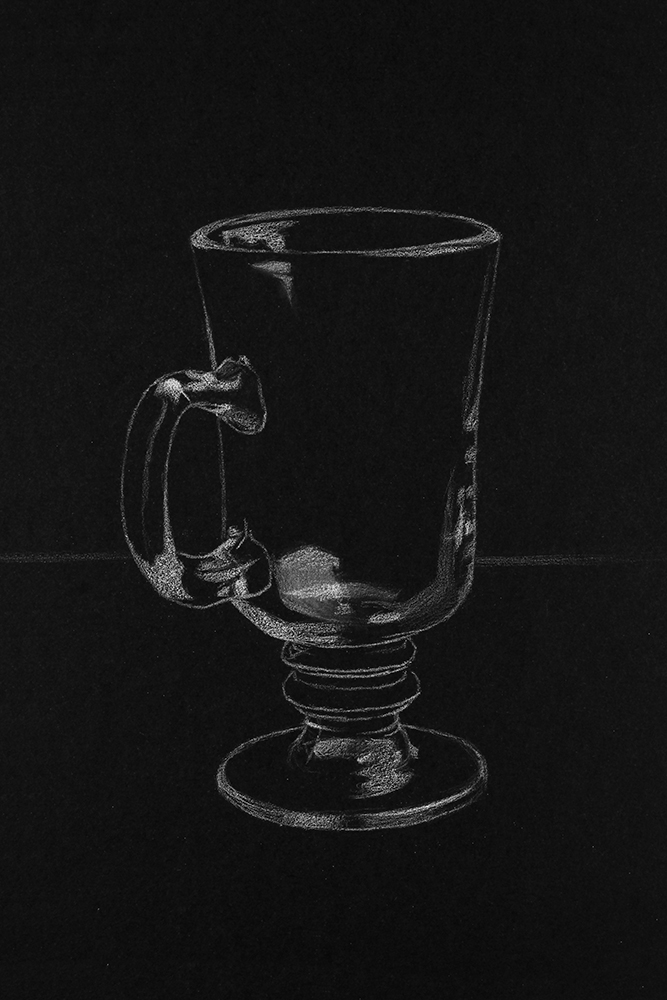
I continue adding shapes of light to the mug, working from larger, simpler shapes to smaller, more intricate ones. I always strive to work 'from general to specific' and 'from large to small', as this greatly improves the accuracy of my drawings.
As I draw in these light shapes, I pay attention to the negative space between the light shapes. 'Positive space' or 'positive shapes' refer to shapes that I have drawn. 'Negative space' or 'negative shapes' refer to the empty space between the drawn shapes. Evaluating the shapes of both positive and negative shapes results in more accurate drawings.
How to Draw Glass: Smoothing Out the Light Shapes
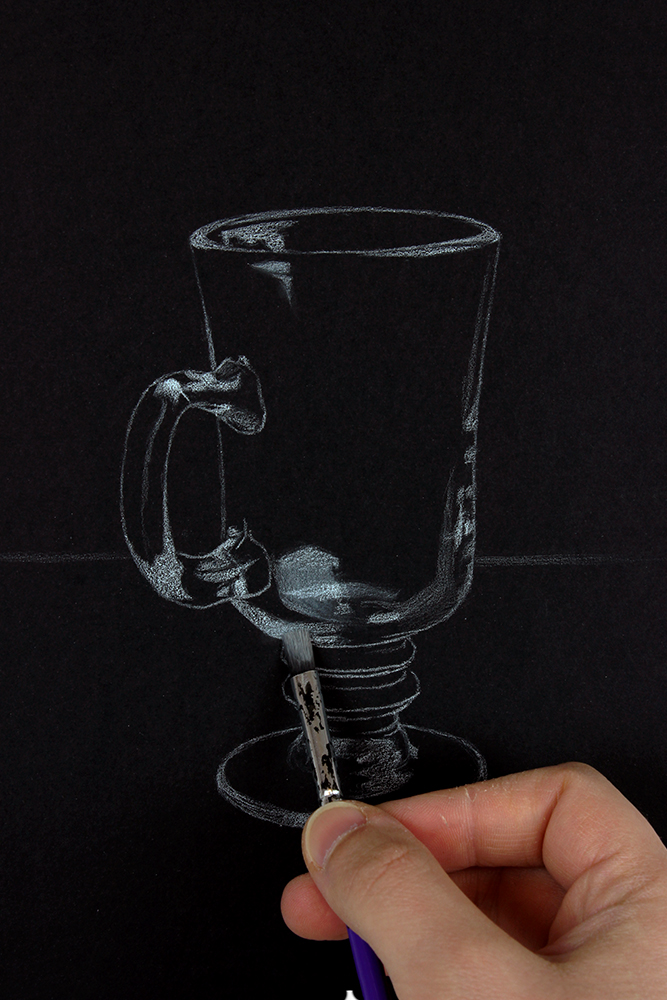
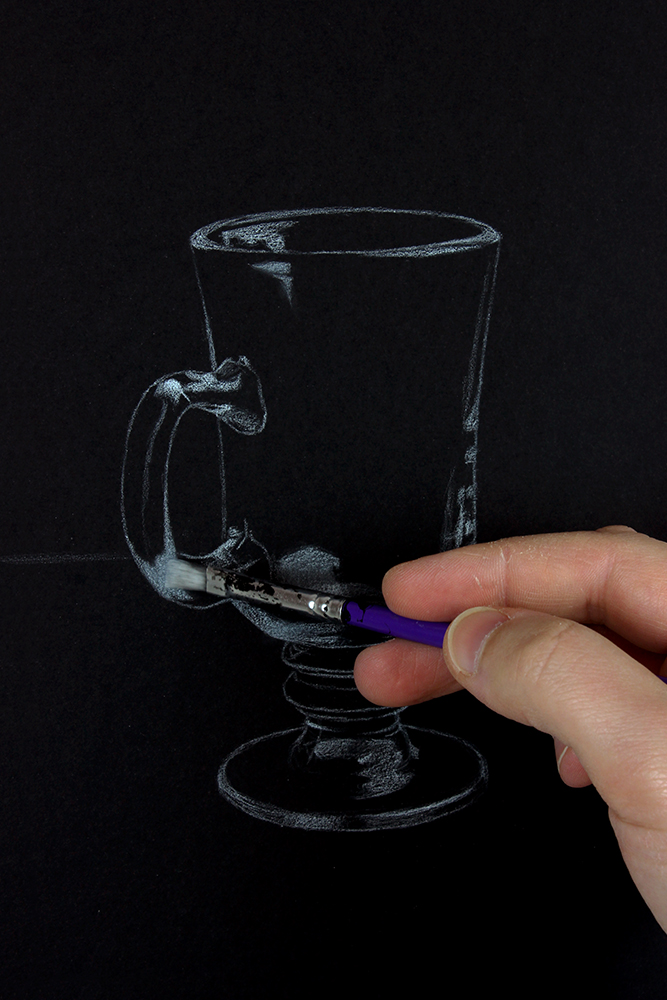
You'll notice that because this black drawing paper has some texture, the light shapes that I have drawn are not entirely smooth. How much texture you leave is a matter of personal preference. I prefer to have flatter, smoother values so as not to detract from the illusion of realism in my drawing, especially since glass is such a smooth material.
An effective method of smoothing out white charcoal is to use a soft paintbrush in a back-and-forth motion. This pushes white charcoal dust into the pores of the paper, creating a flatter value.
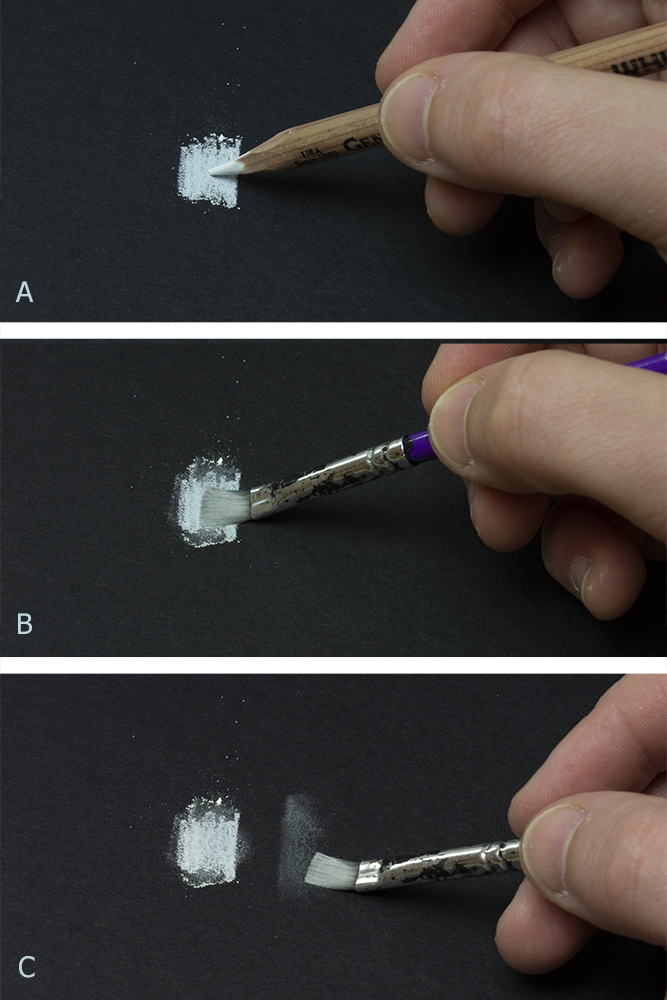
Once our paintbrush is full of white charcoal dust from smoothing out our values, we can also use it as a drawing tool, specifically to draw in very subtle values that would be challenging to draw evenly with our white charcoal pencil. To use this technique ...
Image A: On a scrap sheet of black drawing paper (very important, don't do this on your final drawing), draw a dense patch of light value to create some white charcoal dust.
Image B: Load up your paintbrush with charcoal dust by brushing it over the value in a back-and-forth motion.
Image C: You can now use the paintbrush as a drawing tool to create marks and 'washes' of smooth, subtle value.
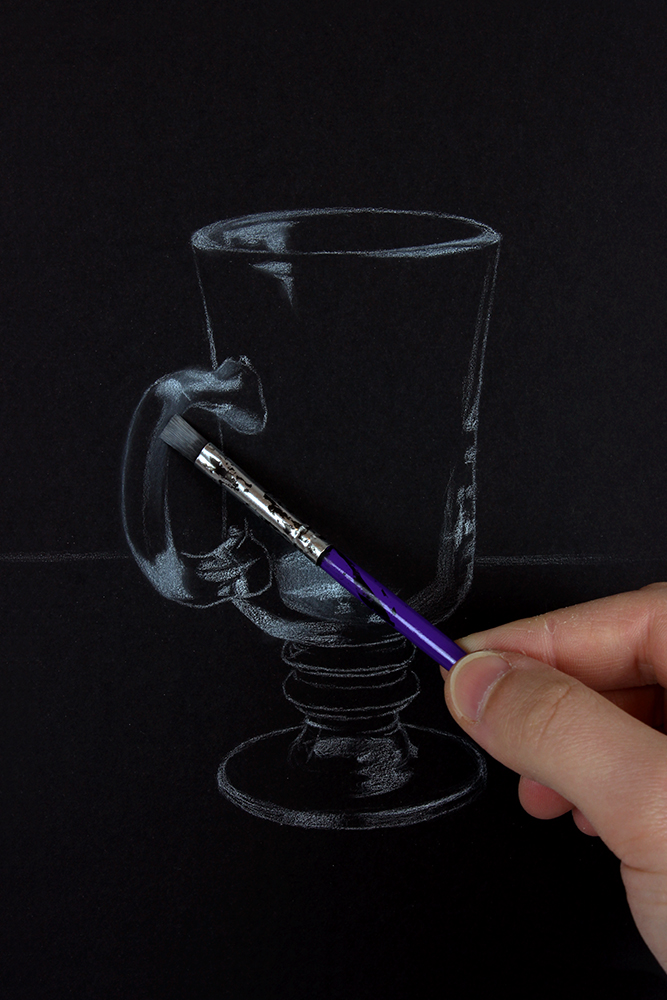
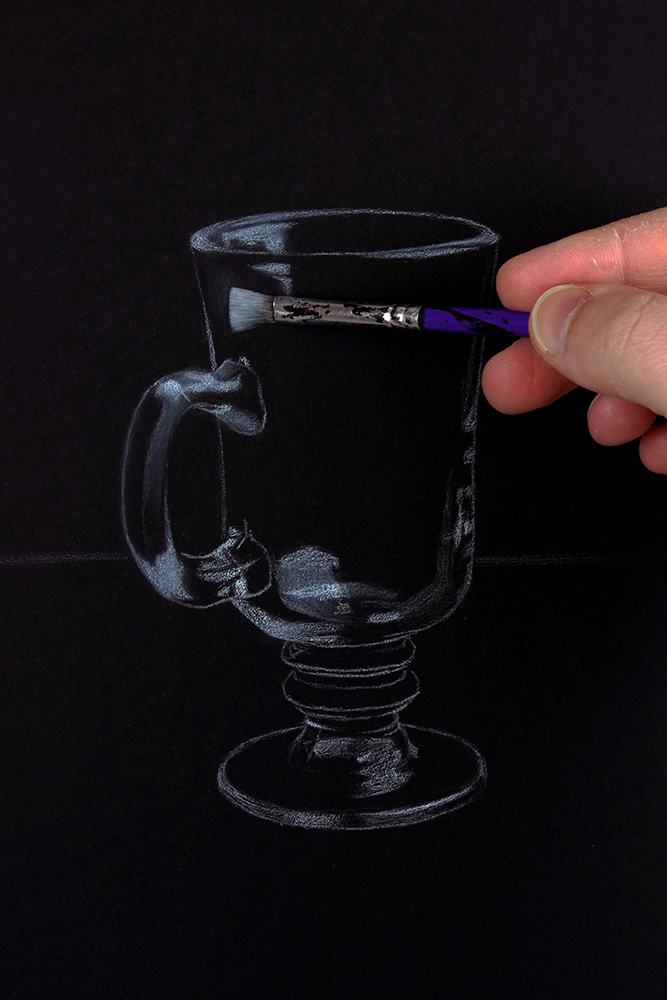
I use the technique described above to draw the subtlest values on the mug, such as the barely-visible reflections on the glass in the top right image, and the subtle value extending down the handle.
How to Draw Glass:
Drawing Lighter Values with a Paintbrush
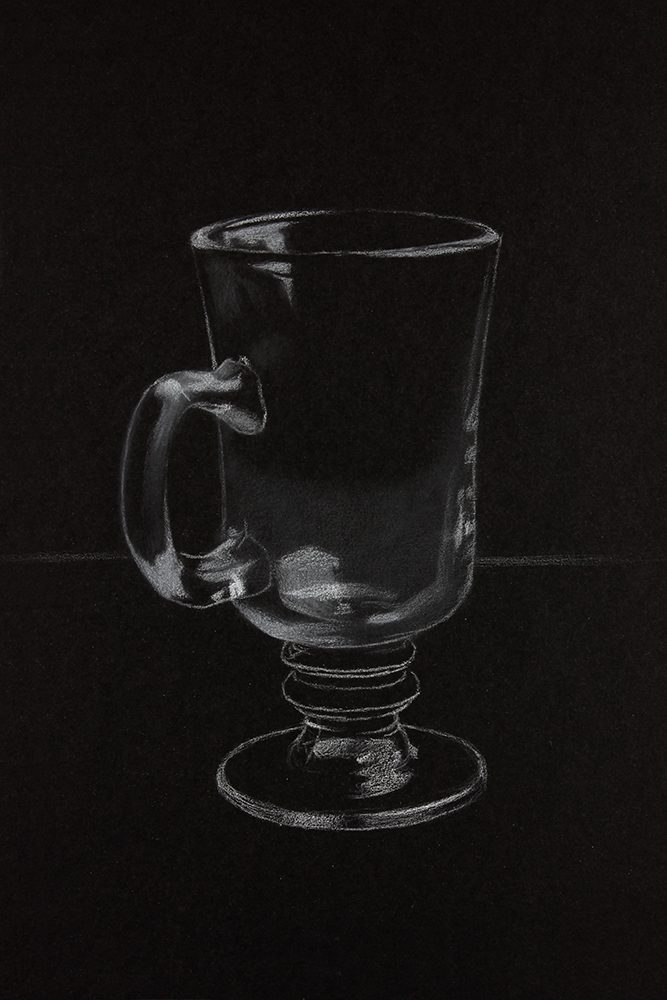
The paintbrush will continue to be an immensely valuable tool for the rest of this drawing. In the step shown above, I used it to mass in the subtle value present in the bottom half of the cup. I also drew in a line (using my white charcoal pencil) that separates the background from the surface that the mug rests on. Eventually I will create this separation through a shift in value rather than a line.
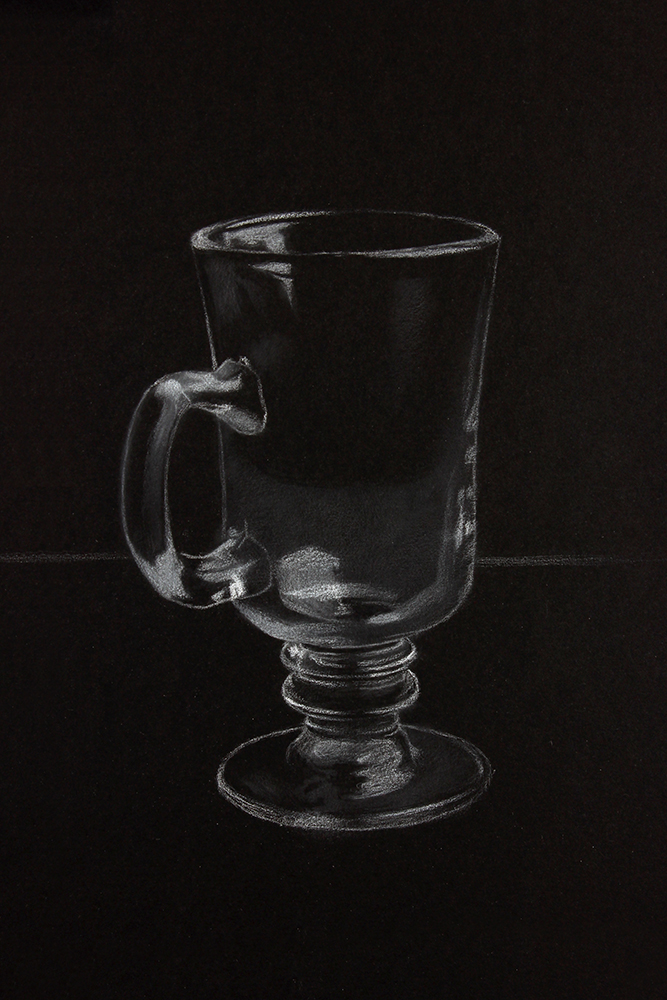
Using the paintbrush, I create the subtle value changes in the foot of the mug.
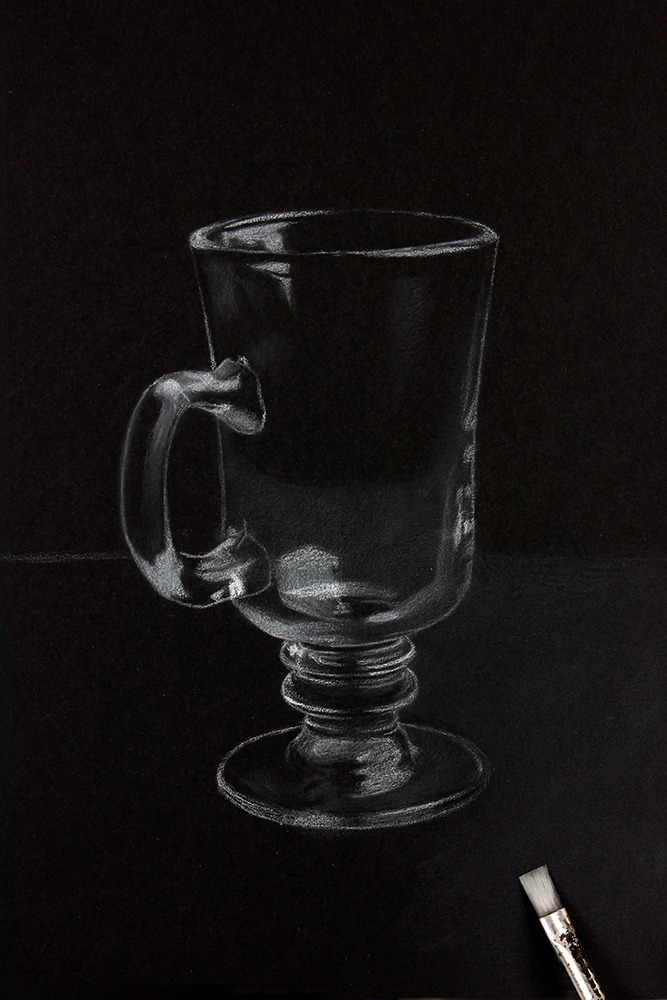
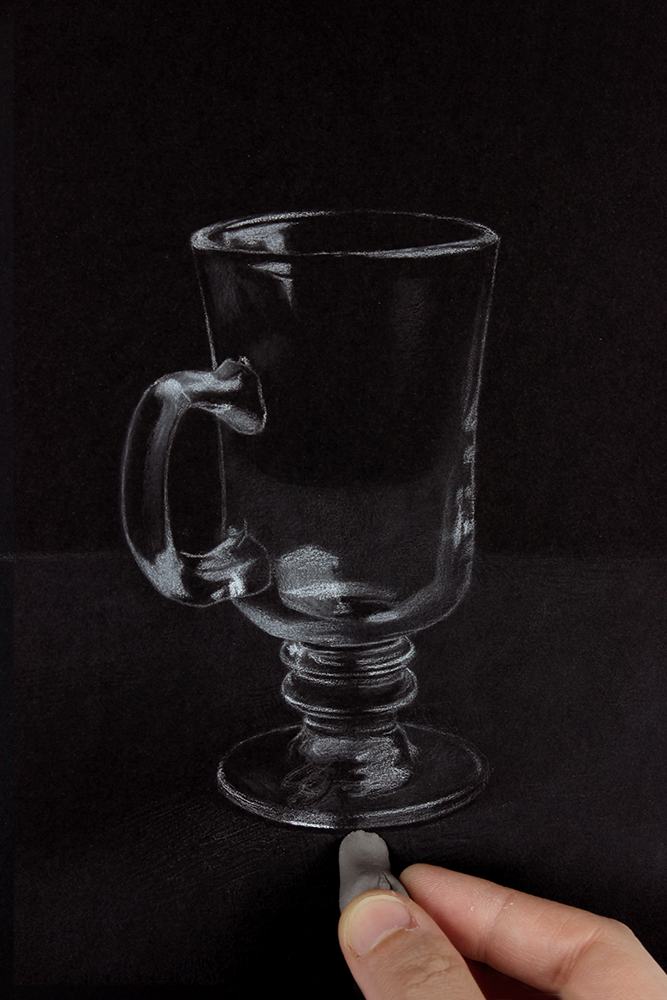
The background is another area that can be efficiently drawn using the paintbrush technique! I load up the brush with white charcoal dust, and 'draw' or 'paint' it in.
In the photo reference (which is downloadable at the bottom of the page), notice the cast shadow to the left of the mug. Directly below the mug is a thin, dark shadow following the curve of its foot. Remember that these need to be left as the black of the paper, since that is the darkest value that we can create. Fortunately, white charcoal erases quite well. In the top right image, I am using my kneaded eraser to clean up the thin, dark shadow created by leaving the paper blank and surrounding it with a lighter value.
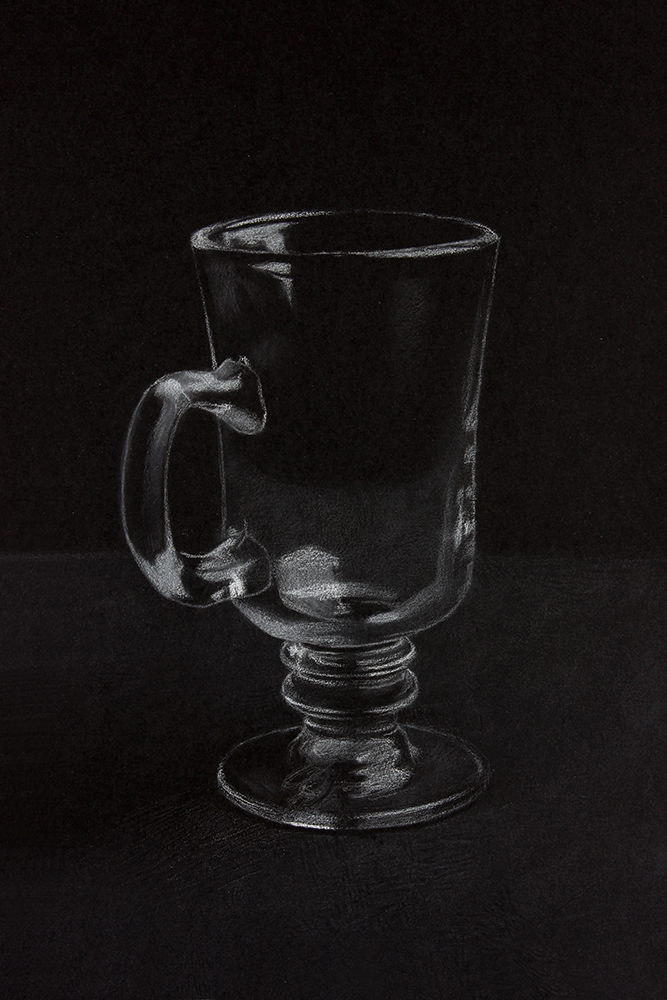
My background in the bottom half of the image is now drawn in. I have created a soft gradation from the lighter area of the background, to the dark cast shadow (to the left of the mug), which is the paper left blank.
How to Draw Glass: Refining the Values and Edges
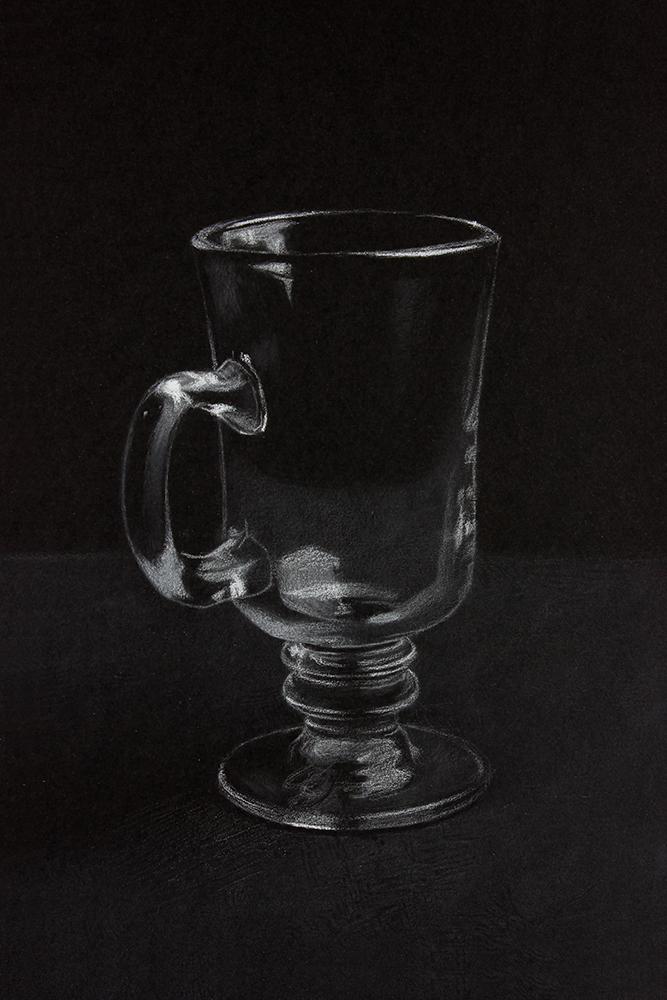
At this point, I have all the major elements of my subject drawn in: I'm confident in my proportions, and in the placement of the light shapes. Now I am looking to create a variety of values and edge qualities in the light shapes, in order to create a believable illusion of depth, dimension, and ultimately realism.
I start by looking for and drawing in the lightest values on the mug. These include the highlights in the top of the handle, and along the rim of the mug, which I have lightened in the step above. Refer to the Lightest and Darkest Values diagram earlier in the tutorial.
When we begin adding value to a drawing,
the first step is always to determine and draw in the 'value extremes' -
the lightest and darkest values in the scene. This gives us two solid reference values to compare the rest of our tones to, and reminds us that the remaining values will fall somewhere between our two extremes, helping us not to over-darken or over-lighten them.
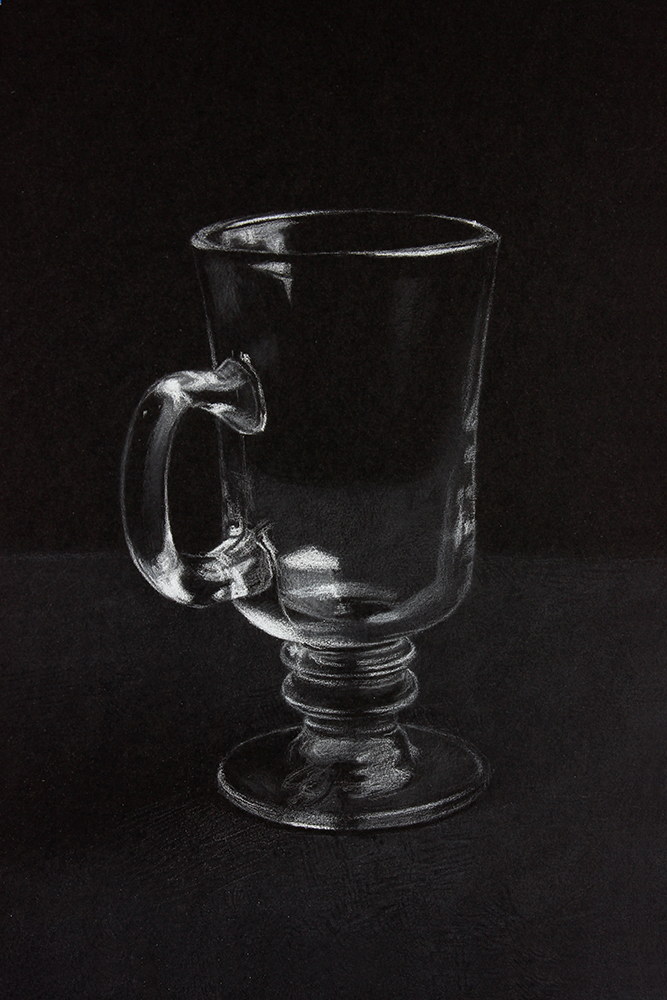
I am continuing to seek out and lighten the lightest possible values in the mug (such as the highlights in the bottom of the handle, and to the right of the handle).
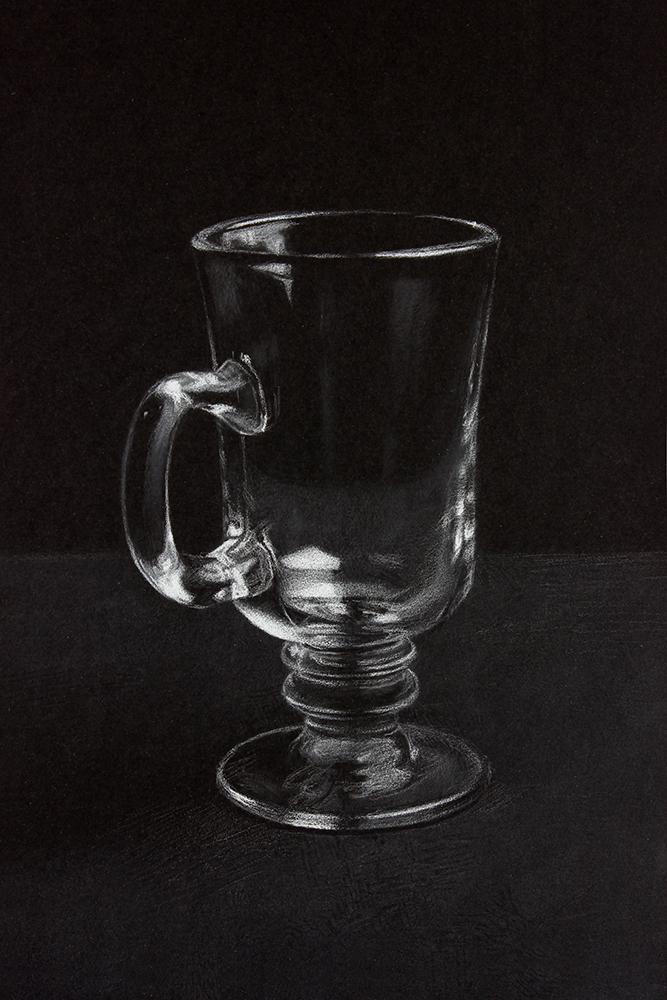
With the two value extremes established on my drawing, it becomes much easier to estimate how light or dark to make the rest of the values, because I have the lightest and darkest values to compare to. I'm shifting my focus to refining the half-tones, or middle values, and making sure that I have a range of middle values in my drawing.
Here I have added more of the subtle reflections in the top half of the glass using my paintbrush, and I have refined the highlights and reflections in the right edge of the mug. Notice the variety of values and edge qualities, from sharp to soft, that I have created here. This level of specificity is difficult to imagine, and because of this adds a sense of realism to the drawing.
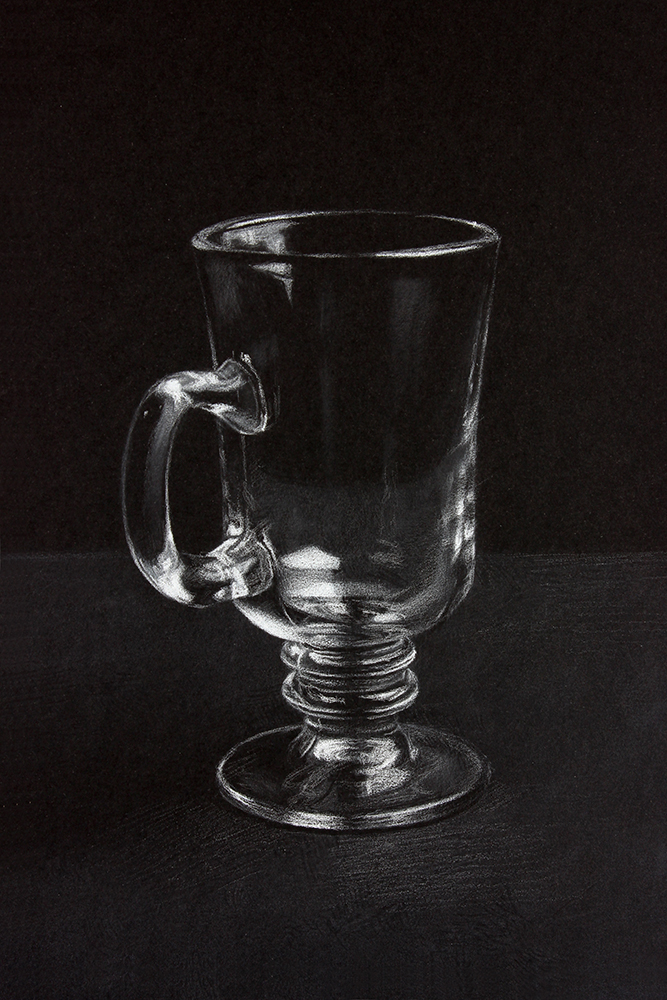
In the step above, I focused on drawing in the major highlights and reflections in the foot of the mug. We don't need to draw every single reflection that we see on our subject. Instead, I squint at my subject regularly to determine which reflections and highlights are the most important. The ones that I continue to see most clearly while squinting are the ones that I include in my drawing.
I also began lightening the right side of the surface that the mug rests on. I'm doing this using a combination of my white charcoal pencil and my paintbrush. I begin with my white charcoal pencil, and then smooth out my marks using the paintbrush. Note that the paintbrush does not always create a perfectly even value. I end up smoothing out uneven areas created by my paintbrush with my white charcoal pencil, and vice versa.
How to Draw Glass: The Finished Drawing
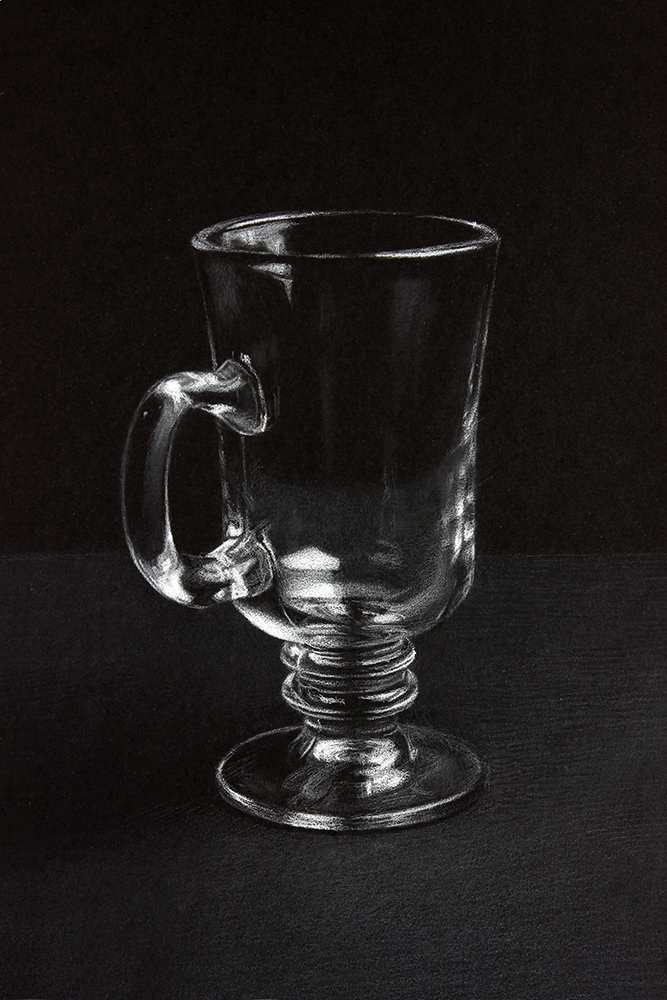
Now that my drawing looks convincingly realistic and is effectively translating the transparent and translucent qualities of glass, I am considering it finished!
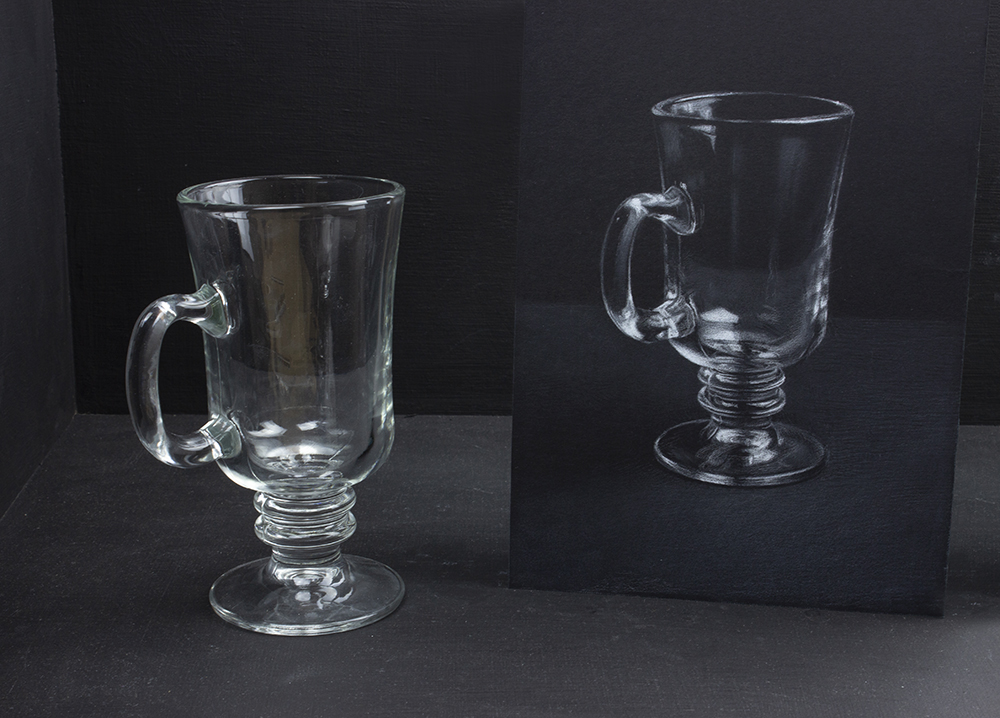
What do you think of this white charcoal on black paper technique?
If you haven't tried it, download a reference photo of the glass mug I have been drawing below, and learn how to draw glass along with me! There is also a downloadable infographic of this step by step tutorial available in the Free Members-Only Drawing Resource Library! (Enter your email below if you're not a member yet!)
Interested in other ways to use white charcoal? Check out two other techniques in my 3 Ways to Use White Charcoal Pencils article!
Happy Drawing!
Next Steps
1) Download the infographic and reference photo from this tutorial below, and try it yourself!
Enjoyed this page? Please share it!
Share buttons and pinnable image below:
If you enjoyed this tutorial on how to draw glass, you may also be interested in ...
Pages Related to 'How to Draw Glass'
3 Ways to Use White Charcoal Pencils
How to Combine White and Black Charcoal in a Drawing
How to Draw an Ear with White Charcoal on Toned Paper
Value Drawing: The Key to Realism
How to Hold and Control Your Drawing Pencil (Video!)
