- Home
- Portrait Drawing
- How to Draw an Ear
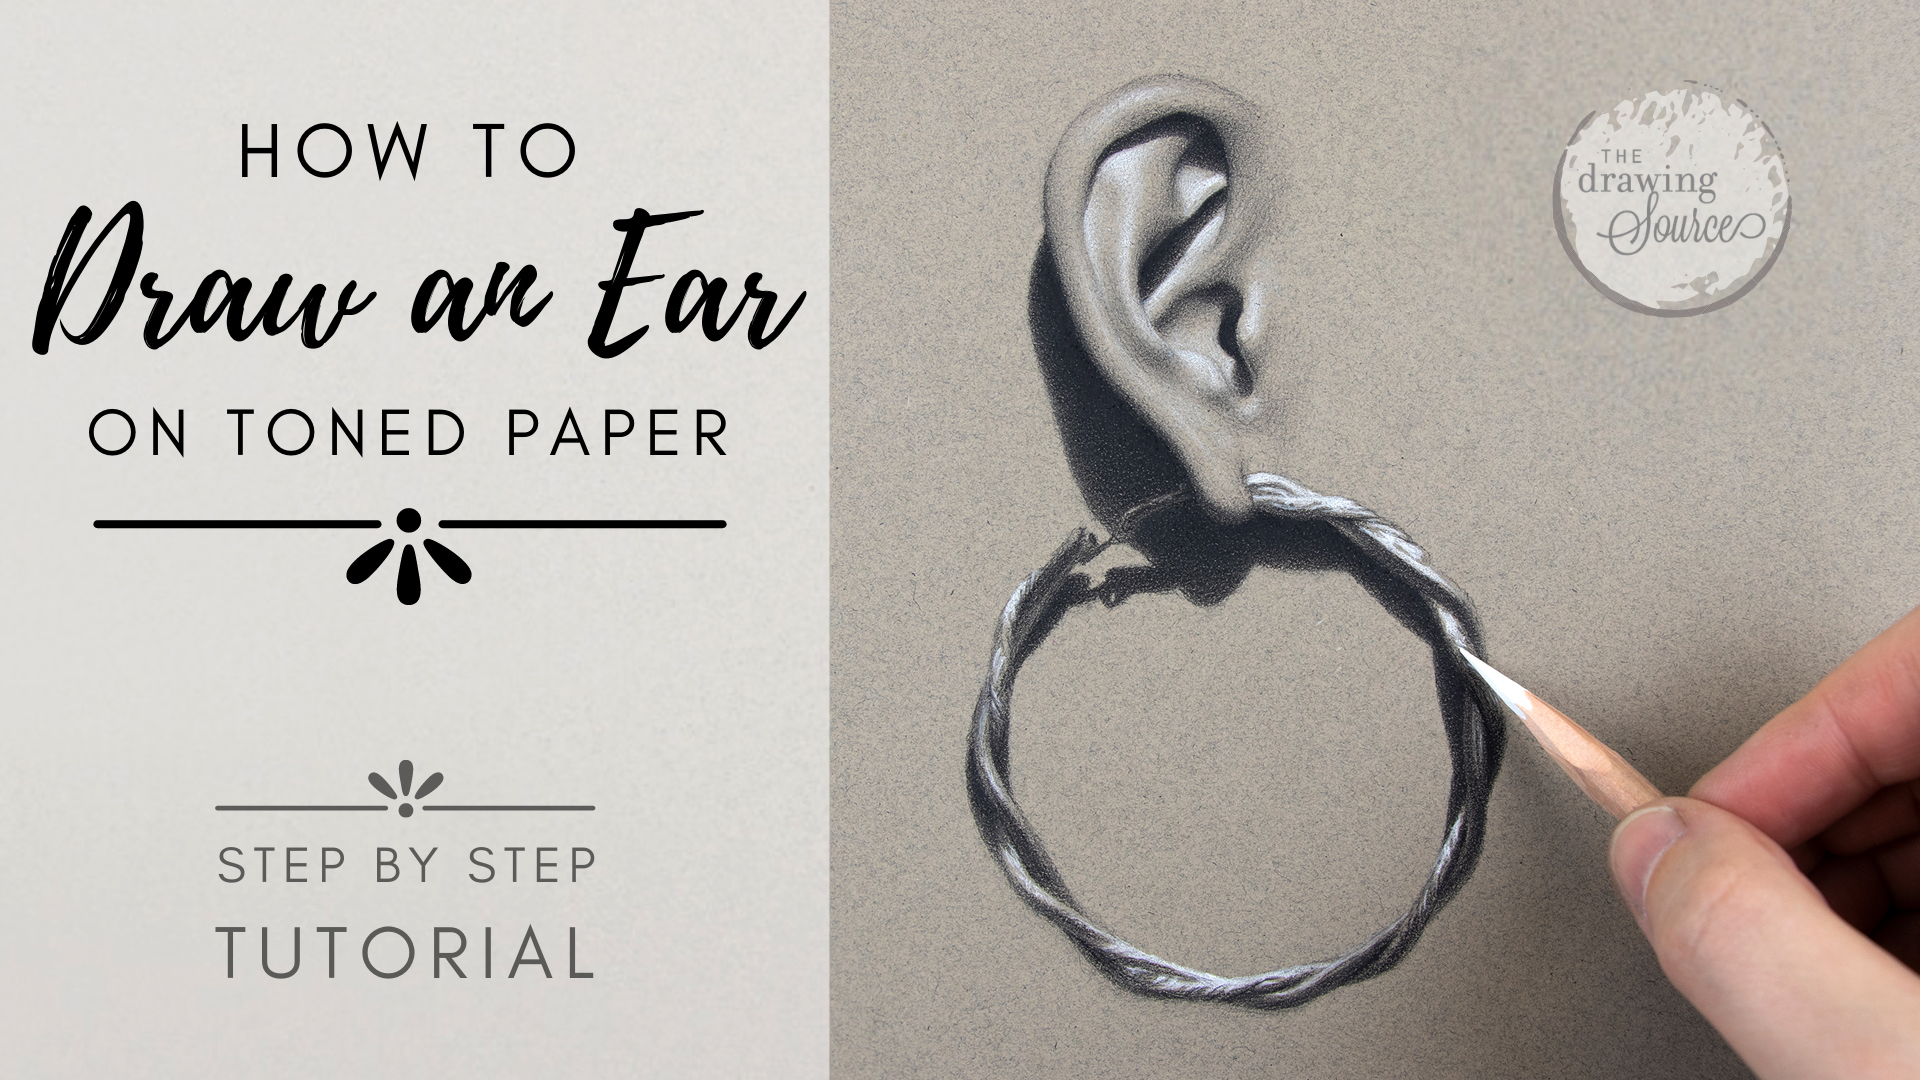
How to Draw an Ear on Toned Paper
Intimidated by the prospect of learning how to draw an ear? Don't be! The ear may look complicated at first, but becoming familiar with its basic structure should simplify it considerably.
The ear is one of the easier features to draw because its structure is quite evident for us to observe. That isn't the case with all anatomy! The structure of the nose, for example, is often very subtle and takes more study to draw convincingly. (Personally, I find noses trickier to draw than eyes!)
Fortunately, the portion of the ear that
can be seen by casual inspection is mostly all we need to
study in order to draw it convincingly. Once I point out what to look for on this ear, you should be able to identify the same structural components on other ears fairly easily (at least from a similar side view).
How to Draw an Ear:
Drawing on Toned Paper
In this tutorial I'll be using a combination of regular charcoal pencils and white
charcoal pencils.
I'll use a technique in which light values are drawn using white charcoal, dark values are
drawn using regular charcoal, and half-tone values are left as the value of the paper. As you can see in the drawn gradation below, the light and dark values stay separate, and middle values are made by either leaving
the toned paper untouched, or by very slightly lightening or darkening it.
Because it takes some extra planning to keep the light and dark values separate, this is a more advanced drawing technique.

Check out two more ways to use white charcoal pencils in this article!
My strategy when working with this technique will be to:
1) Begin with the dark values (the shadows)
2) Jump to the light values (the highlights)
3) Once the two value extremes are established, I will carefully gradate the light and dark values into the middle value of the paper.
I approach the drawing this way because it will take some care to leave the paper showing through in the right places!
How to Draw an Ear:
Drawing Supplies Used in this Tutorial
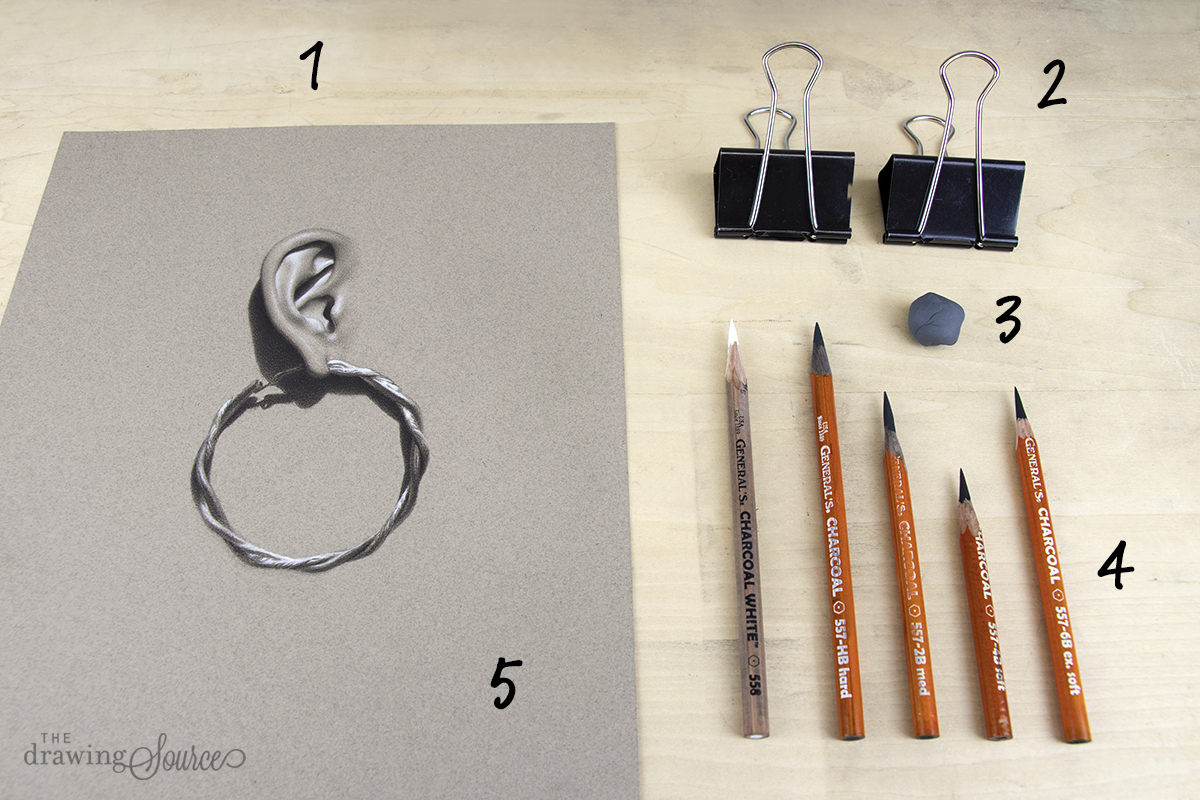
1. Drawing Board: As always, a sturdy drawing board is a must! Not to be dramatic, but flexible drawing boards are the bane of my existence. The one pictured here is a Helix Lightweight drawing board.
2. Bulldog Clips: For attaching my drawing paper to my drawing board. I prefer to use these rather than tape because they are easier to remove and pose less of a risk to my drawing.
3. Kneaded Eraser: This drawing tool is just as important as your pencil! The brand used here is the General's Jumbo Kneaded Eraser. Watch my video tutorial on three essential kneaded eraser techniques here.
4. Drawing Pencils: I will be using General's Charcoal Pencils (HB, 2B, 4B and 6B) and a General's White Charcoal Pencil for this drawing. Learn more about these on my drawing pencils page. You can also learn how to sharpen charcoal pencils here.
5. Drawing Paper: I am drawing on Strathmore Artagain paper - a lovely, smooth toned paper sold in pads containing various hues, not just the one pictured here.
How to Draw an Ear:
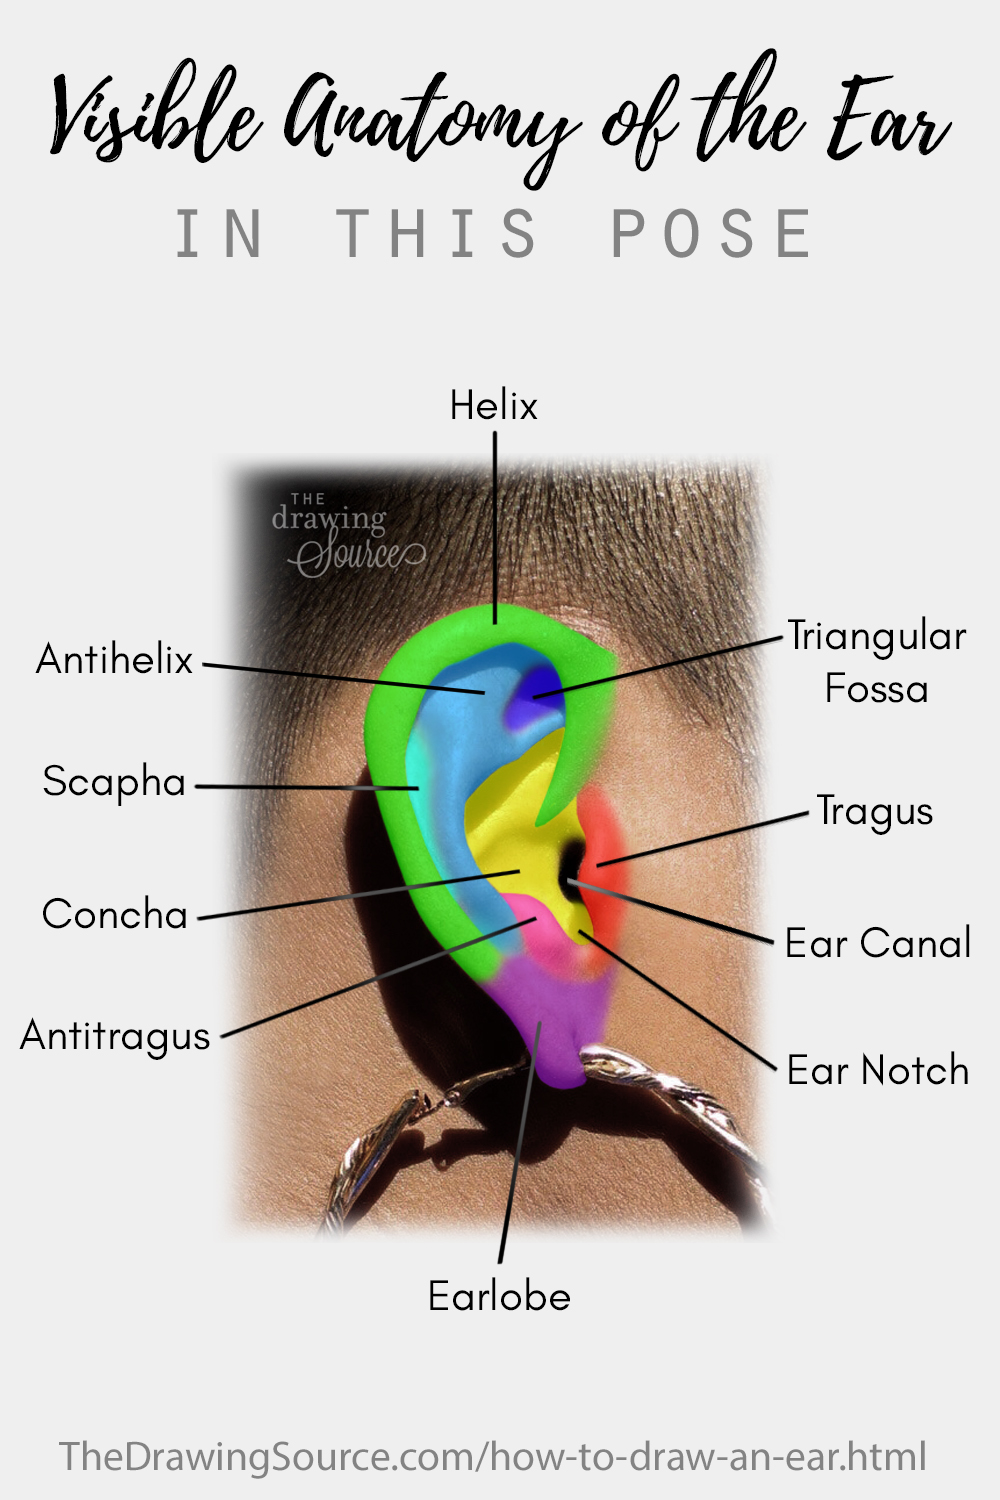
Basic Anatomy of the Ear
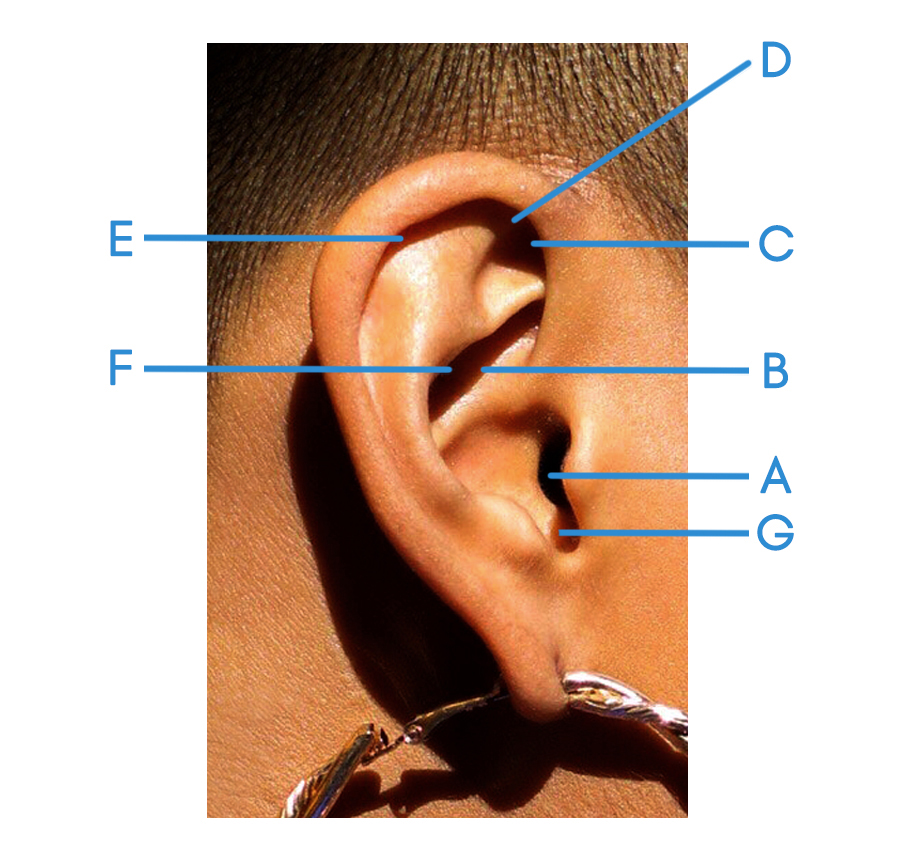
Let's look at the parts of the ear that are visible in this pose, and that I'll be referring to throughout this tutorial. The largest and most prominent parts of the ear are the helix, antihelix, concha, and earlobe (see the left image below):
- Helix: The helix is the outer rim of the ear. It's shaped like a
question mark that starts inside the ear (where it's attached to the
concha) and merges with the earlobe towards the bottom.
- Antihelix:
The curved, Y-shaped, inner rim of the ear. Notice
the two 'branches' of the Y.
- Concha: The bowl-shaped structure that 'funnels' into the ear canal.
- Earlobe: The soft, fleshy, bottom portion of the ear.
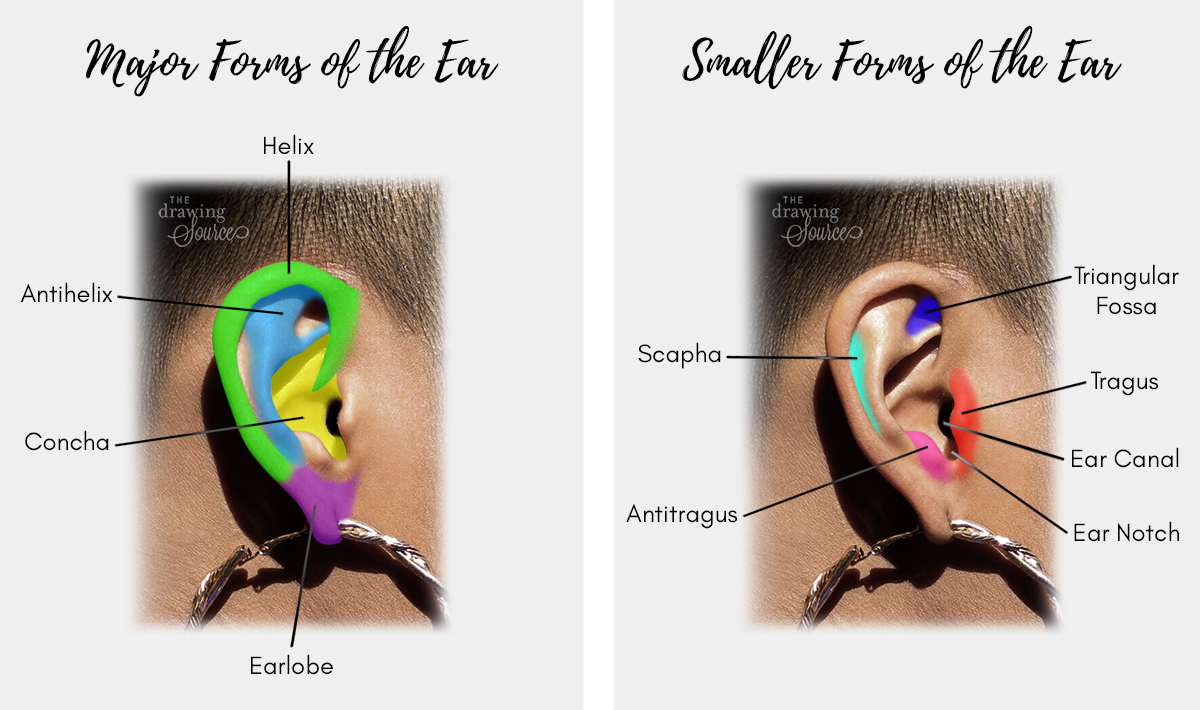
In the right image above are smaller, less prominent, but no less important areas:
- Scapha: The groove between the helix and the antihelix.
- Triangular Fossa: The concavity between the two branches of the antihelix.
- Tragus: The cartilaginous flap in front of the ear canal.
- Antitragus: The cartilaginous bump across from the tragus.
- Ear Notch: The space between the tragus and antitragus.
- Ear Canal: The opening in the ear through which sound waves travel so that we can hear!
Before we start the tutorial, why not run to a mirror and identify these features on your own ears?
How to Draw an Ear:
Starting the Ear Drawing
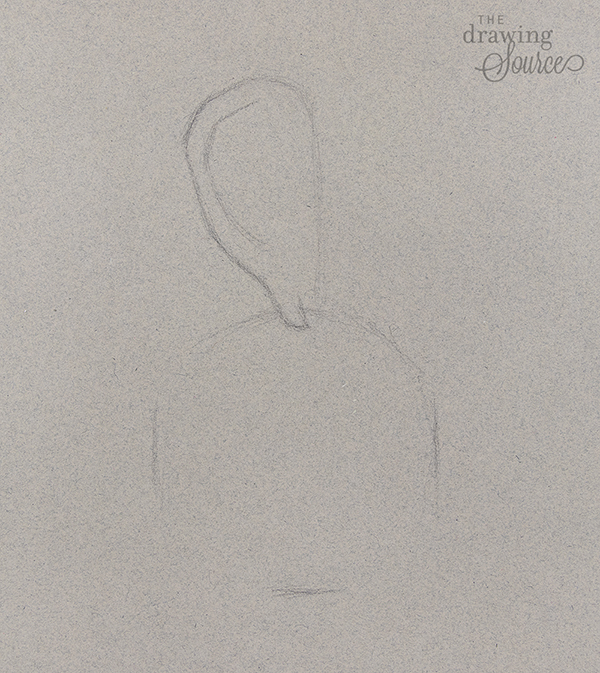
I begin my drawing using a combination of strategies. As usual, I start with an envelope (which you can learn about in my free Mini-Course), I draw in the major angles of the ear, and I use gestures and comparative measurement (which you can learn about in my Realistic Drawing 101 course).
How do we determine how far the earring extends to the left and right of the ear?
Since there is nothing right next to the earring to help us easily place it, we can create some reference points for ourselves.
For example, I can line up my pencil with the left-most point of the ear (in the image below, Line A is extended down from that point). Then I can look to see how far to the left of Line A the earring extends. I'm looking specifically at the distance between Line A and Line B.
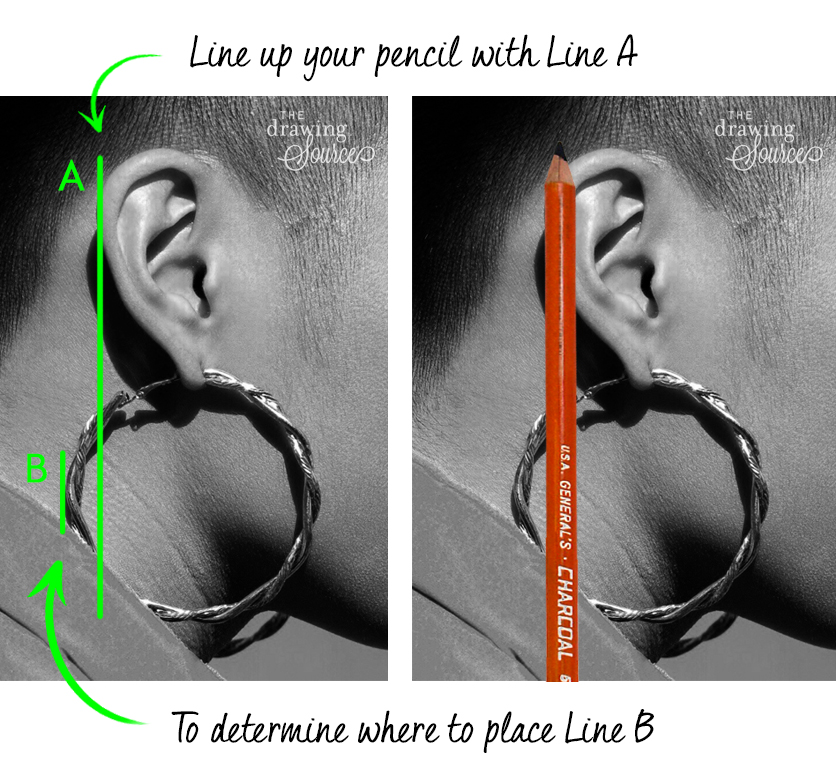
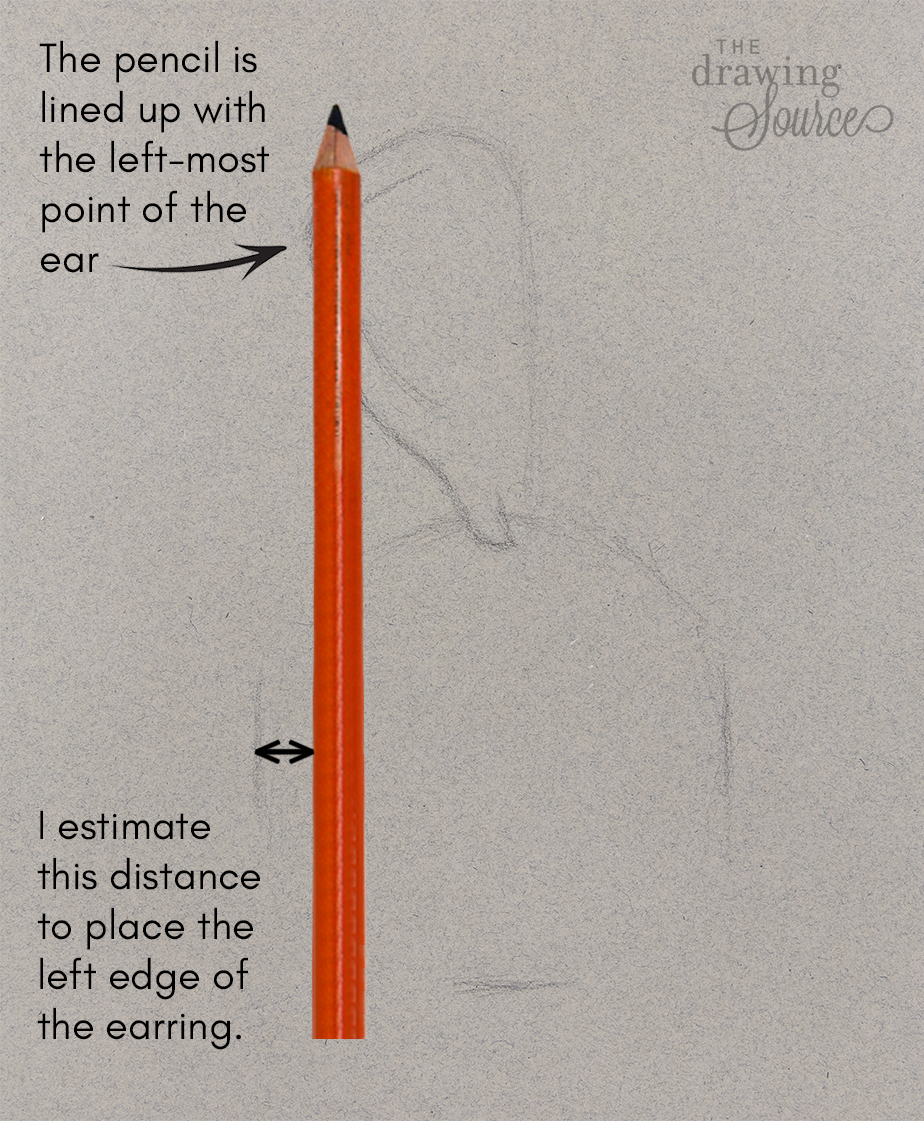
Then I can mimic this on my drawing! I line up my pencil with the left boundary of the ear (as shown in the image below), and place the left edge of the earring the same distance away from the pencil as Line B was from Line A in the image above.
I can use the same process to find the right edge of the earring: line up my pencil with the right-most point of the ear, and then estimate the distance between the pencil and the right edge of the earring.
Once I have the width of the earring indicated on my drawing, I can use comparative measurement to find its height.
How to Draw an Ear:
Using Shadow Shapes to Gauge Proportions
If you've taken my free Mini-Course, you know that I encourage addressing each phase of drawing separately. For example, I will often finish my block-in, or line drawing, before adding any values, and suggest that students do the same (especially while initially getting to know the major concepts of drawing).
However, as you become more skilled with each drawing stage separately, you can begin to merge them together, working on more than one stage at a time.
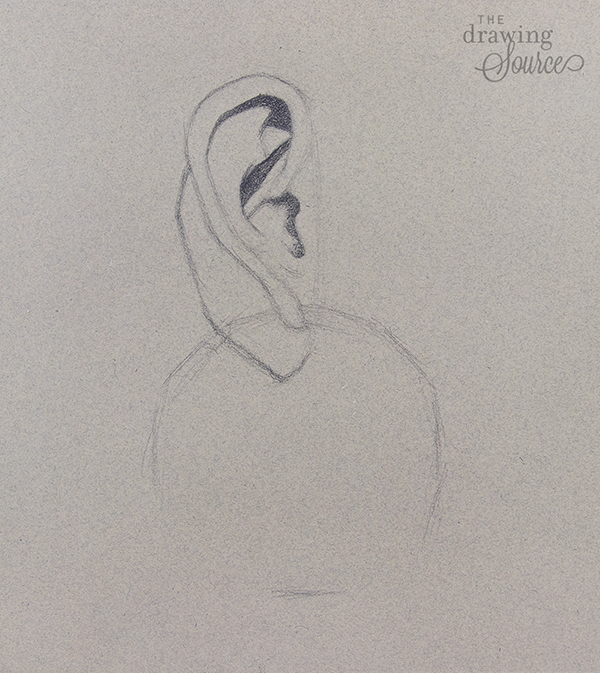
This is just such a scenario: because there are such distinct, small shadow shapes in this subject, I can use them to help me judge the proportions of the ear and create a more accurate line drawing.
To see the shadow shapes more clearly, and to more easily judge their accuracy, I fill them in with a flat value as I draw them.

I continue working on my line drawing and the shadow shapes simultaneously.
I develop the earring just as I developed the ear: by finding the major angle changes and indicating them very simply at first.
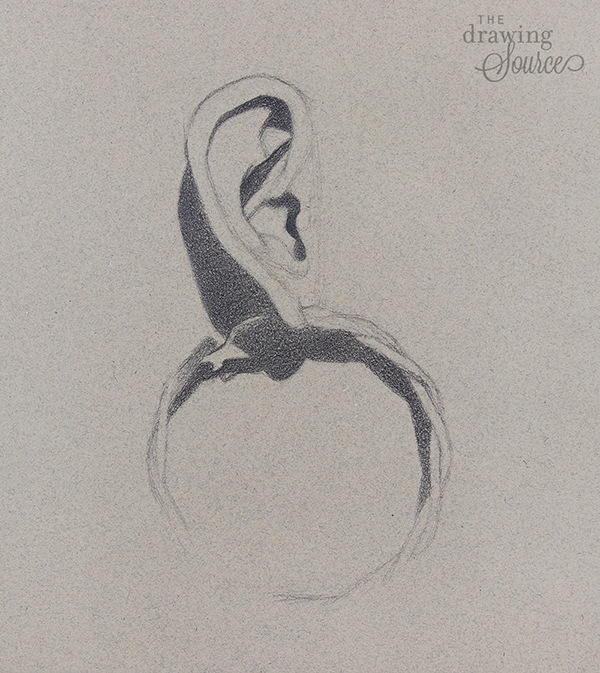
Notice that this earring is two bands woven together. To communicate this in my drawing, I pay attention to the overlapping lines created by the intersecting strands.
Now that I'm fairly confident in my line drawing, I would call this block-in completed. In fact, I'm 'ahead of the game' of my usual finished block-ins since I've already been filling in my shadow shapes!
How to Draw an Ear:
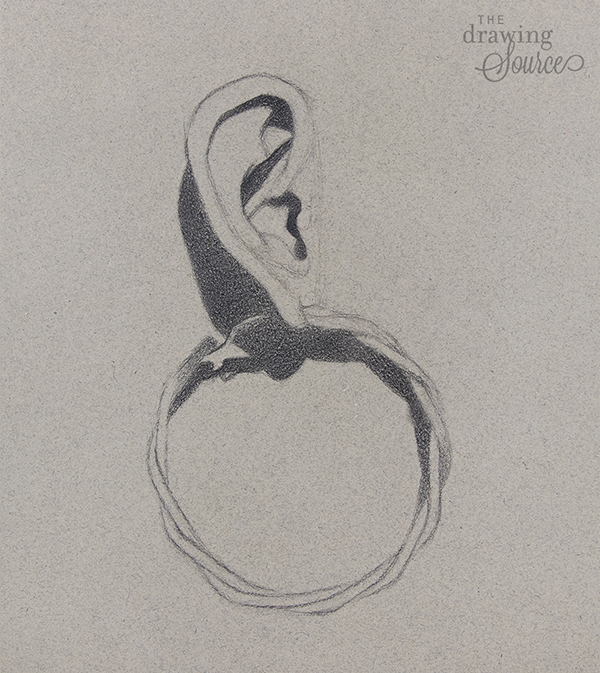
Analyzing the Dark Values
Up until this point I have been filling in the shadow shapes with a fairly flat value (that's about a value 7 or 8 on the value scale).
Before I do anything else, I need to establish my value extremes - the lightest and darkest values in the scene. This is an extremely important step, as it will allow me to more accurately gauge the rest of the values.
If you look closely at the shadow shapes in the ear, you'll notice several subtle value differences:
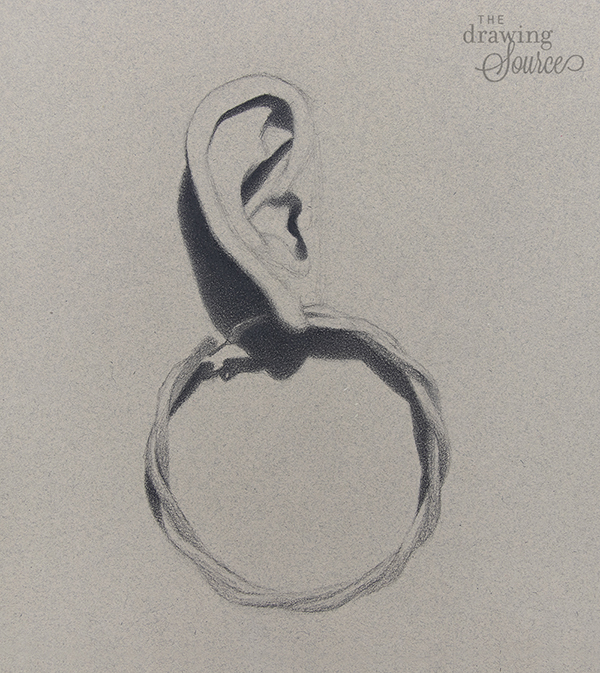
The darkest value is at the opening of the ear canal at Value A.
Value C (at the deepest part of the triangular fossa) and Value F are close to the darkness of Value A - perhaps very slightly lighter.
Notice that Value D (the 'upper crus' of the antihelix) is slightly lighter than Value C. Adding this value difference to my drawing will help create the illusion that the upper crus of the antihelix protrudes, and therefore is exposed to slightly more light, than the concavity deep in shadow at Value C.
There is a similar gradation from value F (almost pitch black shadow) to value B (a considerably lighter value).
Look how much lighter the shadows are at Value E and Value G, and how similar in value they are to each other.
Paying attention to such subtleties is what will add realism and depth to our drawings!
Look how much depth was added to the drawing since the last step, simply by adding the darkest accents and value variations within the shadow shapes.
I have also refined the shadows, evening out the values and creating smooth gradations. (You can view how I do that, and the rest of my drawing process, in my Realistic Drawing 101 video course.)
How to Draw an Ear:
Adding the Light Values
Rather than jumping into the next stage and drawing on autopilot, it's good practice to put our pencils down, consider the next priority in our drawing, and take a few minutes to look closely at our subject. My next priority is to draw the lightest values, so let's analyze them!
First, we can organize our subject into three value groups: light, half-tone, and shadow. Where are the light values on this subject?
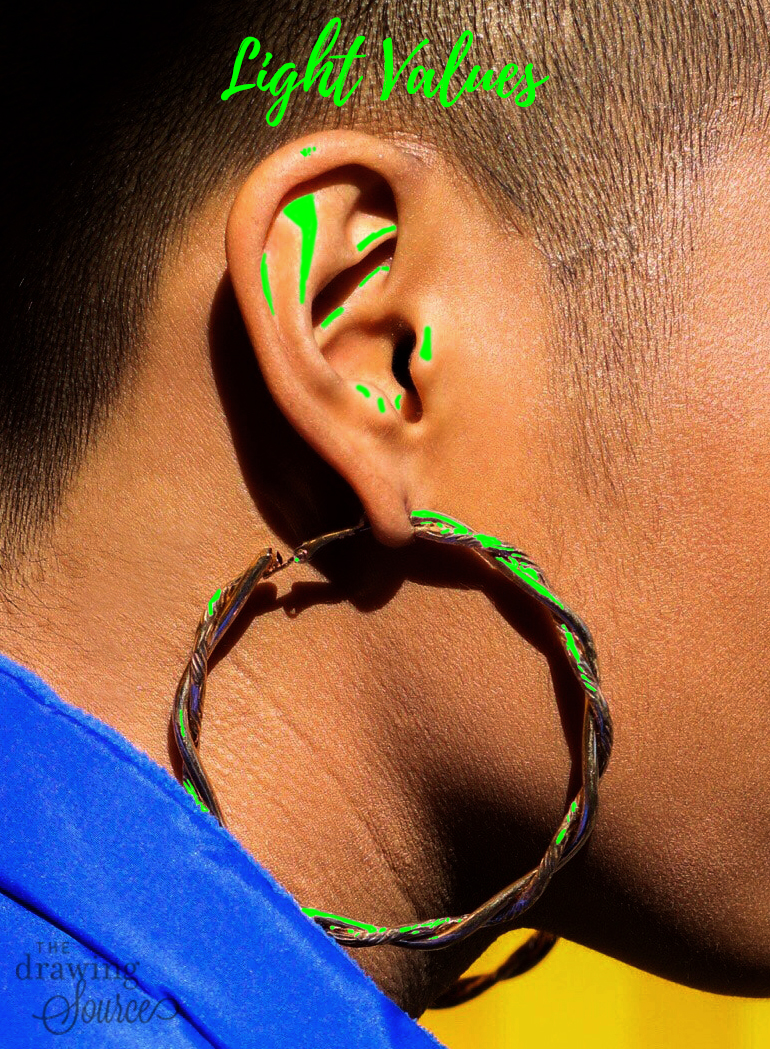
Next, just as there were tonal variations within the dark values,
there are also tonal variations within the light values:
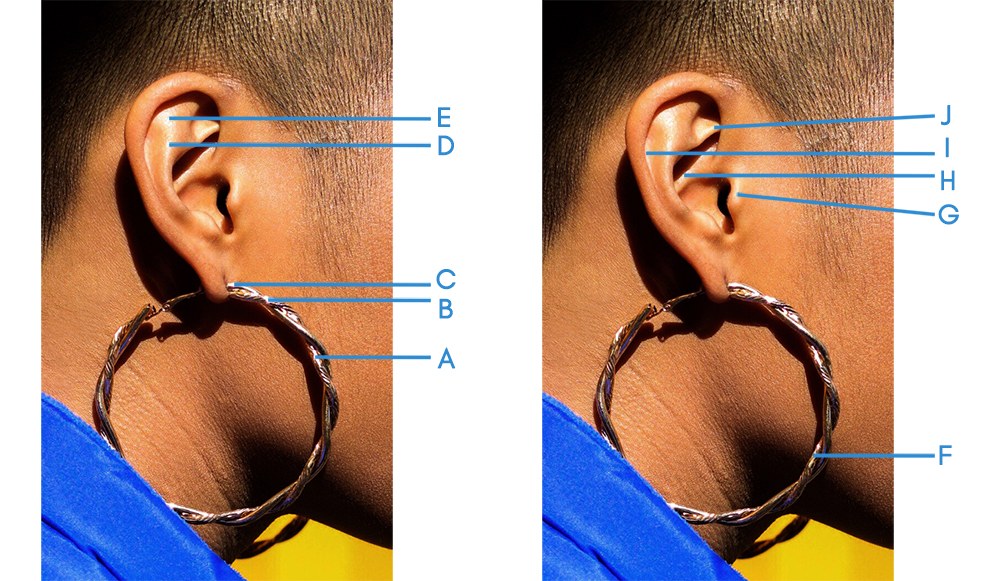
I would call Values A through E (in the left image above) the lightest values in the scene.
There is a 'second tier' of light values (in the right image above), which are slightly darker than the lightest group, consisting of Values F through J.
Finally, the 'third tier' of light values includes the highlights on the helix, the antitragus, and the concha: these are the 'darkest light values' (so, still within the 'light' group of values, but considerably closer to the half-tones).
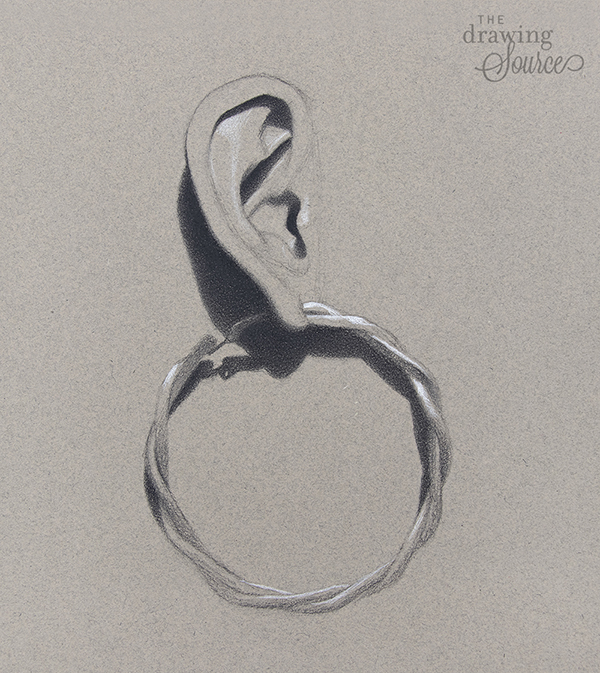
Because a priority in this drawing is to keep the lightest and darkest values separate, I start simply by placing the light values where they need to be. I'm not concerned with drawing the correct intensity of these highlights yet.
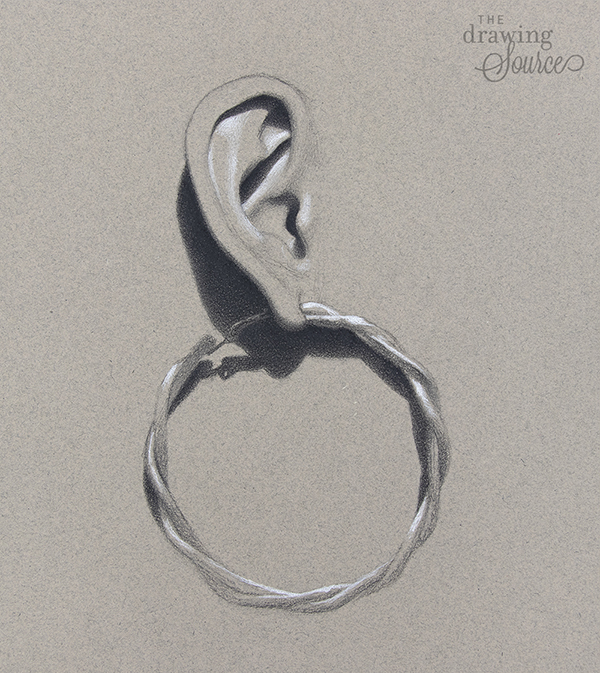
Once I'm confident in the placement of the highlights, I incrementally lighten them until they reach the intensity that they need to be.
Now that my value extremes are established, I start 'turning the form' by creating gradations from the light values into the half-tones, and from the dark values into the half-tones. Using this technique, once you have the lightest and darkest values drawn, it doesn't take much work on the half-tones for the drawing
to start looking believable.
How to Draw an Ear:
Analyzing Edges
As I work on values, I also pay close attention to the edges in this subject. Edges refer to how quickly or slowly a form turns, and are usually seen as a change in value. This is an extremely important drawing concept that allows us to create depth, dimension, and focal points in our images. (Watch a video lesson on edges in my free mini-course!)
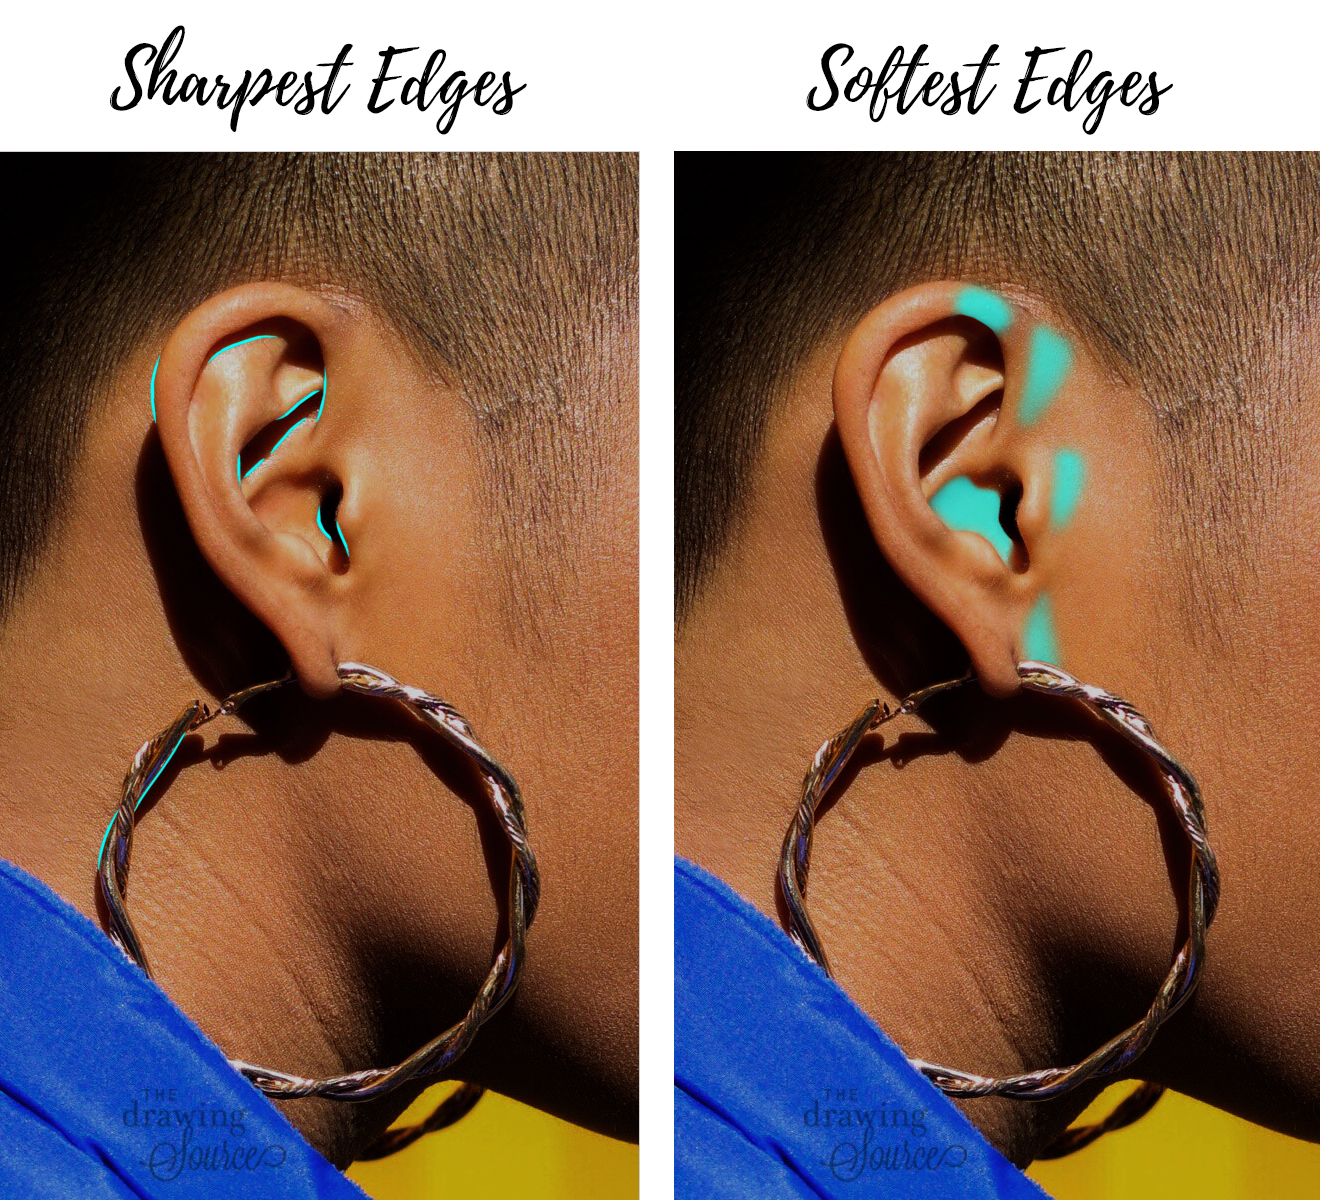 How to draw an ear: the sharpest and softest edges in this subject.
In the left image above, I have indicated some of the sharpest edges on the subject: these are evidenced by abrupt value changes (where one value suddenly ends and another begins).
In the right image above, I have indicated some of the softest edges: these are evidenced by slow value changes, some of which are so gradual that they are almost imperceptible.
To create convincing depth and dimension in my ear drawing, I need to mimic the edges that I see on my subject as sensitively as possible.
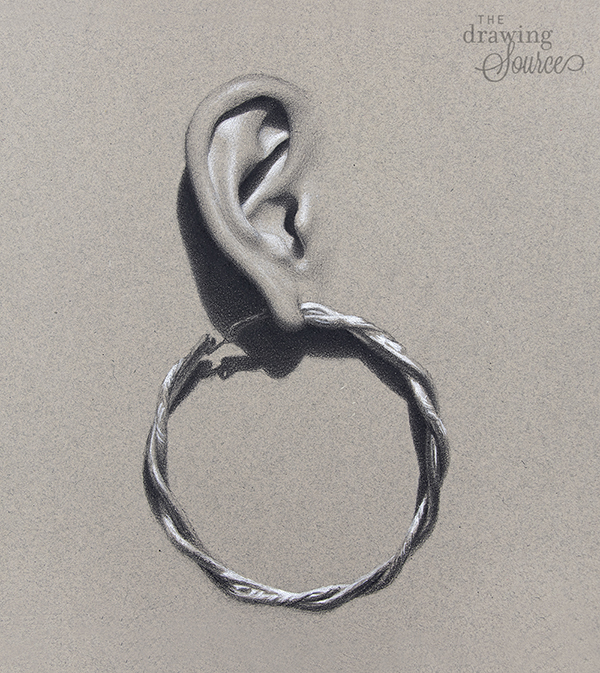
Since the last step, I darkened and defined some of the gradations leading into the half-tones, paying close attention to the varying edge qualities throughout the ear. Before I add any final details to the ear, I'll build up the earring to the same degree of finish.
How to Draw an Ear:
Drawing the Earring
When rendering a texture that seems challenging, overwhelming or busy, I suggest that you look for patterns of values. For example:
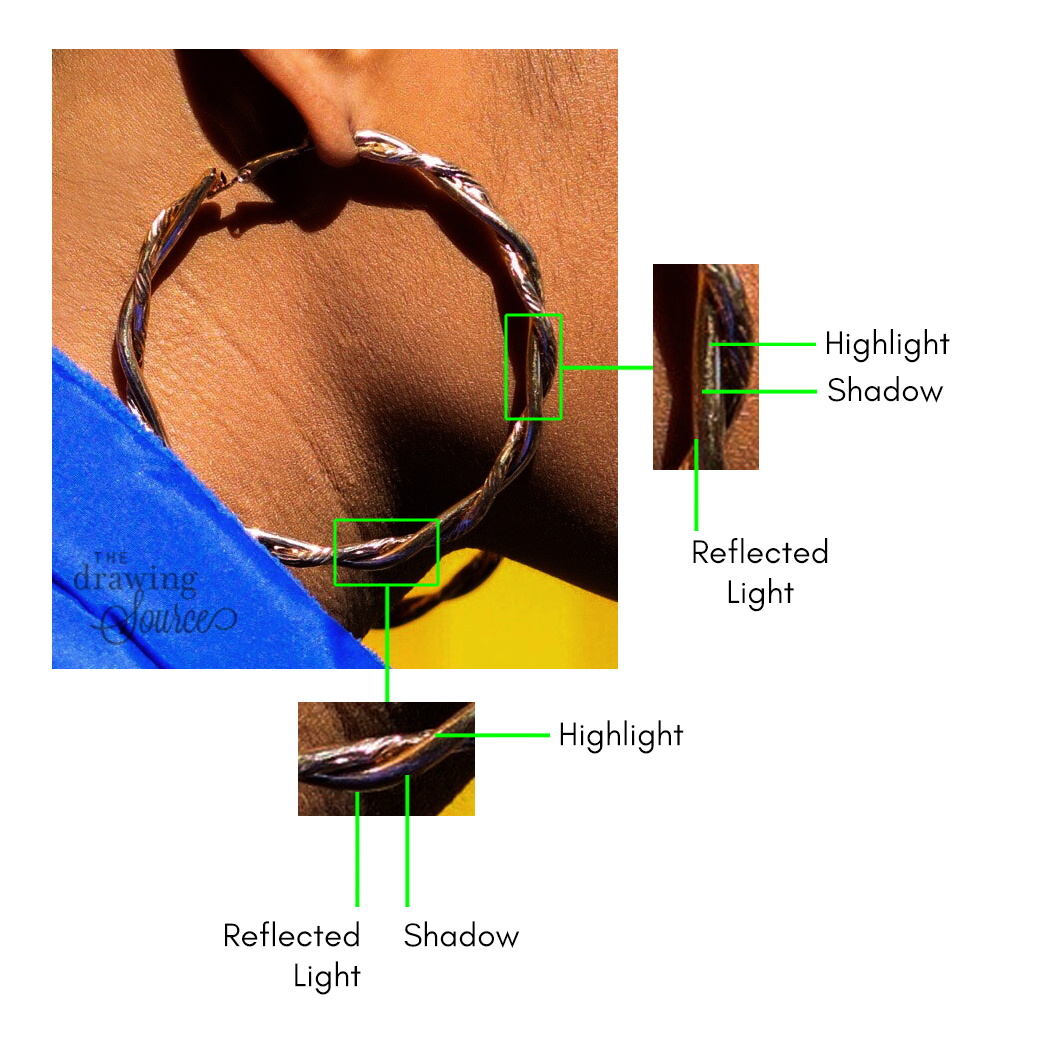
I notice that a certain value pattern repeats regularly throughout the form: in several places, one of the earring bands has a highlight, followed by a shadow, followed by reflected light towards the edge (notice that the reflected light is darker than the highlight). Finding such patterns can greatly reduce the intimidation of a complex texture.
Where else on the earring can you see this pattern? And what other value patterns can you spot?
Notice also that one of the interlacing bands of the earring is textured, and one is smooth: this contributes to the slightly different looks of the two bands.
As I focus on the earring, I start by indicating the value patterns where they are most obvious to me. I spend most of my time looking at the subject, and a fraction of the time drawing. Don't underestimate attentive observation! Give yourself time to simply observe and become familiar with your subject.
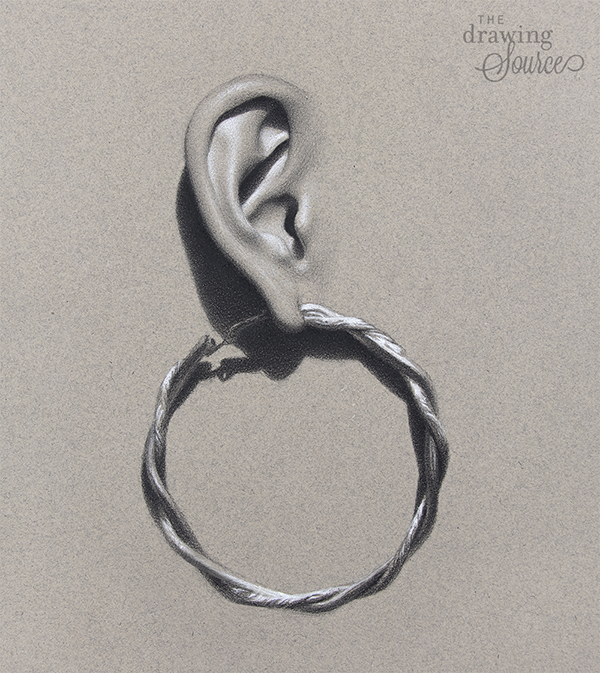
Because of the high contrast in the earring, very little of the half-tone paper will show through. It will really only be visible where there is reflected light on the earring.
Here I'm experimenting with refining the earring where it's closer to the ear itself, and leaving it more loosely drawn towards the bottom.
However, currently I feel that the contrast in the earring is pulling attention away from the ear. I'm going to tone down the contrast (in the earring) by darkening some of the light values, and see if that remedies the problem.
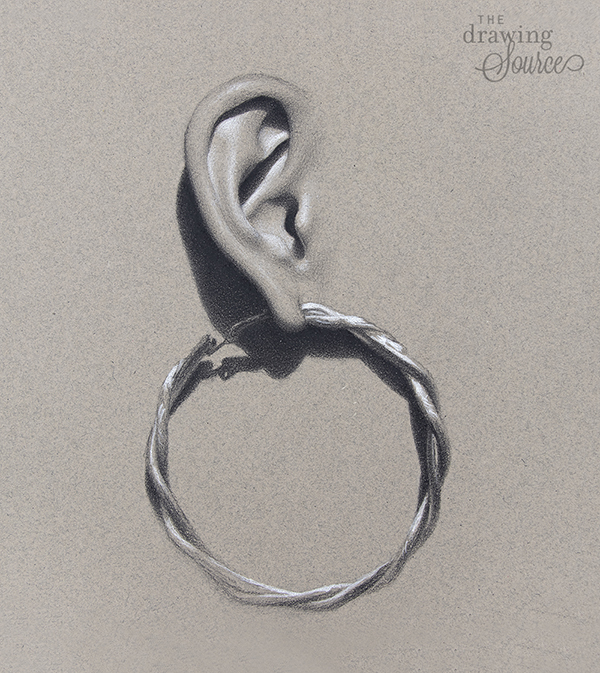
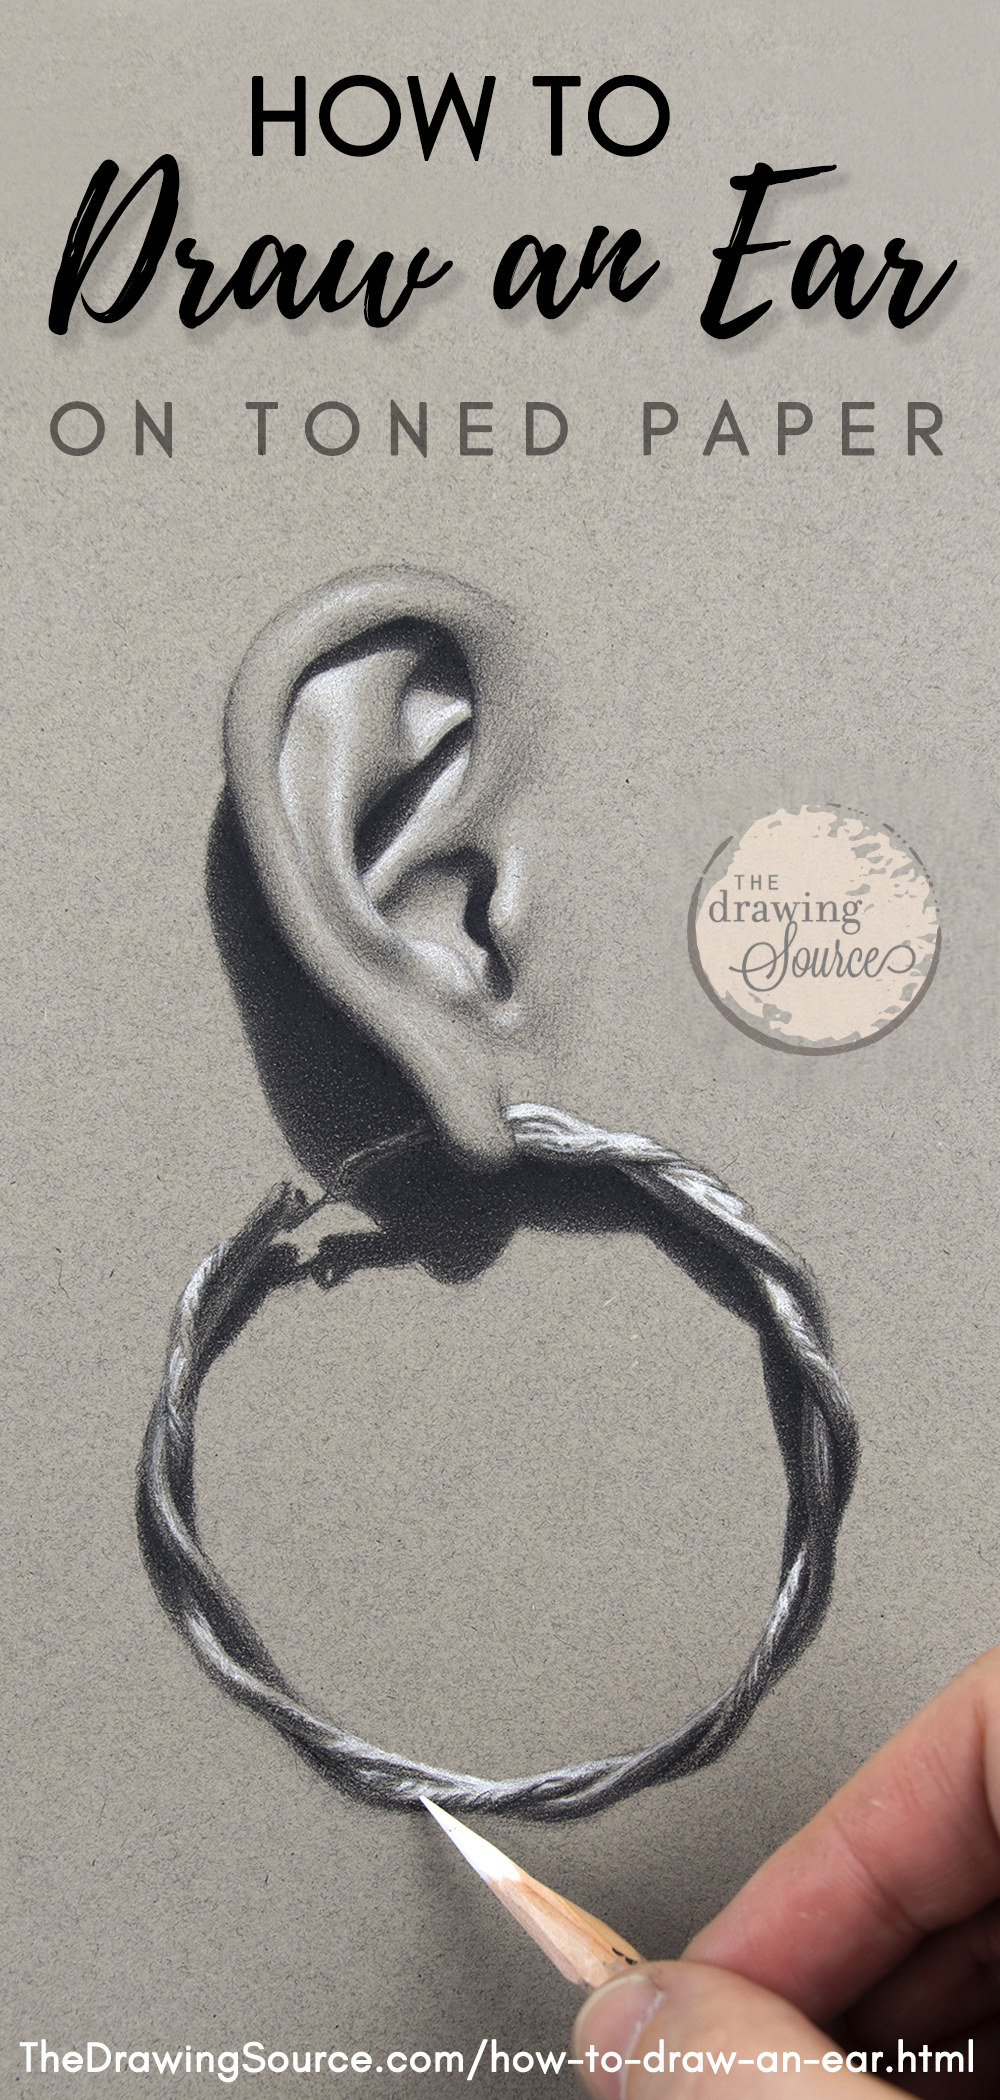
How to Draw an Ear:
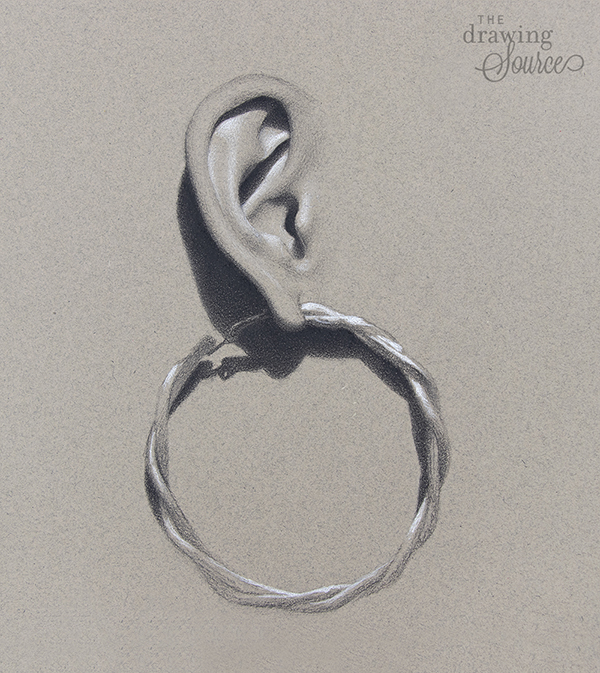
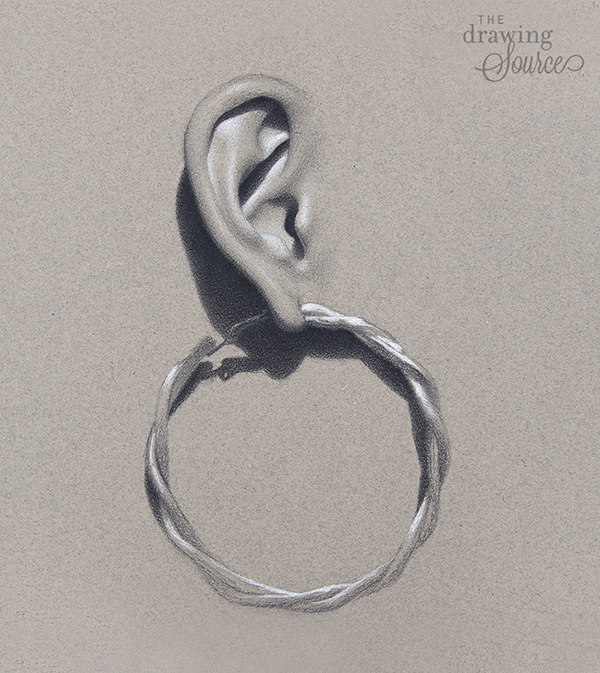
The Finished Drawing
Having toned down the contrast in the earring, I am much happier with the balance of values in my drawing. Though the earring still draws attention from the ear, my eye now moves around it and back up to the ear itself. We can curate a viewer's experience of observing a drawing through composition, value, gesture, and edge... but we'll leave that for another lesson!
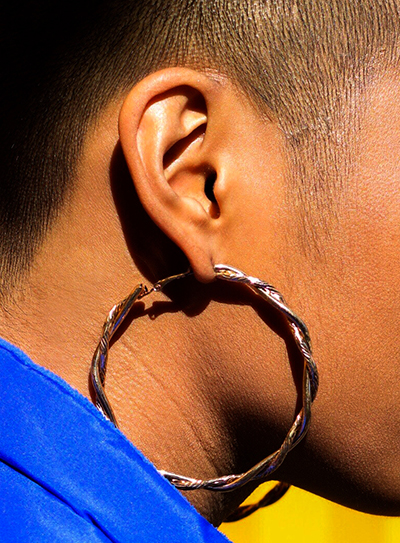
If you try out this drawing (by downloading the reference photo below), remember that there are many challenges in this scenario! Besides learning how to draw an ear, this toned paper technique and the earring texture are just a few of the elements that make this drawing more advanced than some of the other tutorials on the site. Be patient with yourself and take it one step at a time.
You could also study these elements separately first, by:
- Drawing this ear using charcoal on white paper
- Familiarizing yourself with this white pencil/charcoal technique by using it to draw a sphere or a value scale
- And then returning to this particular tutorial to merge all of these components!
Downloadable Resources
What next? Why not download the reference photo below and try drawing it yourself!
I hope you enjoy learning how to draw an ear!
Happy Drawing,

Enjoyed this page? Please share it!
Share buttons and pinnable image below:
If you enjoyed this page on how to draw an ear, you might also be interested in ...
Related Pages
3 Ways to Use White Charcoal Pencils
How to Start a Portrait Drawing
Proportions of the Face to Know
Return to Portrait Drawing from How to Draw an Ear
Return to Drawing Tutorials from How to Draw an Ear
Return to the Homepage from How to Draw an Ear
Search the site above


