- Home
- Supplies & Techniques
- Drawing Pencils
How to Choose the Best Drawing Pencils for Realistic Drawing and Shading
The 4 Levels of Drawing Pencils, and Pencil Grades Demystified
A Complete Guide to Choosing the Best Drawing Pencils for Realistic Drawing and Shading
Have you ever spent hours building up the rich, dark values in a drawing, only to step back, tilt your paper in the studio light, and see a shiny, metallic reflection?
You’re looking at the infamous graphite glare that can completely change the values – and break the realism – of your image.
Annoyingly, at that point you’re probably not going to fix that specific drawing. But for your next one, you can choose different drawing tools that are better suited to your drawing.
Whether it's graphite glare, values not getting dark enough (and you don't know why), or struggling to draw the precise detail you need, I wrote this article to help you choose the best drawing pencils not only for realistic drawing and shading, but for your specific drawing scenario and skill level.
While there's quite a lot to cover, so I’ve summarized everything in the free Drawing Pencil Decision Guide below (coming soon!). Start with your skill level and the kind of drawing you’re planning, and it shows you which pencils to choose.
- ➔Part 1: The 4 Levels of Drawing Pencils (and How to Choose the Right Ones)
- ●Level 1: Graphite Pencils
- ○Advantages and Disadvantages of Graphite Pencils
- ○When to Choose Graphite Pencils
- ○An Important Note About Shading Skills
- ●Level 2: Combining Graphite with Mars Lumograph Black Pencils
- ○When to Choose this Pencil Combination
- ●Level 3: Charcoal Pencils
- ○Advantages and Disadvantages of Charcoal Pencils
- ○When to Choose Charcoal Pencils
- ○Bonus Pencil Combination for Detailed, Dark Drawings
- ●Level 4: Combining Graphite and Charcoal Pencils
- ○When to Choose this Pencil Combination
- ➔Part 2: A Guide to Drawing Pencil Grades
- ●Graphite Pencil Guide and Graphite Pencil Grades
- ○Free Download: Graphite Pencil Hardness Scale
- ○Understanding Drawing Pencil Grades
- ○Learning How to Use the Pencil Grades
- ○Types of Graphite
- ○Tips for Minimizing Graphite Glare
- ●Staedtler Mars Lumograph Black Pencil Grades
- ●Charcoal Pencil Guide and Charcoal Pencil Grades
- ○Vine and Willow Charcoal Sticks
- ○Graphite vs. Charcoal
How to Choose the Best Drawing Pencils
for Realistic Drawing and Shading
There is no single 'best drawing pencil type' for realistic drawing. It's a little bit more nuanced than that. Each pencil type has distinct strengths and weaknesses, feels different to work with, and has unique properties that determine how your drawing will look. This means that we need to choose our pencils specifically for the drawing we're about to start.
To choose the best drawing pencils for a particular drawing, we evaluate 2 core criteria:
- The Specific Effects We Want To Create: such as the value range and degree of detail
- Our Level of Drawing and Shading Skills: different pencils require different levels of control and sensitivity
Part 1: The 4 Levels of Drawing Pencils
Here are the pencils and pencil combinations I’ll be introducing and discussing in this article, organized into 4 levels based on the skill level you must have to use them effectively:
Level 1: Graphite Pencils
Level 2: Graphite Pencils and Mars Lumograph Black Pencils - Combined
Level 3: Charcoal Pencils
Level 4: Graphite and Charcoal Pencils - Combined
Level 1: Graphite Pencils

The Advantages of Graphite Pencils:
- Especially if you’re a beginner, I
suggest starting with graphite pencils because they're the easiest to control and the
smoothest to work with. They're excellent for learning foundational pencil
control, essential shading techniques, and building up your confidence. This is why we use graphite pencils in my foundational Smooth Shading in Graphite course.
- For drawing light values and smooth gradations, I consider graphite pencils unbeatable. Many artists fall in love with graphite and continue
working with it for the rest of their creative careers. But – there are a few
cautions to be aware of.
The Disadvantages of Graphite Pencils:
- Even
if you use an 8B graphite pencil or an even softer graphite pencil, the dark
values just won’t get that dark. Certainly not pitch black.
- And, the ‘main con’ - the darker the values you build up (especially with
softer pencils like 6B and 8B), the more reflective they become. This
creates the infamous, often frustrating ‘graphite glare’ or graphite shine:

Years ago, I abandoned the drawing above because I was frustrated with
the graphite glare. Lesson learned! Graphite is better used for lighter value
drawings. Notice that the lightest areas in the drawing above are not
producing any glare. More on this in the Graphite Pencil Grades portion of this article.
The graphite glare phenomenon makes graphite a poor choice for drawings that
have mostly dark values, but excellent for drawings with mostly light
and medium tones:
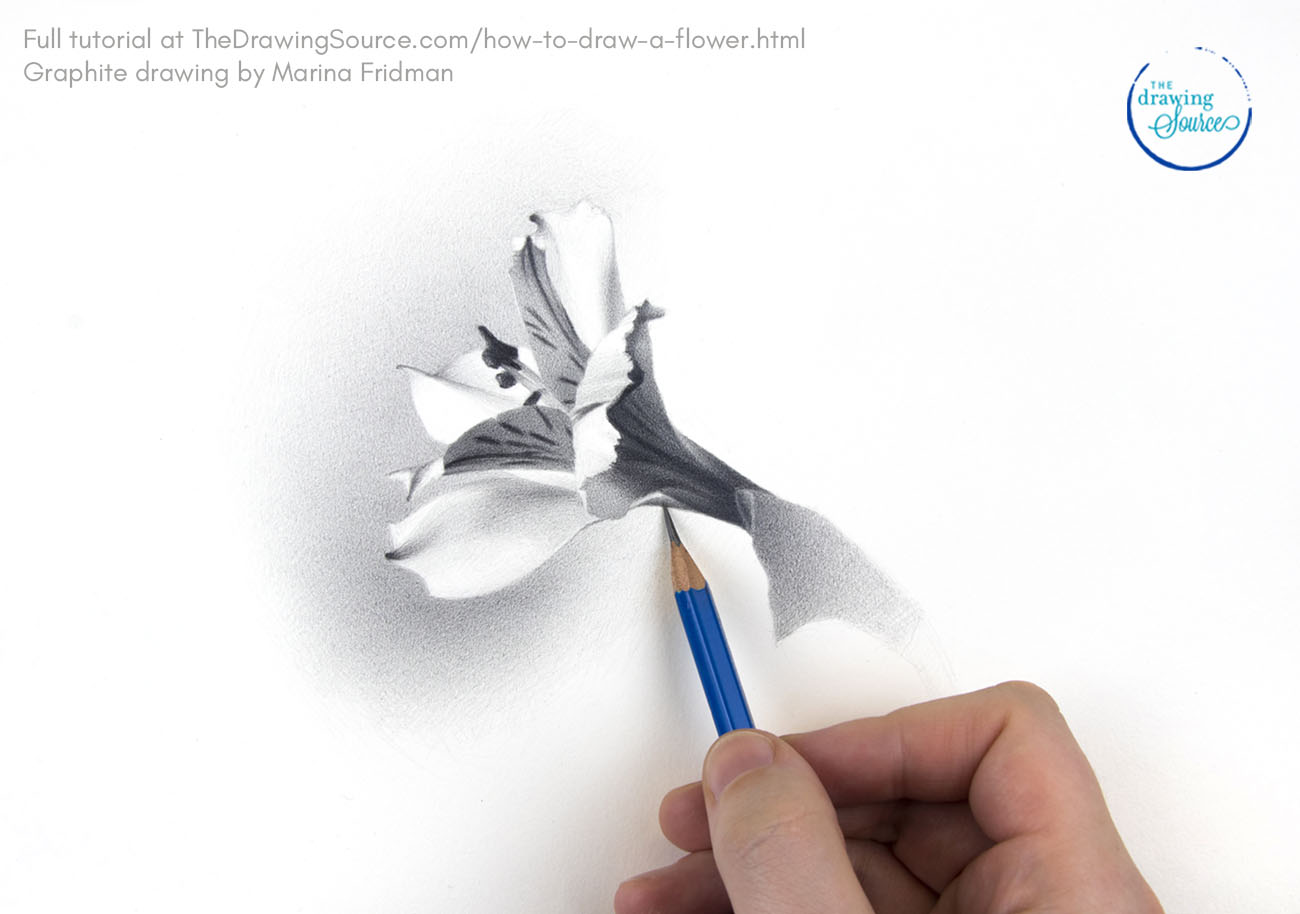
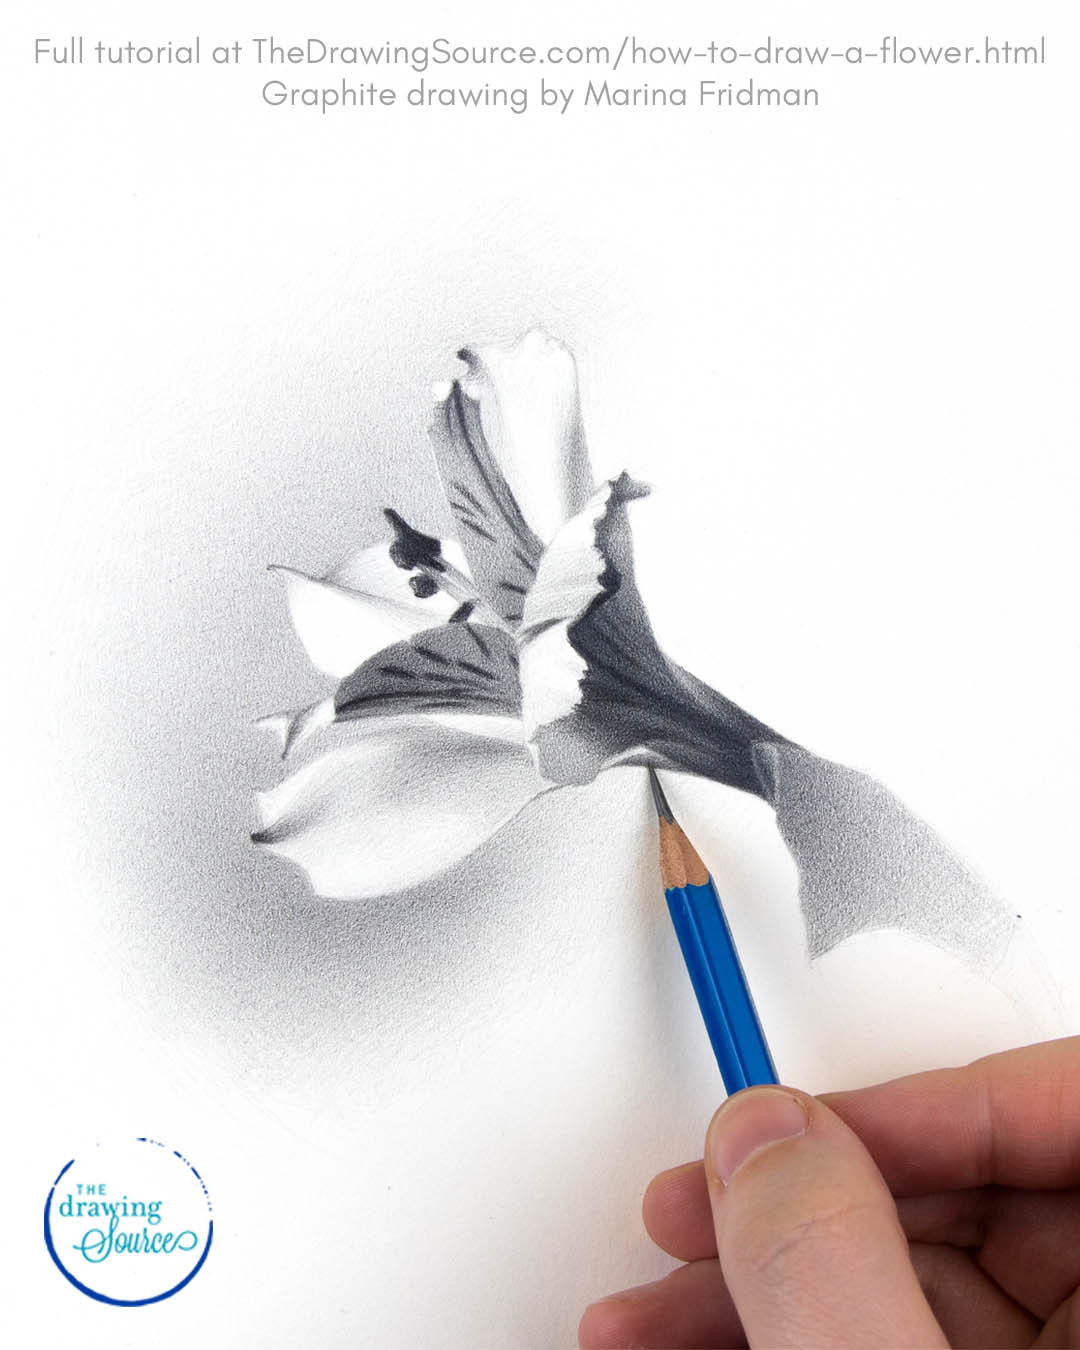
I chose graphite pencils for this flower drawing because:
- There are many very light, subtle gradations in the petals. I also knew that I wanted to create a light, smooth gradation in the background. This is easiest to do using graphite pencils.
- The dark values and accents are limited. There's not enough surface area of dark values to produce a lot of graphite glare.
When to Use Graphite Pencils
- When creating a 'high key' drawing: a drawing that consists mostly of lighter values. Lighter values produce little to no graphite glare.
- When dark values are limited.
- When you want a smoother drawing experience. The
application of graphite on paper is definitely smoother than that
of charcoal. It is easier to draw lightly with graphite, and to shade smoothly and
evenly. (You can certainly learn to do the same with
charcoal, but it will take considerably more practice.)
- When you want utmost precision and control to render small details in light or mid-tone values. Graphite pencils are easier to sharpen to an extreme point, which helps in shading extremely precise details, and to smooth out shading. You can learn these techniques in Smooth Shading in Graphite.
➤ My Go-To Graphite Pencil Brand: Staedtler Mars Lumograph graphite pencils have been my go-to for years. We’ll
cover graphite pencil grades, or the pencil hardnesses that graphite comes in, later in this article.
An Important Note About Shading Skills
In this guide I’ll be mentioning pencils that are ‘easiest' or 'smoothest to use’ or vs. pencils that are 'not as smooth', etc. It's essential to know that:
Even with the smoothest pencils, smooth shading will not just happen. You still need to learn essential shading techniques, and practice them effectively using intentional exercises.
The good news: No matter which pencils you choose (Level 1 or Level 4 drawing pencils), you need the same core shading skills for all of them.
If you're ready to acquire these core shading skills that you'll use with every pencil, I can guide you through the process, step by step, in Smooth Shading in Graphite.
Smooth Shading in Graphite
Develop the foundational shading skills needed to shade any subject realistically - no matter what pencils you use.
Explore the Smooth Shading CurriculumIt’s often assumed that to draw or shade advanced subjects, we need ‘new’ or ‘different’ techniques. This isn’t the case. To shade advanced subjects, we need to use the same shading techniques at a higher level.
Whether I’m drawing an eye tutorial for The Drawing Source or working on one of my immersive drawing installations of space (which you'll see later on this page) – I’m using the same techniques.
We never ‘graduate’ from foundational skills. Instead, we
deepen and evolve them continuously, just like a professional tennis player
working on their forehand swing for their entire careers.
You can develop the universal shading skills needed to shade any subject realistically in Smooth Shading in Graphite.
Level
2: Combining Graphite and Mars Lumograph Black Pencils
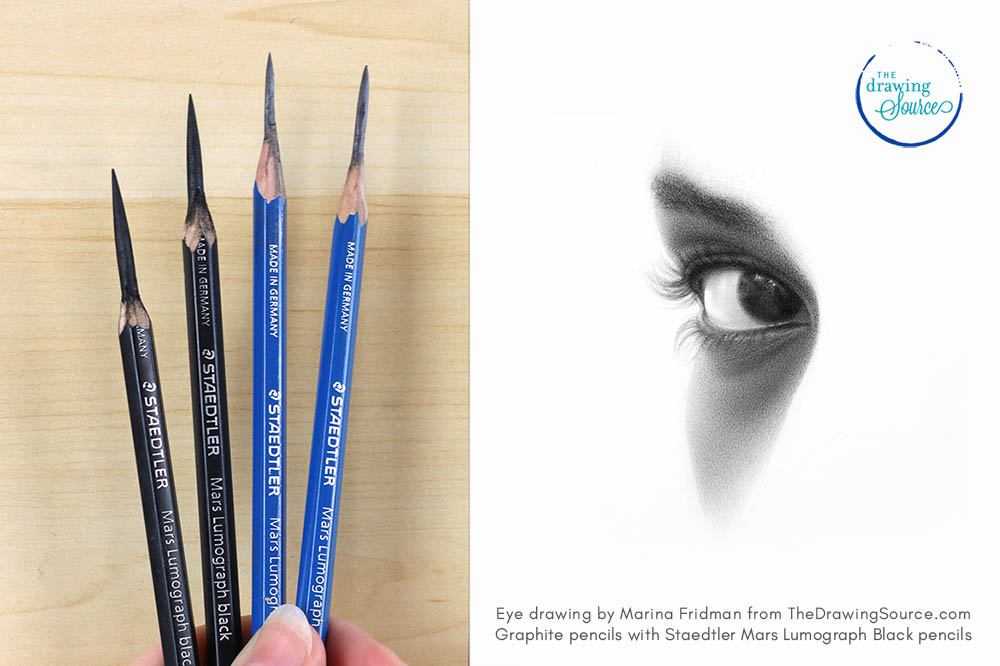
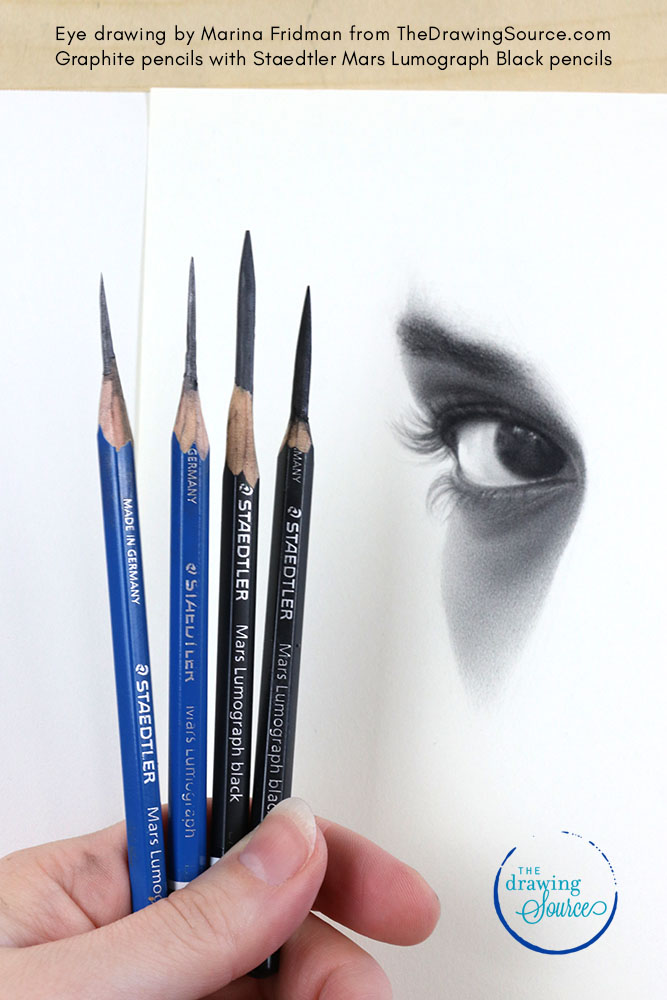
The first solution to bypassing graphite glare? Combine
standard graphite pencils with Staedtler Mars Lumograph Black pencils, which
give you matte, dark values while being easier to control (and less messy) than charcoal pencils.
I’m calling this Level 2 because the Mars Lumograph Black
pencils are just a little bit rougher to use that graphite – meaning that we
need to work a little bit harder than with graphite to shade smoothly - and they
don’t erase as well. But they’re still really quite lovely, and you can see
that we can get much darker, matte, non-reflective values with them:
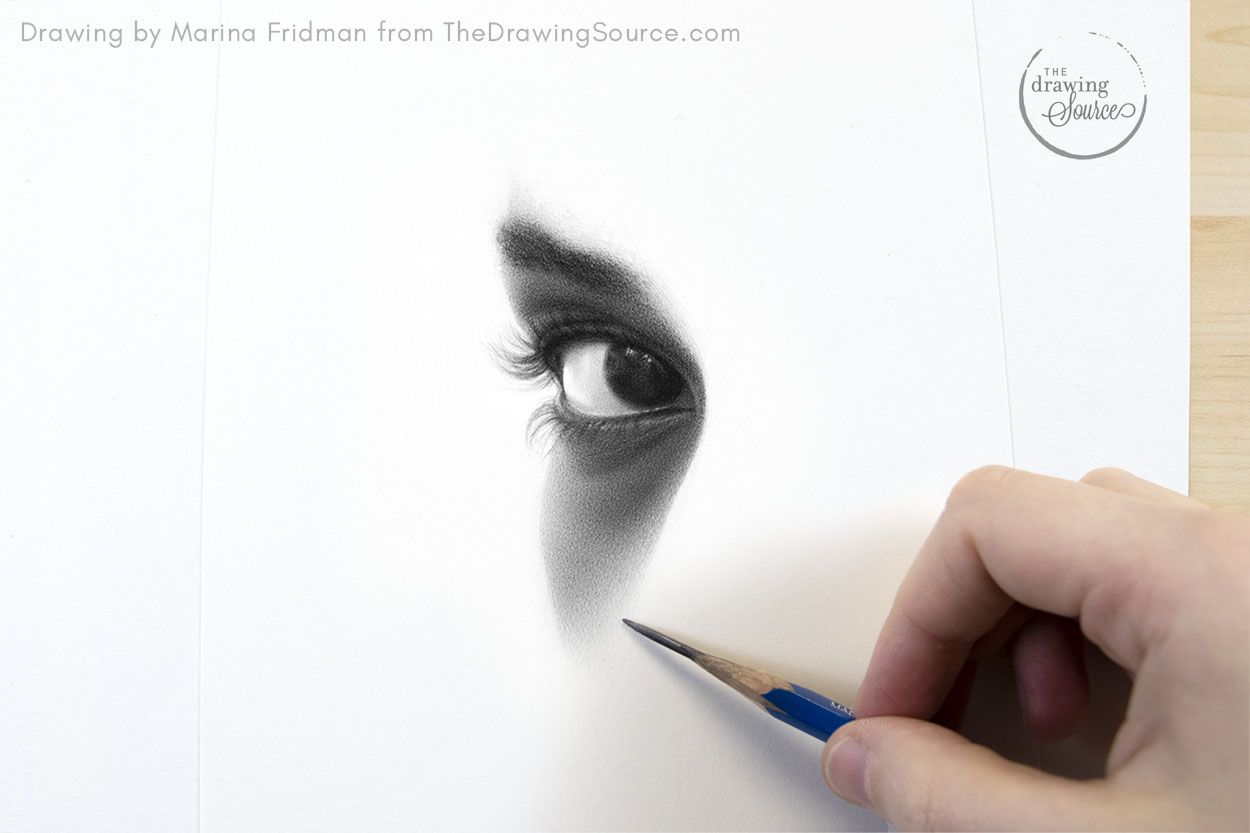
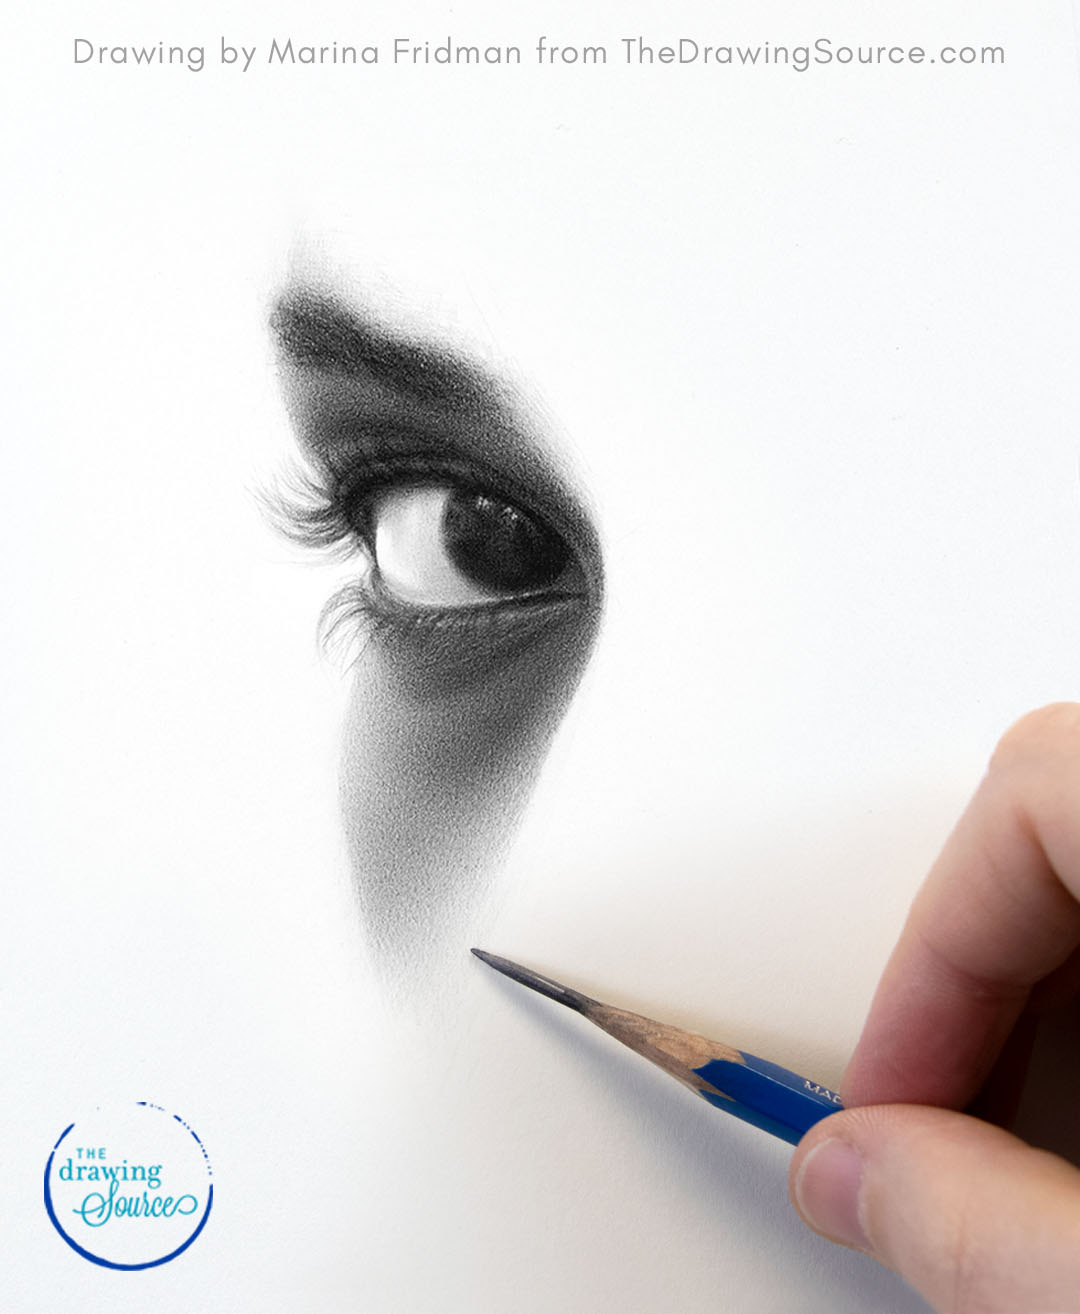
I chose to use the combination of graphite pencils and Mars Lumograph Black pencils for the eye drawing above because:
- I wanted the smoothness and precision of graphite for the extremely subtle values and edges in the sclera of the eye, and the fade out at the bottom of the drawing.
- But, I also wanted deep, dark values for elements such as the iris and pupil of the eye, the eyelashes, and eyebrow - without graphite glare.
Would this have been possible in charcoal? Yes, provided your skills are at a high enough level. Charcoal requires a much lighter touch to create light values, and demands more precision and control to achieve the same smooth effects.
When to Choose This Pencil Combination
Graphite Pencils + Staedtler Mars Lumograph Black Pencils
Choose this combination of graphite pencils and Staedtler Mars Lumograph Black pencils when your drawing scenario has:
- A wide value range: Detailed light and mid-tone areas where you want to use graphite for its precision and control, and some important dark values where you want to strictly limit shiny glare.
(Note: If the dark values in your scenario are extensive and cover large masses of your paper, it's usually more efficient to step up to Level 3 and work with charcoal instead.)
Level
3: Charcoal Pencils
For the darkest, matte, light-absorbing dark values, nothing beats charcoal. I
became intimately familiar with charcoal while creating my immersive, outer space
drawing installation below:
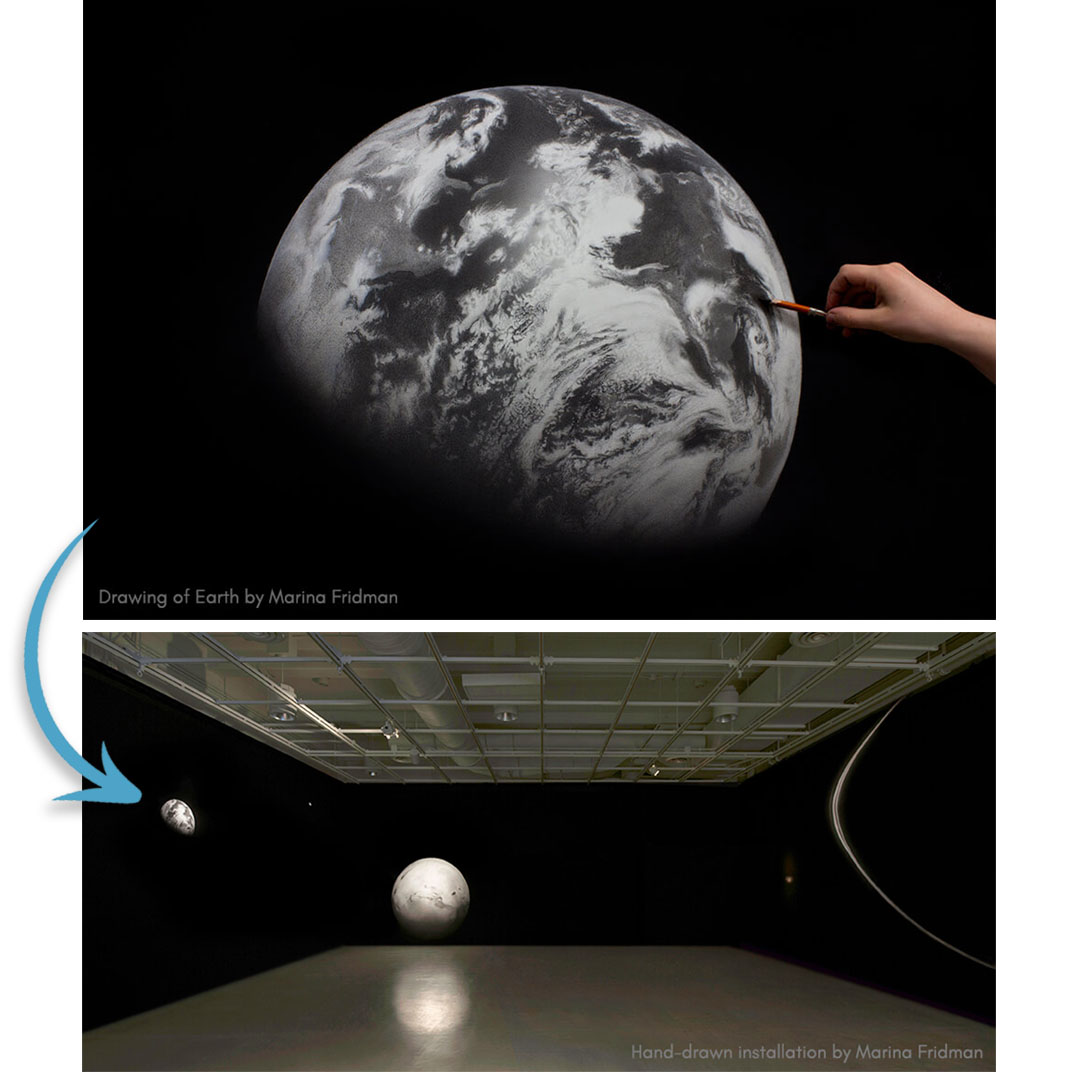
Everything along the walls – the planets and the deep space surrounding them – is hand-drawn using charcoal pencils and compressed charcoal sticks on white paper.
I specifically chose charcoal for the background because after countless material tests (including fabric and black paper), it was only layers of compressed charcoal on white paper that created the completely matte, non-reflective surface that I needed for the illusion of infinite space.
Plus, once your eyes adjust to the low light of the exhibition, you start to see the gestural marks of the drawn, black space surrounding the planets.
The Advantages of Charcoal Pencils:
- They provide amazing
dark values and the ability to draw a truly full value range from white to
black. As you can see in the image above –
when it comes to matte, light-absorbing, pitch black values – nothing beats
charcoal.
- Other pros include the option to combine charcoal with white – this cools the temperature of the charcoal and creates a gorgeous (in my opinion), almost silvery effect.
The Disadvantages of Charcoal Pencils:
- Charcoal
can be messy, it’s more difficult to control and smooth out, and you need to be
much more light-handed to draw light values lightly.
When to Choose Charcoal Pencils
- When you need a full range of values, from white to pitch black. Charcoal
darkens to pitch black, allowing you to create a wider range of values
in your drawing. Graphite simply does not darken to the same pitch black
as charcoal does.
- When creating a 'low value key' drawing: a drawing where most of the values are between values 5 and 9 on the value scale.
- When you have extensive dark values that must be matte and non-reflective, and/or when you dislike the shine that graphite
creates. Some artists love the graphite shine, others are neutral, and
others quite dislike it. I personally don't love it, and usually only use graphite
when creating drawings that consist mostly of lighter values.
- When you want to combine charcoal with a white drawing pencil to create a unique, cooler-temperature drawing. Charcoal
is a very versatile medium. It can be used by itself, or combined with
a white drawing pencil to give your drawing different looks and variations in
temperature. Here are three of my favorite techniques for combining charcoal with white pencils.
➤ My Go-To Charcoal Pencil Brand: General's. I drew
the entire installation above, and the one below, using General’s charcoal pencils and
Compressed charcoal sticks on white paper. (But if you want to do your own exploration, you can learn how to evaluate different charcoal pencil brands here.)
 Drawing Charon, Pluto's largest moon, in charcoal and including it in an immersive hand-drawn installation
Bonus Pencil Combination for Dark-Value, Detailed Drawings
Charcoal Pencils with Staedtler Mars Lumograph Black Pencils
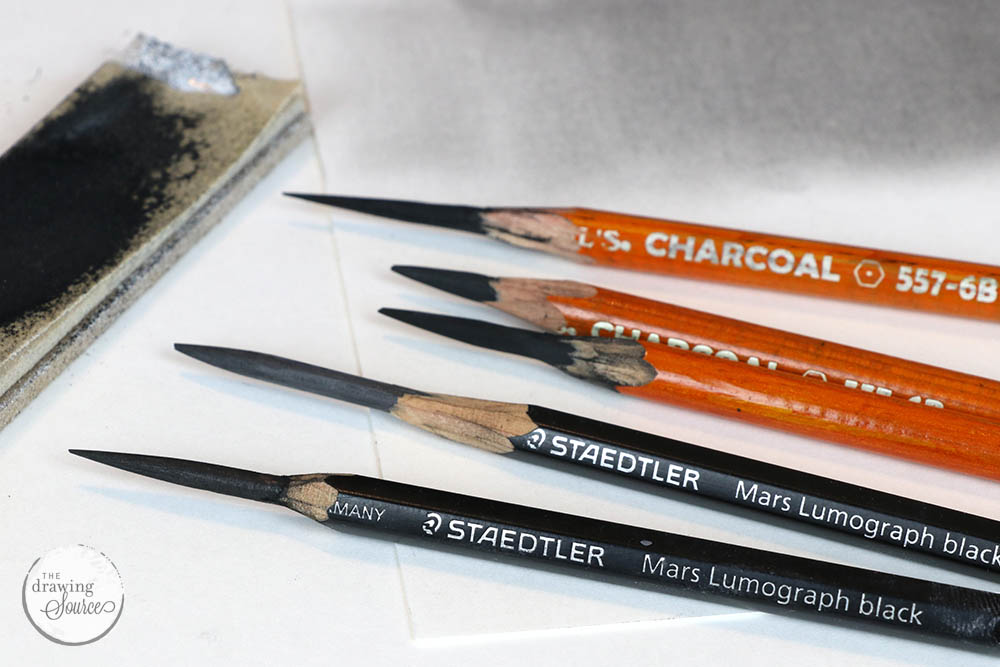
What if your drawing is 'low-key,' meaning that it consists
mostly of darker mid-tones and dark values... but it also has lots of detail?
If you need to render crisp, fine details within a low-key drawing but find that you don’t quite have the precision you need with charcoal pencils (yet!), try combining charcoal with Staetdler Mars Lumograph Black pencils.
Because Mars Lumograph Black pencils are matte and closer in chemical composition to charcoal pencils, they blend together very successfully.
In this scenario you could use charcoal pencils for the large,
dark expanses of the drawing (possibly with some blending tools), and then use
your Lumograph Black pencils to render the clean, crisp fine details right over
or alongside them.
Level
4: Combining Graphite and Charcoal Pencils
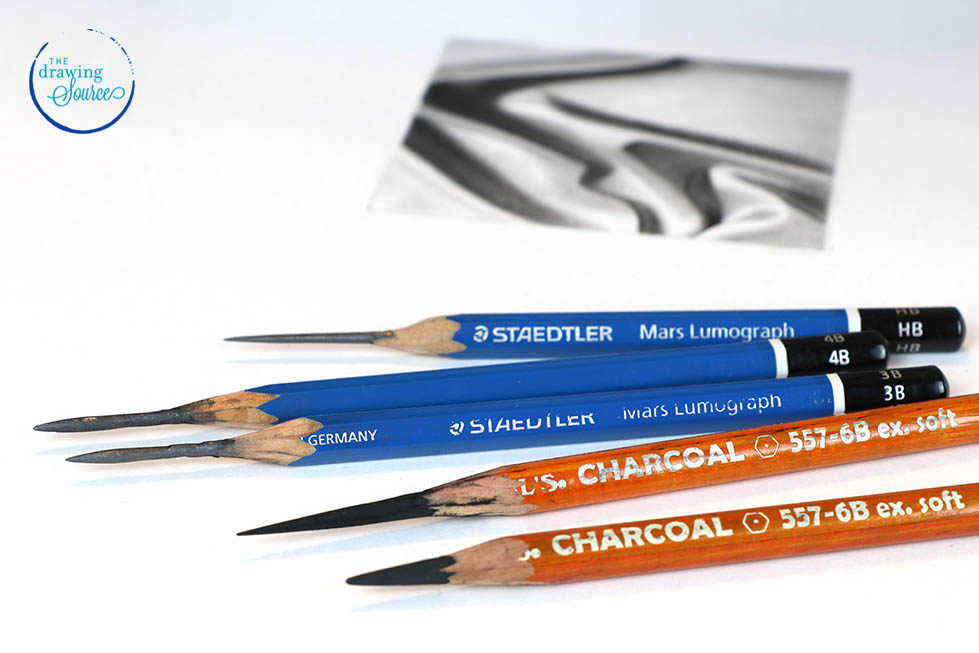
So: Can you combine graphite pencils with charcoal pencils? Can we have the best of both worlds? The smoothness, ease of control and precision of graphite in the light and half-tone values, with the rich, matte, dark values of
charcoal? Yes, we can!
How do you combine graphite pencils with charcoal pencils in the same drawing? There are two techniques.
Two techniques for combining graphite pencils with charcoal pencils:
- Graphite + Charcoal Technique 1: Layer graphite over charcoal
Start with charcoal, and layer graphite over top. This must be done intentionally, using certain pencil grades so as not to ‘trigger’ the graphite glare over top of the charcoal. Done correctly, this can work 100% successfully. - Graphite + Charcoal Technique 2: Keep the graphite and charcoal separate, using graphite for the light values, and charcoal for the dark values.
Technique 2 involves using charcoal exclusively for the dark values and darker half-tones, and using graphite exclusively for the light values and lighter half-tones. In this technique, you create an imperceptible gradation from the charcoal sections into the graphite sections.
*This takes a high level of technical shading skills that you can acquire in Smooth Shading in Graphite.
I don't know why it took me so long to experiment with layering
graphite and charcoal, but I completed a figure drawing commission last year using Technique
1, and it was an absolute success.
Personally, I find that Technique 1 requires a little bit less patience and precision than Technique 2. It's a little bit more forgiving, perhaps because the charcoal acts as a non-reflective mattress for the graphite on top.
However, you must ensure that you only use the harder
graphite pencil grades that don’t produce any graphite shine, and be careful
not to over-burnish them (over-layer them), as that’s what causes graphite
glare in the first place.
When to Choose this Graphite and Charcoal Pencil Combination
Use a combination of graphite pencils with charcoal pencils when your drawing scenario has:
- Large
areas of both extremes:
Extensive, high-precision light values with extensive, deep matte dark values. Using charcoal, you'll be able to efficiently cover the large, dark areas without any glare, and you'll have the precision and control of graphite for the nuanced light and half-tone values and gradations.
Free Download: *Coming soon!* Download
my free, one-page printable decision chart to identify which pencil
combinations match your current drawing scenario and skill level.
Choosing the right pencils is important, but what’s even more essential is your technique. After all, if you don't know how to use your tools, then even the correct pencil choice won't make a difference.
No matter which pencils you choose to work with, the natural next step is to learn how create the three-dimensional effects you want in your drawings.
If you’re ready to stop guessing your way through scratchy textures, uneven values, muddy shadows, and frustrating graphite glare, I invite you build an unbreakable shading foundation with me, in Smooth Shading in Graphite.
Smooth Shading in Graphite
Build the core shading skills needed to shade any subject realistically - no matter what pencils you use.
Start the Smooth Shading in Graphite coursePart 2: A Guide to Drawing Pencil Grades
And a Closer Look at Graphite, Charcoal, and Mars Lumograph Black Pencils
Now that you’ve identified which drawing pencils to use for your specific drawing and current skill level, let’s
dive into pencil grades - what are they, and why getting know them is essential to creating the effects we want in our drawings.
Graphite Pencil Guide and Graphite Pencil Grades
Graphite
pencils come in a series of ‘hardness’ ratings, or ‘grades’, ranging from approximately 12B (the
softest) to 10H (the hardest).
The full range of graphite drawing pencils looks something like this:
12B, 11B, 10B, 9B, 8B,
7B, 6B, 5B, 4B, 3B, 2B, B, HB, F, H, 2H, 3H, 4H, 5H, 6H, 7H, 8H, 9H, 10H
The range varies depending on the brand. The grades above (and below) reflect
the range of Staedtler Mars Lumograph graphite pencils (my preferred brand).
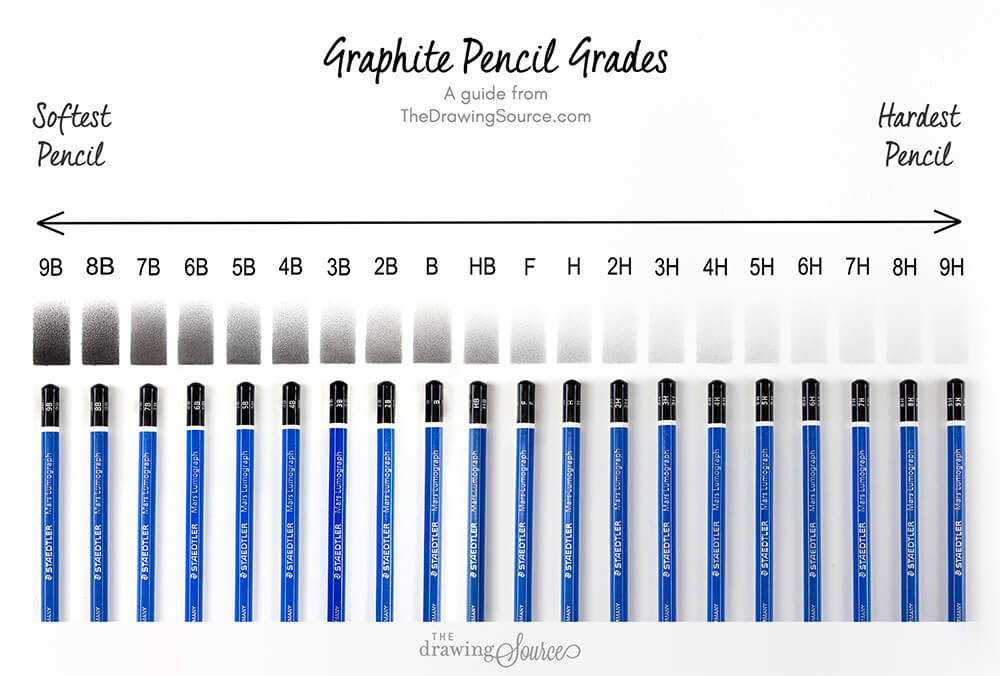 Pictured above: Staedtler Mars Lumograph graphite pencils
 Pictured above: Staedtler Mars Lumograph graphite pencils
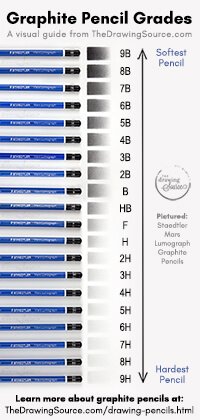
Graphite Pencil Grades Chart
Download a free graphite pencil hardness scale, showing the comfortable value ranges of graphite pencils ranging from 9B (the softest, darkest pencil) to 9H (the hardest, lightest pencil).
Get the Free Graphite Pencil Grades Chart
Understanding Drawing Pencil Grades
Why are pencil grades important?
The grade, or the hardness/softness of a pencil, determines the range of values and type of line that the pencil can create. Let’s begin with the range of values:
If you picture a full value range (from absolute white to pitch black),
each pencil grade can create a segment of that value range.

In the diagram above, you can see that the HB pencil can
create a certain segment of values. Within its maximum value range is the most
comfortable value range that it can naturally create.
You can manually extend any pencil's value range by:
- Using a kneaded eraser to lighten values
- Layering your pencil marks to darken values
- Switching to a pencil grade designed to create the target value effortlessly
The foundational rule:
The harder the pencil: the lighter the range of values that it creates.
The softer the pencil: the darker the range of values that it creates.
(This is the case for charcoal as well as graphite.)
As you can see in the graphite pencil grades chart above, the darkness of graphite pencils varies from very light grey (9H) to a very dark grey (9B) - though it never gets quite as dark as charcoal (more on that later in the article).

Let’s compare the value ranges of two more specific graphite pencil
grades. In the image above, the top gradation was drawn with a 2H graphite
pencil. It ranges from the darkest possible value the 2H can create to the lightest
possible value that it can create.
The bottom gradation was drawn with a 4B graphite pencil,
and ranges from the darkest possible value the 4B can create to the lightest
value it can create. (I used Staedtler Mars Lumograph graphite pencils for both gradations.)
How do these gradations compare?
First, notice the vast difference in the range of values. The 2H can comfortably create from a value 2 to a value 3 or 4 on the value scale, while the 4B can create from a value 6 through 8. I had to use a kneaded eraser to create the lighter values of the 4B gradation, while it was almost effortless to use the 2H to gradate into the white of the paper.
Notice how much smoother the 2H gradation appears as well, while you can see more of the paper texture in the 4B gradation.
How does the grade of a drawing pencil affect line quality?
- Harder pencils: Create sharper, lighter, and thinner lines.
- Softer pencils: Create softer, darker, and thicker lines.
Of course, this also depends on the sharpness of your pencil, but generally speaking - it is much easier to create a sharper line with a hard pencil, and a softer line with a soft pencil.
Do you need the whole range of graphite pencils, from 9H to 9B?
No, it's not a necessity. Choosing your range of pencil grades is a matter of personal preference and your current skill level.
When I work with graphite, I usually have a 2H, HB, 2B, and a 4B (of course depending on the values in the scene).
On the occasion that my drawing requires a very dark value, I may also use a 6B (though I try to avoid them, as the darker the graphite pencil, the more it will reflect light and produce the graphite glare that we discussed earlier).
If you're new to drawing and are developing the sensitivity of your hand, you may want to add a few harder pencils, such as a 3H, to make it easier to draw the
lightest values in your drawing. Don't miss this video with 3 tips for shading light values.
Learning How to Use the Pencil Grades
While understanding pencil hardness is a great start, truly getting to know the pencil grades - so that you can reach for the best one at different moments of a drawing - is a skill built through intentional practice.
In Smooth Shading in Graphite, you'll be guided through specific exercises to learn the pencil grades, and to build the foundational technique you need for all realistic shading. These skills and techniques are 100% transferable to all pencil types. We simply start with graphite because it's excellent for building confidence.
Types of Graphite Drawing Pencils
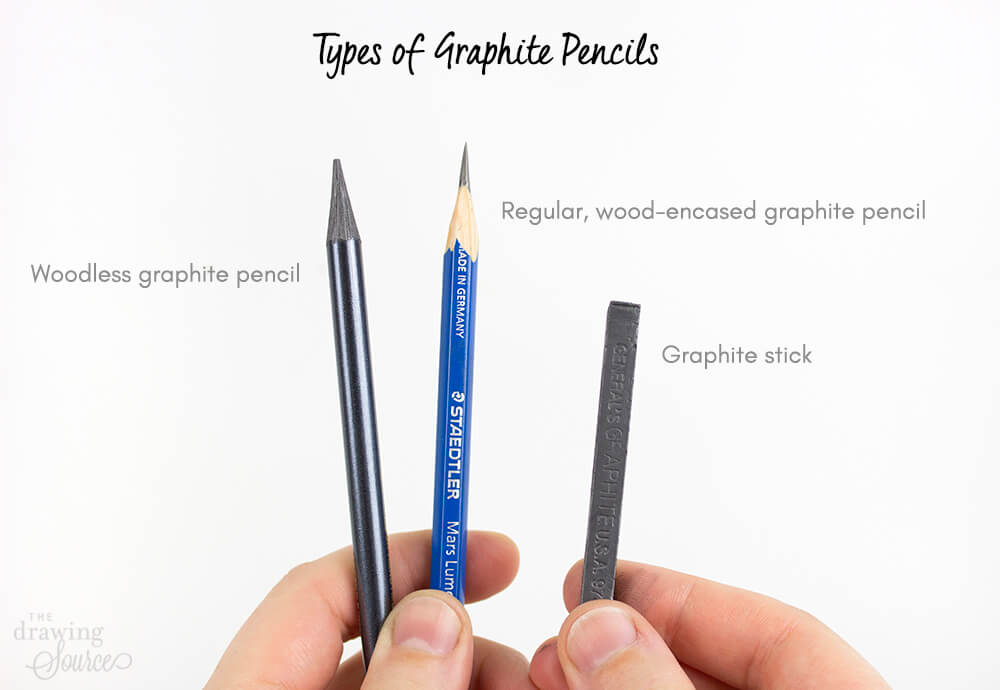
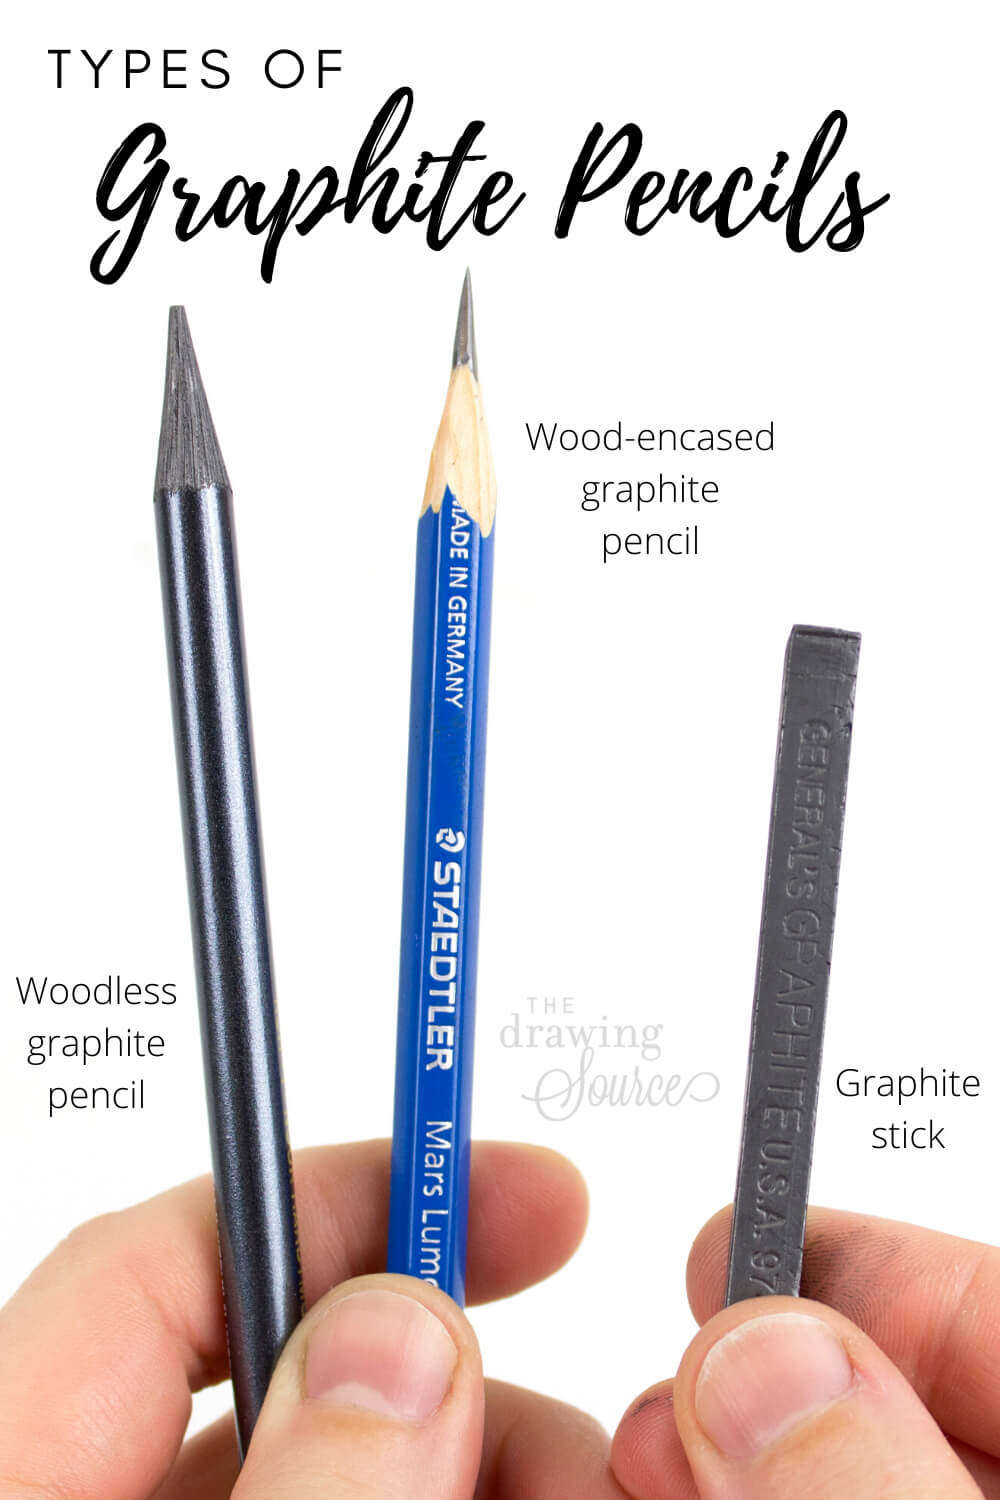
Graphite pencils come in several distinct forms:
- Wood-Encased Graphite Pencils: The most common form, made of a mixture of graphite powder and a clay filler. The specific ratio of the two determines the grade, or hardness, of the pencil: more clay filler creates a harder pencil, whilc more graphite creates a softer, darker mark.
- Woodless Graphite Pencils: Solid cylinders of graphite coated in a thin, plastic film, offering maximum core utilization.
- Graphite Sticks: Thick, uncovered blocks ideal for large-scale tonal coverage and expressive gestures.
- Graphite Powder: Loose powder that can be applied directly to the paper and manipulated with blending tools.
Tips for Minimizing Graphite Glare
A drawing abandoned due to excessive graphite glare in the dark areas
We always want to work with our materials, not against them. To do this, we do our best to choose the best drawing pencils for our drawing scenario and skill level. This results in a much more enjoyable drawing process, and a much better end result.
However, on occasion, you may still have to manage challenges like graphite glare. Here are a few practical tips to minimize the shine:
- Evaluate Your Subject's Value Range: As
you can see in the image above, the lighter the value, the less glare is produced. Choose to work in graphite when your drawing scenario has mostly light values and lighter mid-tones.
- Incorporate Matte Pencils: If your drawing has larger areas of darker values and you've already chosen to use graphite for the drawing, add some Staedtler Mars Lumograph Black pencils to use for the darker values.
- The Reset Trick: If you notice your darker values starting to reflect too much light, you can gently erase the shiny patches and re-draw them using the Lumograph Black pencils. (I've definitely done this in a pinch, and it absolutely helped).
- Limit Layering: Graphite glare comes from burnishing - or over-layering - graphite. The more quickly you achieve your target value, the less you have to layer, and the less the graphite will 'glare.' Try to choose your pencil grades more intentionally to achieve your desired value more quickly with fewer layers.
*To do this efficiently, you need to really understand how your graphite pencil grades perform through hands-on experience. In Smooth Shading in Graphite, you'll be guided through specific exercises to get to know your pencil grades, and shading techniques to use them effectively.
Staedtler Mars Lumograph Black Pencil Grades
Staedtler Mars Lumograph Black pencils are made in a concise, 6-grade range focusing on the softer, darker end of the value spectrum:
HB (hardest, lightest pencil), 2B, 4B, 6B, 8B (softest, darkest pencil)
Charcoal Pencil Guide and Charcoal Pencil Grades
 Pictured above: Generals Charcoal Pencils
Charcoal pencils consist of charcoal powder mixed with a gum binder. As with graphite, the amount of binder used regulates the degree
of hardness of the pencil: the more binder used, the harder the pencil grade.
The hardness of charcoal pencils usually ranges from HB to 6B (from hardest to softest). A few brands, like General's, go a step further to make a 2H charcoal pencil. These can be extremely useful for drawing lighter values and details in charcoal.
If you're going to work with charcoal pencils, I suggest that you buy the full value range: an HB, 2B, 4B and a 6B (and a 2H if possible!) by a brand called General's. (Read about what I look for in charcoal pencil brands and how to compare them in this article!)


You may come across charcoal pencils by other brands that are classified simply as 'soft, medium, and hard' or 'light, medium, and dark'. I don't use these because I find that pencils using the 'soft,
medium, and hard' classifications tend to be less consistent and
predictable than the General's pencils.
General's pencils also have a wider range. For example, a General's HB tends to be harder (and therefore easier to create lighter marks with) than a 'hard' charcoal pencil. If you must use charcoal drawing pencils labelled as 'soft, medium and hard', here is an approximate comparison:
- The 'soft' pencil is comparable to a 6B
- The 'medium' pencil is comparable to a 2B or 4B
- The 'hard' pencil is comparable to an HB
Willow and Vine Charcoal Sticks
 Vine charcoal sticks
Literally
burnt twigs, willow and vine charcoal sticks are uncompressed charcoal. As opposed to compressed charcoal (which is found inside regular charcoal pencils), uncompressed charcoal is much softer, lighter, and
easier to spread and erase. In fact, it lifts off the paper so easily
that you really have to be careful not to disturb it!
Willow and vine charcoal sticks are particularly useful tools for filling in and
evening out large value masses at the beginning of a drawing, especially when paired with a
soft bristle brush. You can also use it to tone your own paper, as I did for the sketches below:


Above: sketches on toned paper using a combination of charcoal and white drawing pencils.
Graphite vs. Charcoal
One drawing pencil type pencil is not "better" than another: they all have different characteristics
that are suitable for different kinds of drawings. The downloadable chart on this page is a good start to discovering which pencils to use, but you'll ultimately need to experience the different pencils through intentional exercises, to learn to choose the right medium for your drawings.
Having said that, here are some pro's and con's of graphite vs. charcoal:
| Medium | Strengths (Pros) | Limitations (Cons) |
|---|---|---|
| Graphite |
|
|
| Charcoal |
|
|

By Marina Fridman — a professional visual artist, former tenure-track professor of art, and founder of The Drawing Source. She has taught realistic drawing through her 6 Foundational Skills method to over 1,000 students in her drawing courses, and thousands more through her free tutorials.

Next Steps: How to Learn to Use Your Drawing Pencils for Realistic Drawing and Shading
Now you know that choosing the best drawing pencils for realistic drawing and shading depends completely on your specific drawing scenario and your current skill level.
In case you missed it above, here is your free downloadable Drawing Pencil Decision Guide, to help you choose the best pencils for your next drawing:
<freebie download - coming soon>
The next steps are to acquire the technical skills, modes of seeing and knowledge needed to use your drawing pencils to create the realistic, believable effects you want in your drawings. I would love to guide you through this in Smooth Shading in Graphite:
Smooth Shading in Graphite
Build the foundational shading skills needed to shade any subject realistically - no matter what pencils you use.
Start the Smooth Shading in Graphite courseSearch the site above
Welcome to The Drawing Source!
Here you can learn realistic drawing through six foundational skills that unlock every subject.
Start here if you're new.
Then, explore these learning paths:

Hi, I'm Marina — a professional artist and former professor of art. I started this school to simplify realistic drawing into steps that are easy to understand and apply. Let's grow your skills and your enjoyment of the drawing process.
Realistic Drawing Curriculum
Develop your foundational skills and learn to apply them to figure and portrait drawing in the Atelier membership.
$29/month USD or
$199/year (5 months free)
