Step by Step Figure Drawing Tutorial
Page 1: Blocking in the Figure
|
|
This first page of the step by step figure drawing tutorial will explore blocking in the figure.
A block-in is similar to a blueprint in that it acts as a plan for your drawing.
In this tutorial I cover:
-using the head as a unit of measurement,
-finding major angles of the pose,
-drawing the gesture of the pose,
-relating interior forms to the contour, and more.
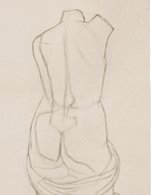
You can also take a look at these preparatory studies I drew before beginning this long-pose drawing.
|
Step by Step Figure Drawing Tutorial
|
|
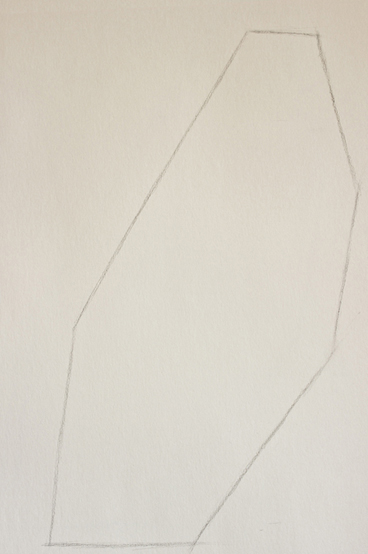
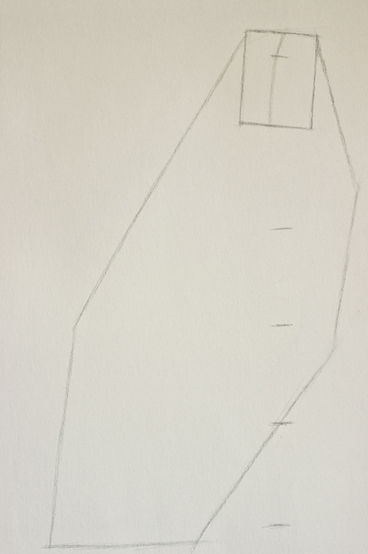
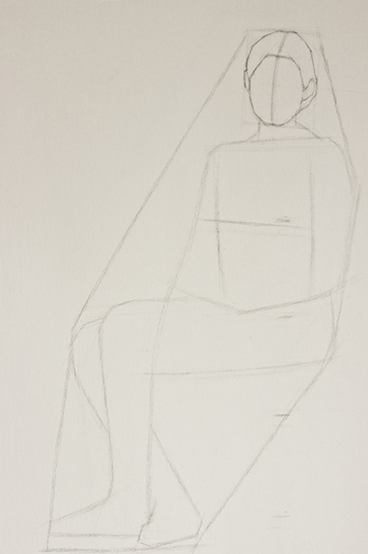
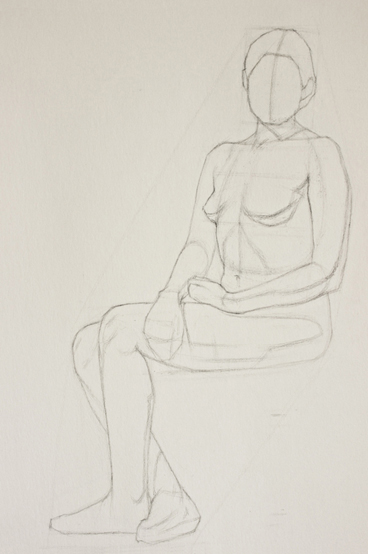
I begin this step by step figure drawing tutorial by blocking in the general shape of the pose using straight lines.
This is often called an envelope. When you draw the envelope, you essentially set boundaries for the drawing.
This is helpful because the blank page doesn't seem quite so vast when
you have a defined space in which to draw.
The envelope also begins to
establish the gesture of the pose.
Try to keep your pencil marks extremely light during these early stages
of the drawing, so that they are very easy to erase and adjust.
(I am darkening mine for this tutorial so that they are easier for you to see.)
|

|
|
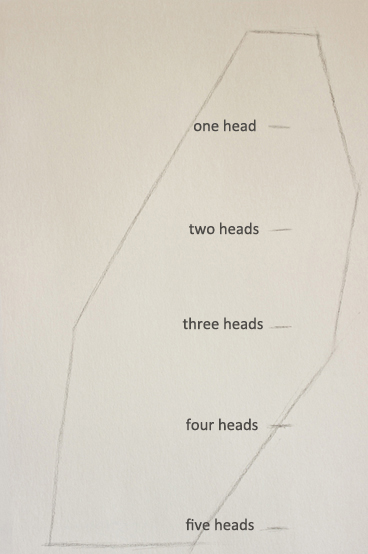
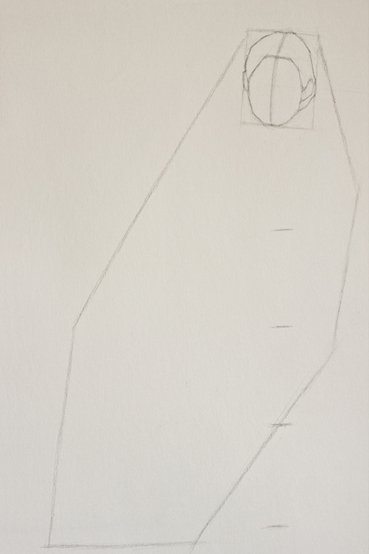
Whenever possible, I use the head as a unit of measurement.
I say "whenever possible" because there will, of course, be exceptions
when you cannot see the entire shape of the head, in
which case you must find another unit of measurement.
If I establish the shape of the head early on, I will be able to use it as a reference point throughout the entire drawing.
I have measured that this pose is slightly more than five heads
tall, and marked these measurements on my drawing.
I can now use this
tool to find important landmarks on the figure.
|
|
|
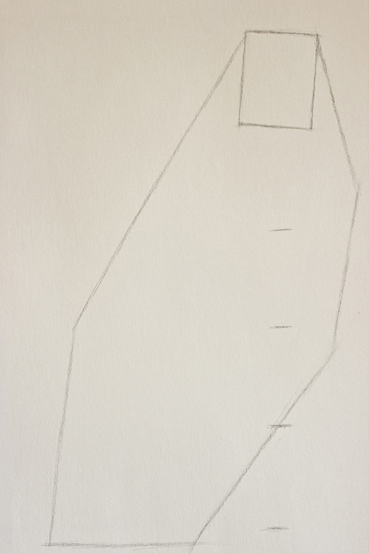
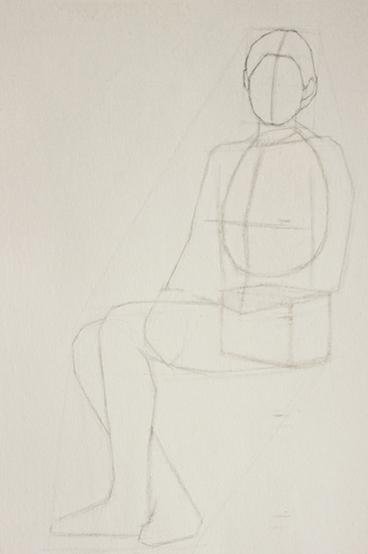
Since I will be using the head as a unit of
measurement throughout this step by step figure drawing, I want to establish its position first, and be fairly confident in its proportions.
Just as I isolated an area for the figure using the "envelope", I can draw a rectangular shape that will house the head.
The rectangle should have the same height to width ratio as the head.
|
|
|
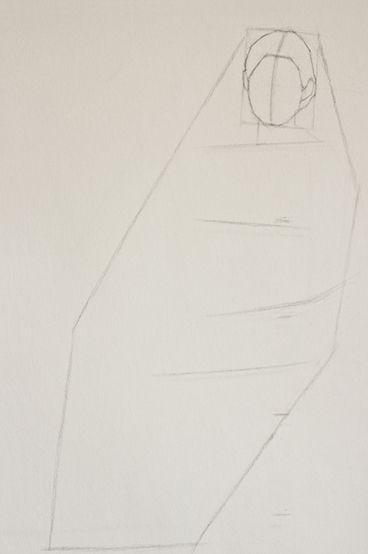
Find the easiest or most obvious landmarks to help you continue your drawing.
For example, it was easiest for me to find the center line and the hairline to aid me in drawing the shape of the head.
|
|
|
I have drawn in the major angles of the pose that I want to keep in mind during my block-in.
I have found the angle of the shoulders, bottom of the breasts, angle of the left arm, and the angle of the seat.
How did I find these?
Once I decided which angles were important to establish, I compared them to the head measurements I found earlier.
For example, when looking for the line of the bottom of the arm, I found that it is just above the "three heads" mark.
The bottom of the seat is about halfway between the three-heads and four-heads marks. (Learn about figure drawing proportions on this page.)
|
|
|
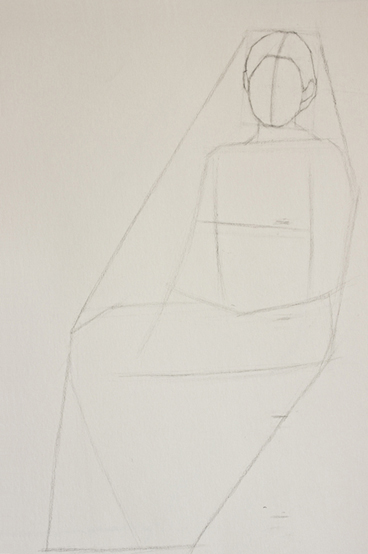
I am confident that I have enough information (measurements and reference points) to begin drawing the gesture of the pose, using the head to check heights and widths whenever I feel uncertain.
|
|
|
I drew several studies
before beginning this step by step figure drawing, in order to study
elements of the pose in isolation before having to deal with the
complexities of the figure all at once.
I drew compositional thumbnails, analyzed the rhythms of the pose, as well as the volumes and anatomy of the figure.
These studies helped me notice that this pose has a flowing figure - eight shape.
I want to retain this figure-eight gesture, as it will lead the viewer's eye through my drawing, and add a sense of movement and flow to this pose.
|
|
|
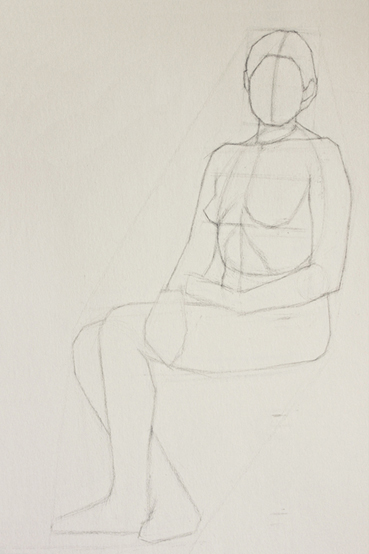
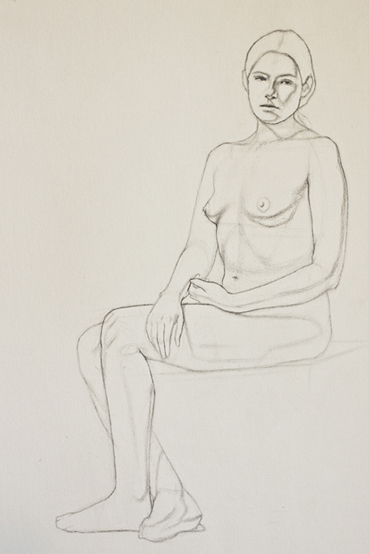
Up to this point I have been working mostly with the contour or outline. But what is a contour, really?
A contour is the edge of an interior form.
This means that a contour cannot exist without the interior form, and the interior form cannot exist without the contour.
They are dependent on each other, two sides of the same coin. Even if you draw a form using masses of values instead of line, it will still have an edge.
To draw the interior forms and their respective contours correctly,
we need to work on them simultaneously so that they relate to one other. Working "from general to specific" or "large to
small", I start drawing in the major forms of the body (the rib cage
and a rectangular box representing the pelvis).
|
|
|
I continue defining the forms of the torso and relating them to the contour.
My goal is to have the contour lines begin as interior forms and
eventually turn into outlines (or vice versa: if you follow a contour
line, you should eventually reach an interior form).
This is beginning to happen in the top half of my drawing.
As I become more confident that the forms and proportions are correct, I begin working with overlapping lines to show which forms are in front of others.
This starts to create the illusion of three - dimensionality in my drawing.
|
|
|
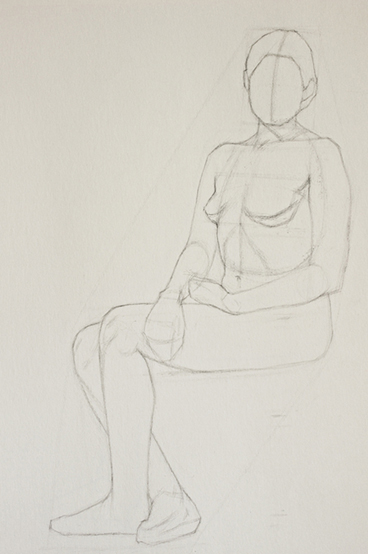
At this point in this step by step figure drawing I am:
-Drawing smaller anatomical features
-Starting to refine the smaller forms such as the hands and feet
-Drawing in the shadow shapes, creating smaller proportions that I can use to check the accuracy of my drawing.
-Starting to pay more attention to the quality of my lines.
For example, a line indicating a core shadow is going to be much softer than a line indicating a bone.
|
|
|
I left drawing the face for last. I don't necessarily recommend leaving the face until the end it is just my personal tendency.
If you think it may be easier for you to draw the face at the beginning
in order to make sure that the shape of the head is accurate, then by
all means do so!
Aside from the face and refining the hands, I am just about finished my block in.
|
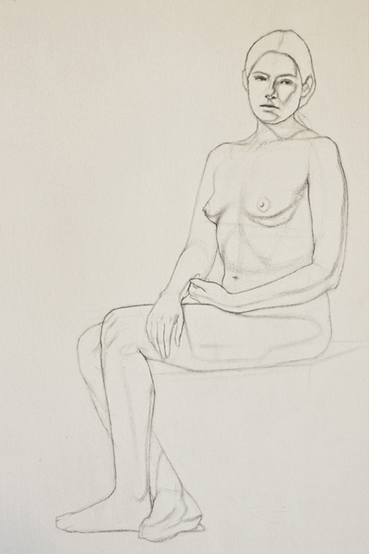
The completed block-in for this step by step figure drawing tutorial.
Step by Step Figure Drawing Tutorial Page 2 is coming soon!
You may also be interested in ...
Return to Figure Drawing from Step by Step Figure Drawing Tutorial
Return to the Homepage