- Home
- Value Drawing
- Value Scale
How to Draw a Value Scale
 |
One of the best ways to become familiar with values is to draw a value scale. Value is defined as how light or dark something is, and is used in drawing to depict light and shadow. Without light and shadow we could not draw (or see) anything, so it is difficult to overstate the importance of this concept! (Read all about value here.) |
The Value Scale
The value scale is a system of organizing
values. It consists of nine values ranging from white to black, with
several shades of gray in between. These shades of gray make up the meat of a drawing, and help to create the illusion of depth and three-dimensionality.

Why Draw a Value Scale?
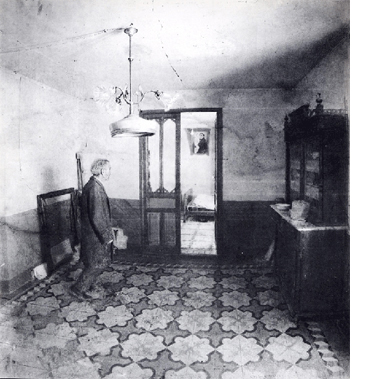 Drawing by Antonio Lopez Garcia Drawing by Antonio Lopez Garcia |
This exercise is more challenging than you might think! It can be quite difficult to determine how much darker one value should
be than the previous one, and to create nine equal steps of values without
looking at a completed scale.
|
This exercise will
improve your eye, making you a more sensitive observer. You will also
gain control of your drawing materials and learn how to draw
an even gradation, which is, in essence, what a value scale is.
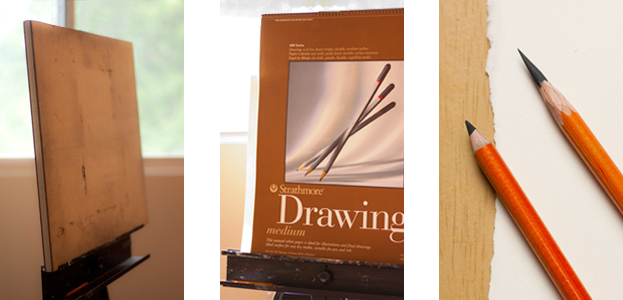
Recommended Materials
A sturdy drawing board, a sheet of good quality drawing paper (such as Strathmore 400 Drawing paper), a selection of drawing pencils (HB, 2B, 4B and 6B), and a kneaded eraser are all the materials that you will need for this exercise.
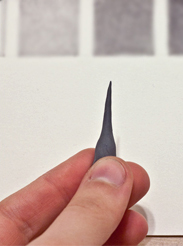
A word about pencils...
In this demo, I am using charcoal pencils.
However, you can use any kind of pencil that you wish to become more
familiar with - charcoal, graphite, conte, etc.
My only recommendation is to use a black pencil as opposed to a colored
one, because the purpose of this exercise is to learn about value, and
this is much easier to do when it is isolated from color.
Before you begin...
Set yourself up for success by creating a clean, organized drawing area. Tape or clip a piece of drawing paper (I am using Strathmore 400 Drawing) to a sturdy drawing board,
and make sure that your pencils are sharpened.
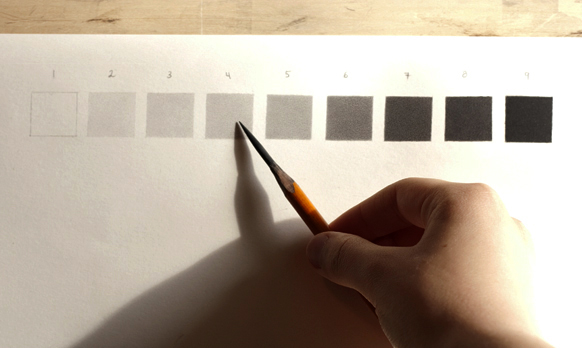
How to Draw a Value Scale
1. Using a ruler, draw nine equally sized and spaced boxes.

2. When you begin a
drawing, in order to accurately capture the relationships between the
values, you first establish your lightest and darkest values.
That way, you have two points of reference to which you can compare all
the other values.
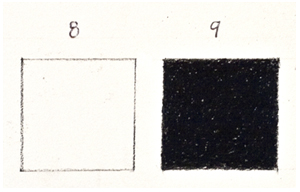 |
Use the same process when drawing the value scale, and begin by establishing the lightest value (value 1) and the darkest value (value 9). Since I am using white paper I leave the value 1 box blank, and use a 6B pencil to fill in the value 9 box. Do not worry if it is not perfectly even at this point. |
3. We now have the two extremes of our value range: white and black.

The next step is to establish the middle value: value 5.
Estimate how dark value 5 should be by imagining what it might look like to blend 50% white with 50% black.
Later on, when you have drawn in more values on the scale, it will be
easier to tell how accurate you were, and darken or lighten value 5 as
necessary.
Since you will probably have to adjust your values, do not worry about making them perfectly even at this point.

4. Now that you have
an estimated middle value, you can choose to either begin with value 2
or value 8 and work inwards towards value 5. I began with value 2.
 |
|
Helpful Hint:
The
neighbouring values on the scale should be similar enough to each other
that when you put them side by side and squint your eyes way down: they
almost merge together. For example, squint your eyes and look:
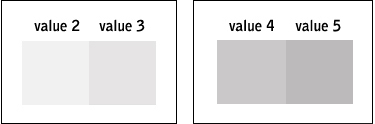
Notice
that it becomes difficult to tell exactly where the boundaries are
between the neighbouring values. Use this technique to help you judge
the accuracy of your values as you draw the value scale.
5. Continue filling in
values 3 and 4 on your scale, constantly evaluating the accuracy of
your existing values. For example, in the image above I noticed that my
value 5 box was too dark. I lightened it using the technique described
below.

Adjusting the Values Using a Kneaded Eraser
 |
During this exercise you will most likely use your kneaded eraser just as much as your pencil. You can think of the kneaded eraser as a white pencil that can be shaped into various forms to help you adjust your values. |
 |
It will take some practice to do this evenly, but it is a great technique once you get the hang of it. Kneaded erasers can also be shaped into points resembling the point of a pencil, and used to pick out individual dark "spots" within a value.
Continue filling in values 6 through 8, adjusting the values until you have a completed scale!
F R E E D O W N L O A D
Value is one of the essential elements of Realistic Drawing.
Download the free Elements of Realistic Drawing E-Book
to learn about the rest (plus, receive a weekly newsletter!)
Related Pages
If you enjoyed this page on how to draw a value scale, you may also be interested in ...

Search site:


F R E E V I D E O & G U I D E
Improve your shading skills with this 4-Step Realistic Shading Roadmap!
By Marina Fridman COPYRIGHT © 2025 The Drawing Source. All Rights Reserved. Based in Canada.