- Home
- Drawing Tutorials
- Shading a Sphere
Sphere Drawing Tutorial Part 3:
Shading a Sphere
Shading a sphere is one of the most fundamental, useful skills for a representational artist to learn.
Why?
Because when you draw the figure or portrait, you are shading basic forms that are combined in different ways to create the more complex forms of the human body.
If you take the time to practice this exercise and learn the theory behind shading a sphere (such as the elements of form and value drawing), you will have a much easier time applying your skills and knowledge to drawing the figure and portrait.
For now, let's focus on shading a sphere. The more professional term
for shading is rendering, and it is probably the most rewarding stage of
the sphere drawing process.
F R E E D O W N L O A D
At the end of this article, download a free Shading a Sphere Infographic!
Rendering a Sphere
In the previous lesson, (Sphere Drawing Tutorial - Page 2), we worked on creating a realistic environment for the sphere.
Now that the background looks believable, it is time to turn our
attention to drawing the actual sphere, beginning with the form shadow
(the shadow on the sphere itself).

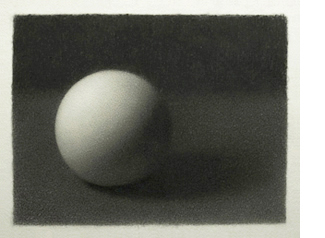
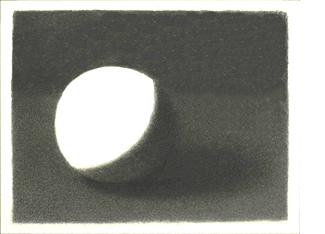
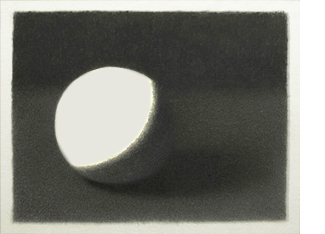
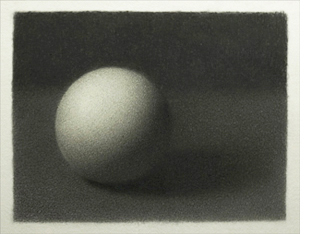
I begin rendering the sphere by filling in a general tone for the form shadow.
I even it out with a bristle brush (link coming soon), being careful not to lose my original drawing.
Keep working from dark to light. Determine what the darkest value is on the sphere. In this case, it is the core shadow - the dark band that occurs where light can no longer reach the form.
Once you establish this dark value, you will have a variable to which you can compare the rest of the values on the sphere.
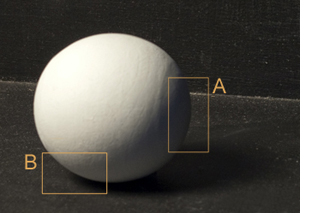
Before you even out the transition between the core shadow and the rest of the form shadow, notice the complexity of this area:
In area A, the form shadow is darker than the background, while in area
B, the form shadow is lighter than the background (due to light
reflecting back into the sphere).
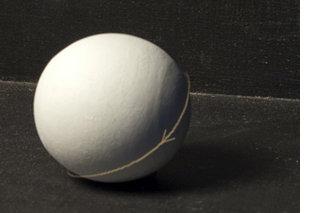
Keep this dark - to - light gradation of the form shadow in mind as you draw it...
...as well as the gradation from the core shadow to the rest of the form shadow.
As you continue rendering the sphere, constantly compare the values of the sphere to its surroundings.
Turning the Form of the Sphere
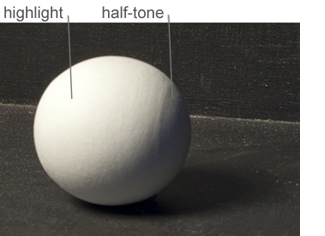
As you begin shading the sphere, remember that you still have values to establish.
The two remaining values are the highlight and the half-tone.
You already have an accurate value for the highlight since you can leave it as the white of the paper.
The challenge is to draw an accurate gradation from the highlight to the half-tone, and from the half-tone to the core shadow.
The gradation must represent the value relationships that you see on the sphere in order to look realistic.
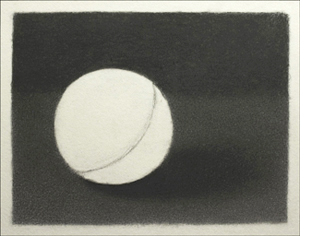
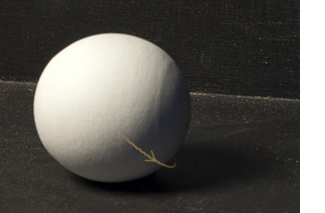
I begin shading the sphere from the core shadow into the half-tone, using a rendering technique called the "airplane stroke".
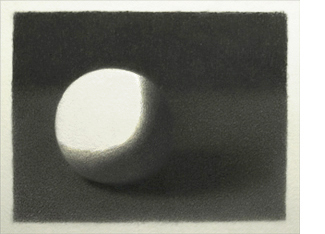
Always keep in mind the form of the sphere.
Pick up your sphere and examine it. Think about how you would sculpt its
smooth surface. Imagine the light running off of the sphere like water.
Do whatever you have to do to become so familiar with the sphere that you almost feel the form turn as you draw your gradation.
An important note about the half-tone is that it must be lighter than the reflected light on the sphere!
Even if the reflected light looks like it is the same value as the
half-tone, notice how much it darkens and merges with the rest of the
form shadow when you squint.
Drawing it as such will create a much more believable illusion.
Keep enveloping the form with tone.
Squint at the scene often to check if you are achieving the effect of
light that you are seeing. If your drawn sphere does not have the glow
that you see when you squint at the scene, you are most likely
overmodelling.
Continue rendering: even out the values by filling in the "gaps" where the charcoal is uneven.
The Finishing Touches of Shading a Sphere
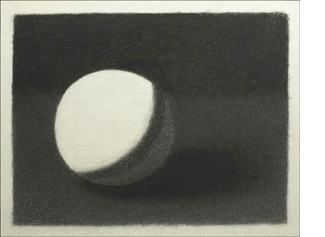
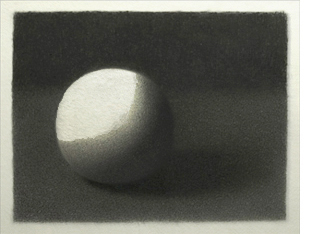
Keep adjusting and evening out the values on the sphere. At this point I have lightened the sphere to try to achieve the "glow" that I see when I look at it.I also slightly lightened the reflected light, being careful to still keep it darker than the half-tone.
Finally, I evened out the values so that they mimic the sphere's smooth surface.
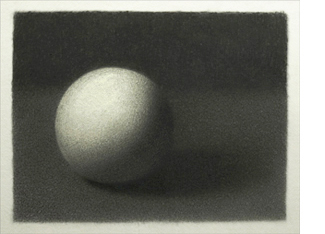
To what extent you refine your sphere drawing is completely up to you.
It is a matter of...
Taste: whether aesthetically you like the smooth finish of the drawing above, or the "grainier" look of the one prior to that
Skill: the more knowledgeable you are about the subject you are drawing, and the more comfortable you are with drawing technique and your drawing tools - the further you will be able to take your drawing
And patience: this last stage of shading a sphere, the last 10%, can often be the most time consuming!
F R E E D O W N L O A D
Get the free Shading a Sphere Infographic
(plus, get a weekly newsletter and access the Members-Only Drawing Resource Library)!
You may also be interested in ...
Return to Sphere Drawing Tutorial: Page 2 from Shading a Sphere
Return to Sphere Drawing Tutorial: Page 1 from Shading a Sphere
Search site:


F R E E V I D E O & G U I D E
Improve your shading skills with this 4-Step Realistic Shading Roadmap!
By Marina Fridman COPYRIGHT © 2025 The Drawing Source. All Rights Reserved. Based in Canada.