- Home
- Drawing Tutorials
- Sphere Drawing
Sphere Drawing Tutorial
Part 1: Blocking in the Sphere

Sphere drawing is an invaluable exercise when learning how to draw. When you draw a sphere, and other basic forms, you learn much of what you need to know to draw the figure and portrait, such as the basic drawing process, how light falls on form, how to see and draw subtle value shifts, and much more!
Take your time learning about and drawing the sphere.
You will come across it again and again, no matter what you draw,
whether it is a figure, portrait, landscape, or still life.
F R E E D O W N L O A D
At the end of this article, download a free Step-by-Step Sphere Drawing Infographic!
How to Draw a Sphere
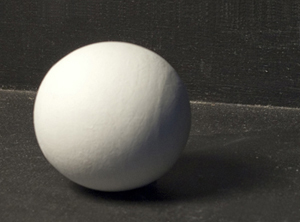
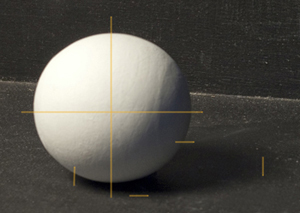
Set up your sphere so
that you can clearly see all the elements of light on form: the
hightlight, half-tone, core shadow, reflected light, cast shadow, and
occlusion shadow.
(Learn about the elements of form here.)

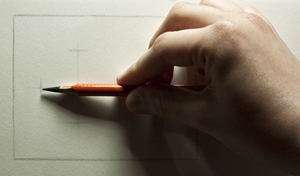
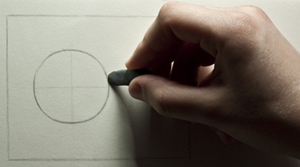
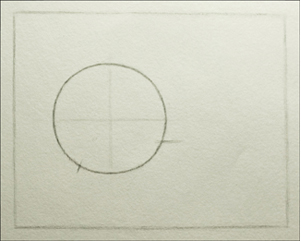
I am beginning my
sphere drawing by lightly sketching in the boundaries of the picture
plane, but it may be easier for you to begin by drawing the object, and
setting the boundaries of the picture plane afterwards.
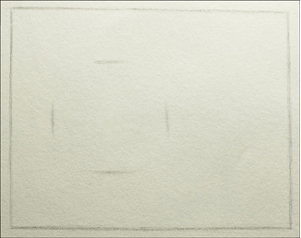
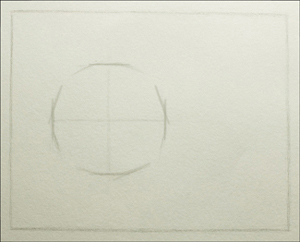
Keeping in mind your
intended composition, locate the approximate boundaries of the sphere.
(You will measure them soon enough!)
Use an HB pencil to help keep your lines light and sketchy, so that they are easy to erase.
Don't be afraid to make mistakes! Good draughtsmanship does not mean being able to draw everything
perfectly from beginning to end (although this skill will improve
greatly with practice). A good draughtsperson has a very good eye, and can
quickly spot and correct mistakes.
Mistakes are simply differences between what you have drawn, and the
subject that you are drawing. Making mistakes can even be regarded as helpful at this point,
because one develops a more sensitive eye by noticing and correcting
them.
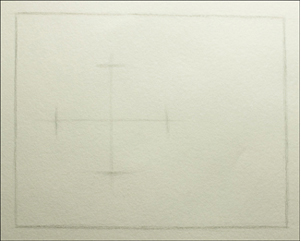
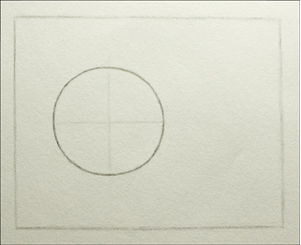
Indicate the horizontal and vertical axes through the center of what will (eventually) be the sphere.
This will help you to gage the correctness of what you are drawing.
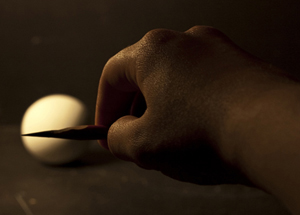
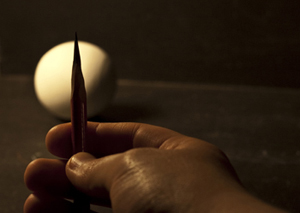
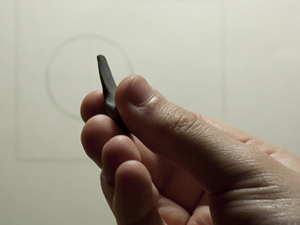
Throughout this drawing, I am using
comparative measurement, which simply means finding one proportion by
comparing it to another. Hold out your pencil, making sure that your arm and elbow are straight.
Close one of your eyes and measure the width of the sphere, as shown
above, indicating the end of the measurement with your finger.
Keeping that finger on your pencil, compare the width of the sphere that you have just measured, to the height of the sphere.
My measurements show that my sphere is slightly wider than it is tall.
Repeat this process on your drawing.
I have already indicated the approximate height and width of the sphere.
I choose to leave the width of the sphere as I have already drawn it,
and edit the height.

I measure the width of the sphere with my pencil...
... compare it to the height, and adjust as needed.
Drawing the Contour of the Sphere
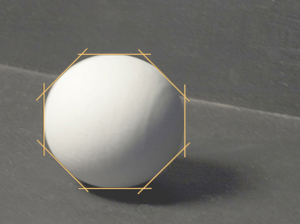
Instead of thinking of the contour of the sphere as one solid line, imagine that it is made up of a series of planes created by multiple straight lines.

These planes can be further divided into smaller planes, which begin to represent the contour of the sphere.

At this point, if you erase the excess lines on
the outside of the sphere and slightly curve the transitions between
the planes, you will be left with a very accurate contour line (much
more accurately drawn than if you had begun with one solid, curved
line).
So, begin your contour drawing in the same way:
You have already marked the top, bottom and side boundaries of your sphere. From there, create side planes using straight lines as shown in the earlier diagram.
Observing the Sphere
Ideally, you will spend most of your time observing the sphere, and a fraction of that time making marks on your paper.
Try not to judge the correctness of your sphere drawing by looking at
your paper and deciding whether or not it looks symmetrical. If you
catch yourself doing that, you are likely not paying close enough
attention to the object in front of you.
Put your efforts into visualizing the planes on the actual sphere, and
compare it to your drawing. This will train your eye to see subtle
nuances that will make or break you when you begin drawing the figure or
portrait!

As you keep dividing the planes into smaller
and smaller segments, your drawing will begin to resemble the contour of
the sphere in front of you.
At this stage, you can connect and smooth the transitions between the planes, using both the pencil and eraser.
Shape the tip of your kneaded eraser so that it is flat...
...and use it to clean up the outside and inside edges of the sphere.
After connecting the transitions between the
planes and cleaning up excess pencil marks with your kneaded eraser, you
should be left with an accurate contour of the sphere.
Sphere Drawing: Finding the High Points of the Sphere
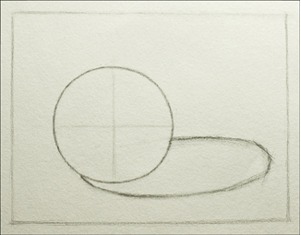
The next step is to draw in the shadow cast by the sphere.
Recall that
we began the sphere drawing by mapping out its height and width.
The points of the object that project outward the most, such as the height and width, are called high points.
When you draw anything, you begin by locating and sketching the high points because they show you the limits, or boundaries, of the object. To draw an accurate shape of the cast shadow, we can first locate its high points.
I first draw the points of the cast shadow in closest proximity to the sphere.
Use the vertical and horizontal axes that you drew to estimate the
location of these points, by visualizing the same axes on the actual
sphere (see above photo).

Now, in the same way
that you used a planar approach to drawing the sphere, you can again use
light, straight lines to map out the cast shadow.
Create a curved line by connecting the transitions between the straight lines that you have drawn.

Erase the horizontal and vertical axes within the sphere, and map out the placement of the core shadow using straight lines.
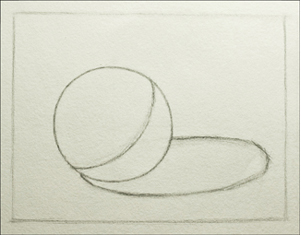
Connect the transitions between the straight lines to create a smooth, curved line.
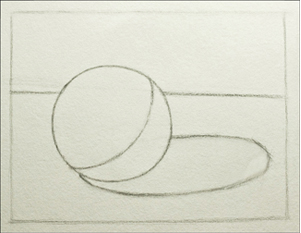
The last step before
you begin adding tone to your sphere is to draw in the plane change
between the surface on which the sphere rests, and the back plane of the
shadow box.
You now have the foundation for a successful, realistic sphere drawing!
Continue to Part 2 of the Sphere Drawing Tutorial
F R E E D O W N L O A D
Get the Step-by-Step Sphere Drawing Infographic
(plus, get a weekly newsletter and access the Members-Only Drawing Resource Library)!
You may also be interested in ...
Return to Drawing Tutorials from Sphere Drawing Tutorial Part 1
Return to the Home Page from Sphere Drawing Tutorial Part 1
Search the site above


