- Home
- Portrait Drawing
- Eye Drawing Learning Path
- Learn to Draw Eyes
Learn to Draw Eyes
Avoid 6 Most Common Eye Drawing Mistakes
A 3-Part Video Series
What does it take to learn to draw eyes convincingly and realistically?
In this 3-part video series, you'll discover 6 of the most common mistakes that
decrease the realism of your eye
drawings. Most importantly, you’ll learn how to fix or avoid these mistakes
altogether!
Before you start, don't miss the free:
Draw Better Eyes Toolkit
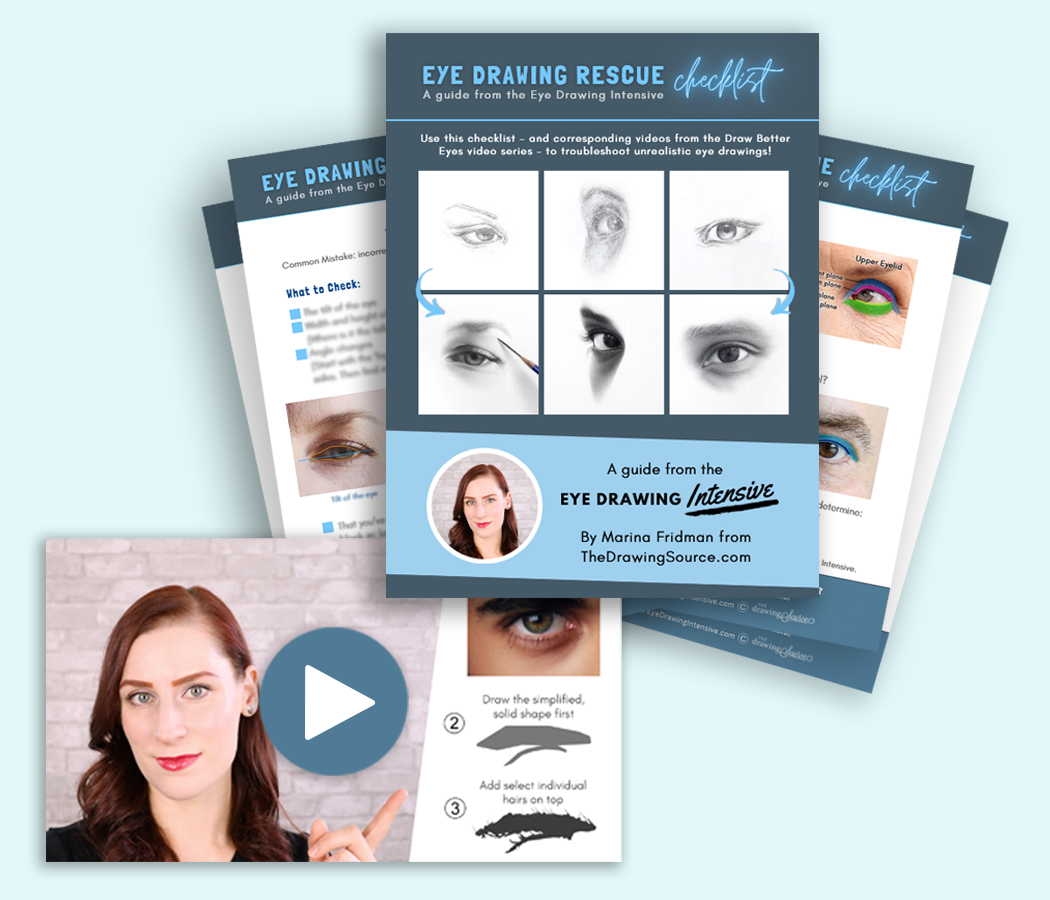
Fix the most common mistakes making your eye drawings look flat and unrealistic with 6 short video lessons and the Eye Drawing Rescue Checklist. Get the Toolkit here!
Watch the video here:
Part 1 - Most Common Eye Drawing Mistakes (and how to avoid them!)
A F T E R T H I S L E S S O N:
Don't miss:
More eye drawing resources:
- Draw Better Eyes Toolkit!
- How to Draw Realistic Eyebrows: Step by Step Tutorial
- How to Draw Eyelashes: Step by Step Tutorial [Video]
- 8 Tips for Drawing More Realistic Eyelashes [Video]
Tutorials on drawing the other facial features:
Or, learn to draw eyes in the:
Prefer to read? Here is the article version of the video!
(... there is more info in the video, though, I recommend it!)
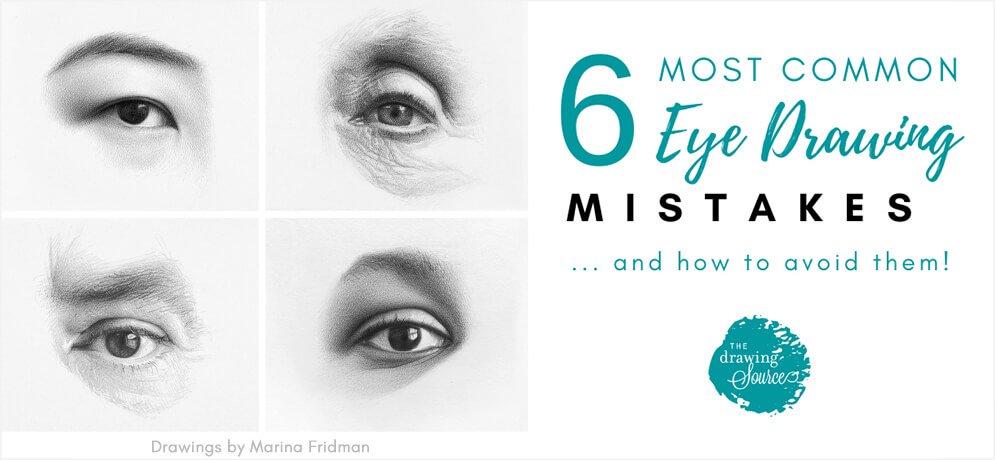
Mistake 1: Assuming that eyes are a generic almond shape (and drawing them that way!)
In drawing,
specific shapes create likeness, or resemblance. Specific shapes make our
drawings look specifically like the model that we’re drawing.
What happens when our shapes are inaccurate?
Best case scenario: if your shapes are a little bit off, your eyes might still look realistic, but they won’t look like the individual you’re drawing. Worst case scenario: if your shapes are really off, your drawing might terrify your audience (and maybe even yourself).
Here’s why:
Unlike some drawing subjects, portrait drawing is not forgiving.
For
example, if your proportions and shapes are slightly off when drawing a still life like
this flower …
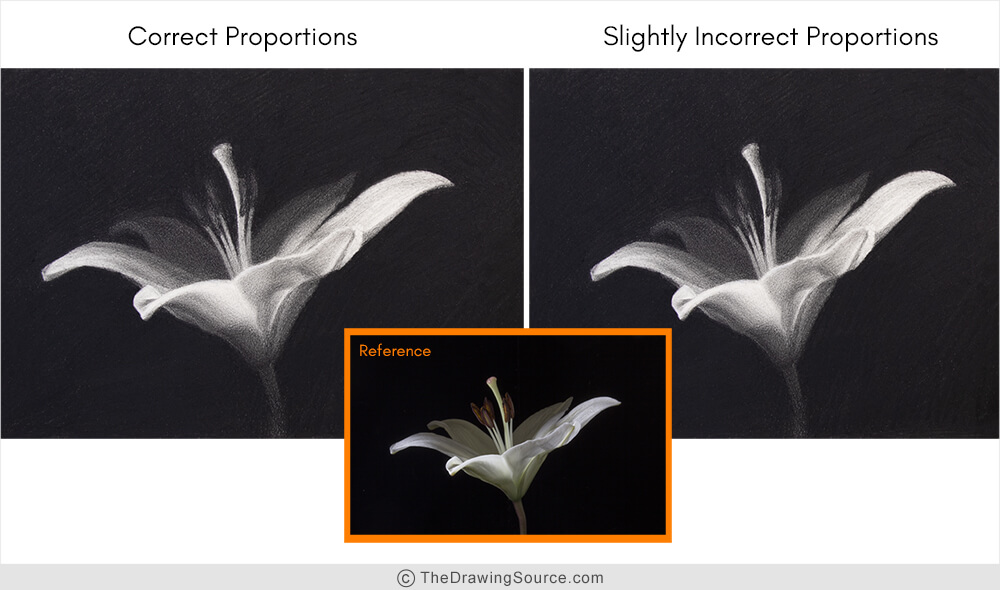
It’s still believable and realistic, right? It’s not the specific flower that you were
drawing, but without seeing the reference photo, you can't even tell! No
problem.
But, what happens if our shapes or
proportions are slightly off in a portrait drawing?
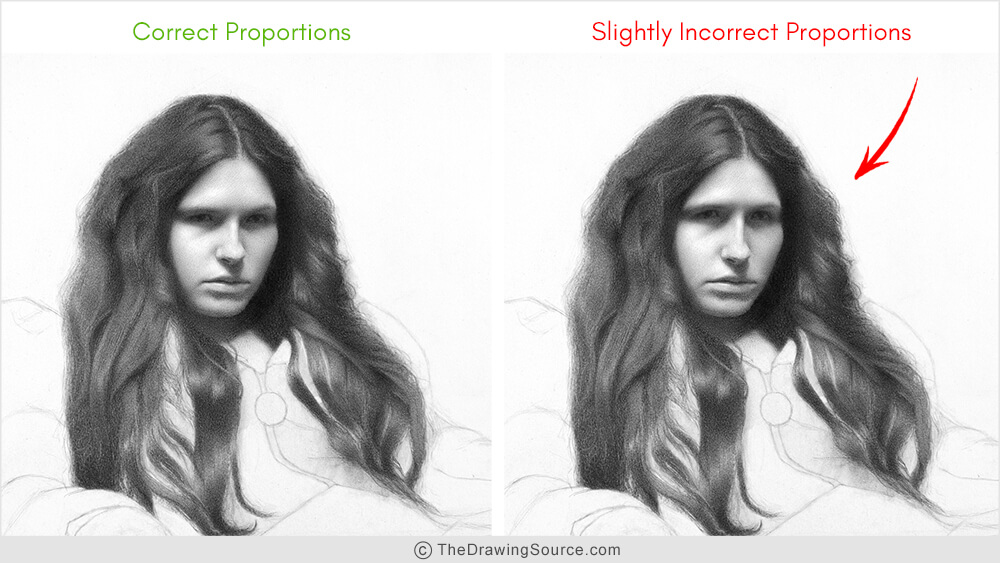
Yikes.
Suddenly we have a (mildly horrifying) caricature of our model. With advanced subjects like the figure and portrait, we can’t get away with much! We must learn to observe, analyze and draw the shapes of our subject sensitively.
Returning to
the shape of the eye:
It’s not that eyes aren’t at all almond-shaped. Sure, there is a resemblance. The issue is that: assuming eyes are almond-shaped leads to generic shapes and generic drawings.
Look how
distinctly unique all of these eye shapes are:
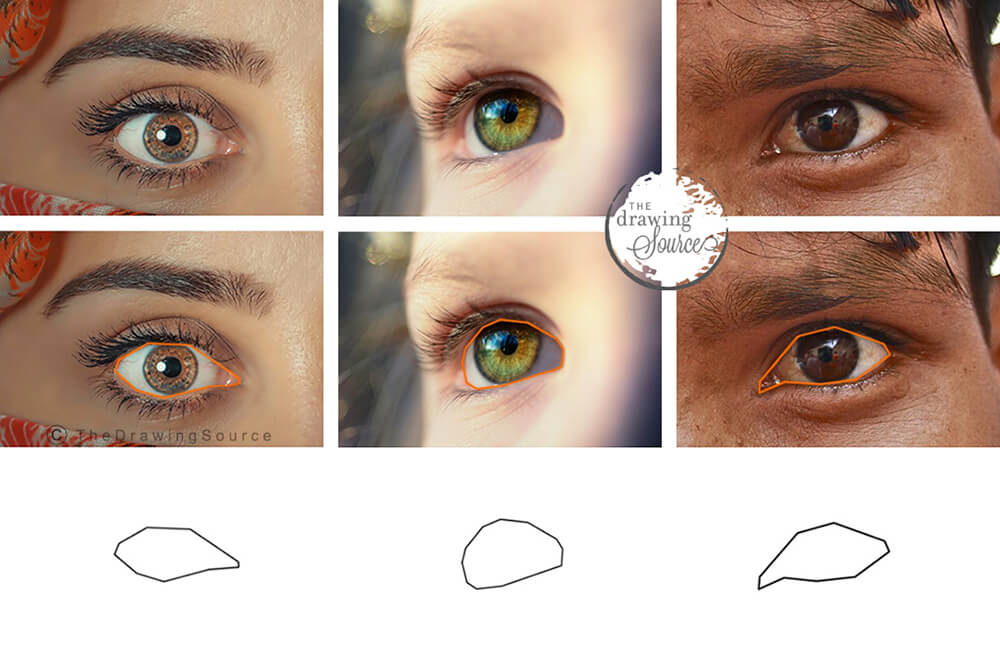 Learn to draw eyes convincingly by paying attention to the specificity of each individual eye shape
Simply almond-shaped? I think not! That simply does not do justice to the nuances of this feature.
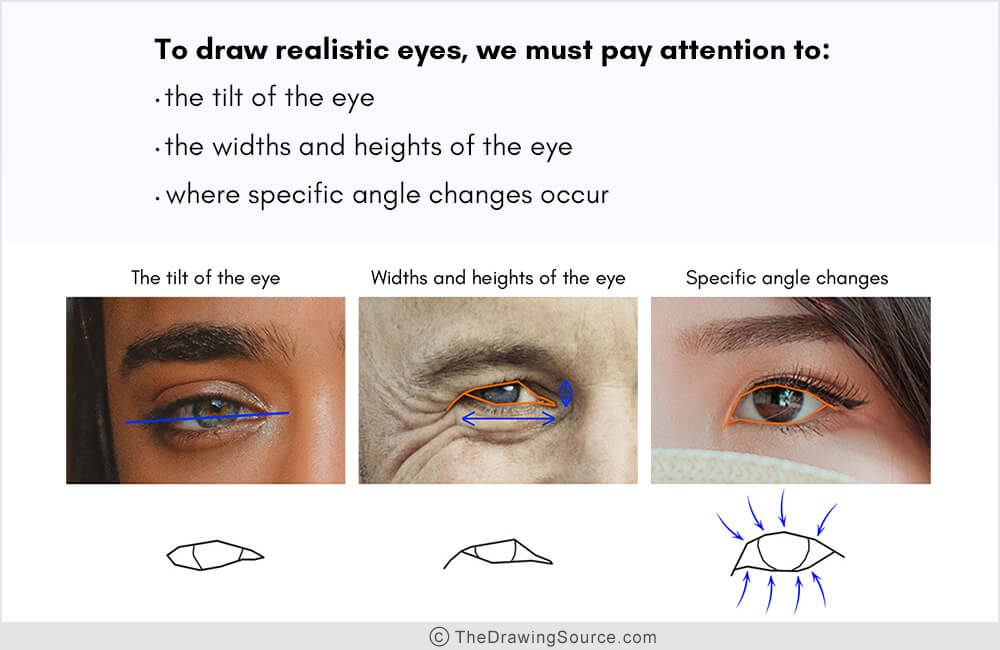
To draw realistic eyes that look recognizably like those of our model, we must pay attention to:
- the tilt of the eye
- the widths and heights of the eye, and
- where
specific angle changes occur (as I do in my eye drawing tutorial).
Don't miss the video above for specific examples of these!
Now that
you’re seeing how unique every eye shape is,
how do you learn to draw eyes specifically
rather than generically?
Try
following these steps.
1) Start
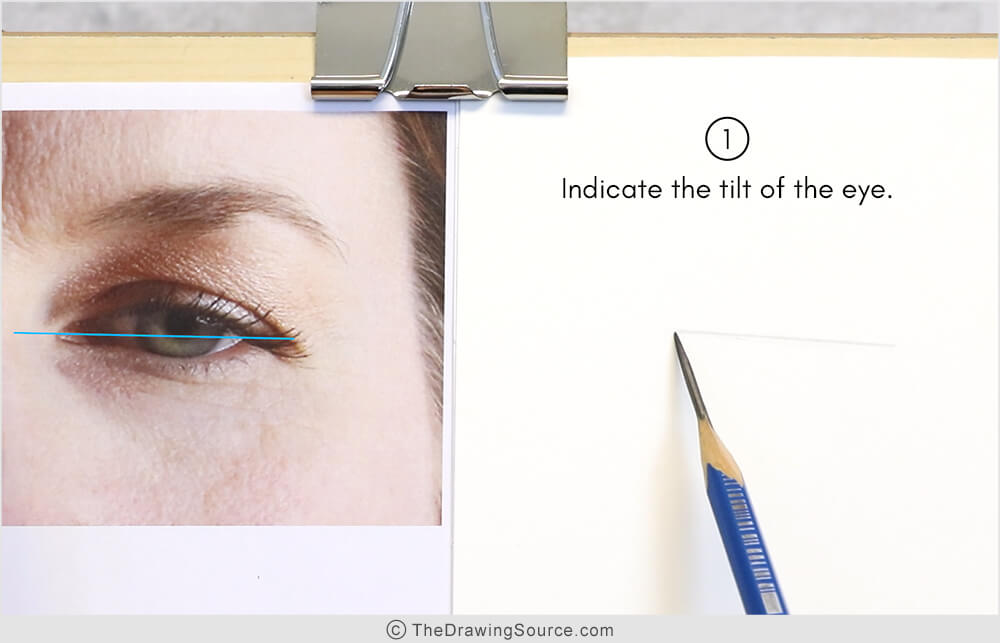
your eye drawings by indicating the tilt of the eye.
Each eye, in every pose, is at a particular angle. It has a tilt, and if we don’t establish it early on in our drawing, it will be very difficult to create later.
When drawing an eye, often the first line I draw indicates the tilt of the eye.
I visualize
this line extending from one corner of the eye to the other, and
then I mimic its angle on my drawing using angle-sighting (as shown in the image above).
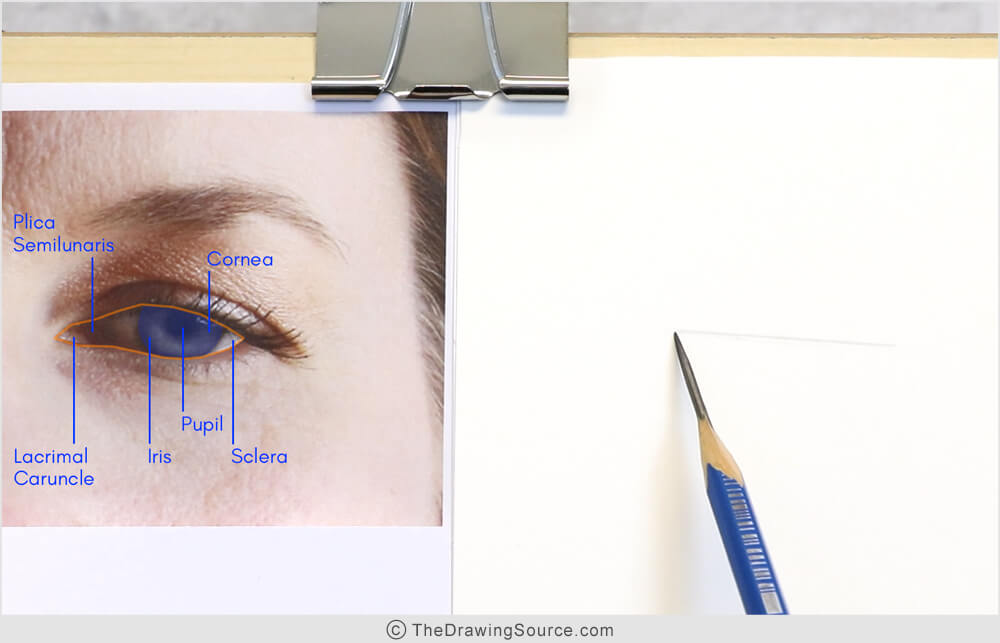
Next, let’s notice what’s included in this shape between the eyelids:
- The sclera, the white of the eye
- The pupil
- The iris
- The cornea, the transparent cover on top of the iris
- The 2 forms in the inner corner of the eye: the lacrimal caruncle, and the plica semilunaris
We study anatomy so that we know what to look for. For example, students often don’t leave enough space for the 2 forms in the inner corner of the eye, because they don’t notice that they’re there, or that the 2 corners of the eye are very different. That’s a little bonus mistake for you to avoid!
Often we
can’t see what we don’t know to look for.
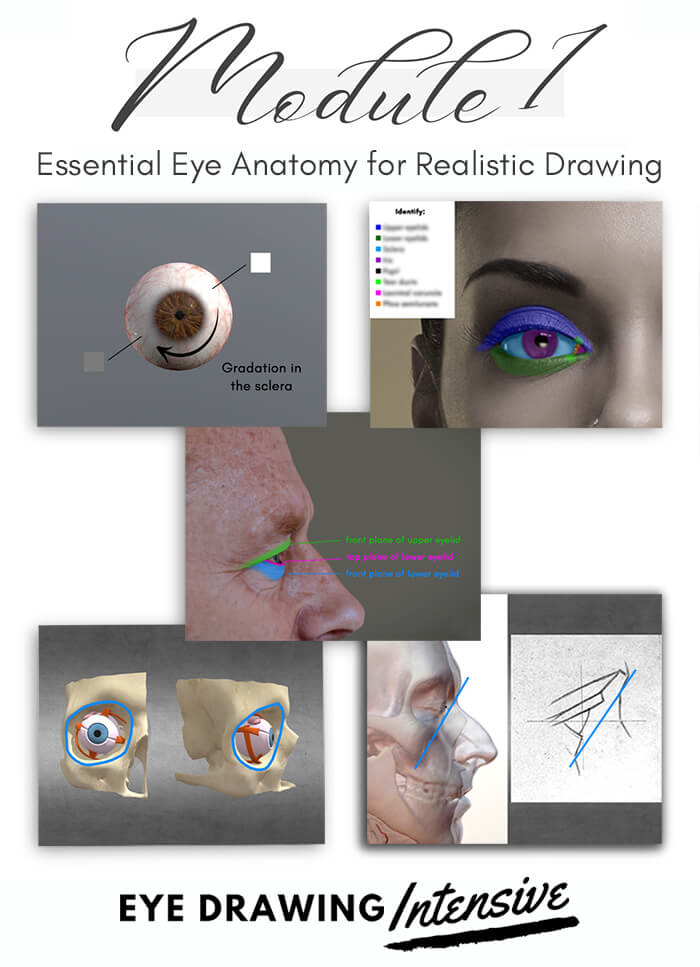
We cover the eye anatomy needed to draw realistic eyes in Module 1 of the Eye Drawing Intensive.
It’s so much fun to learn, and it will completely transform the way you view
and draw eyes!
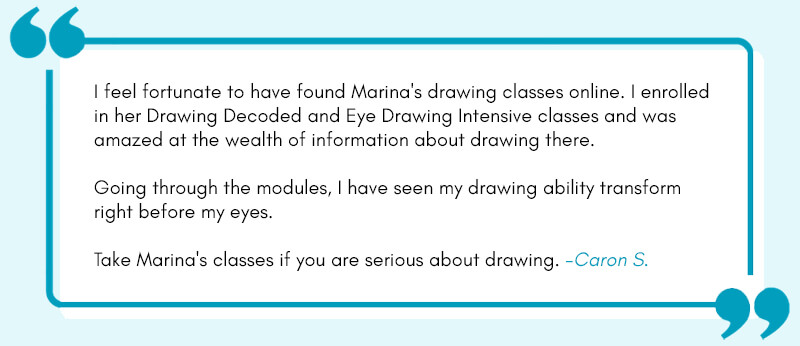
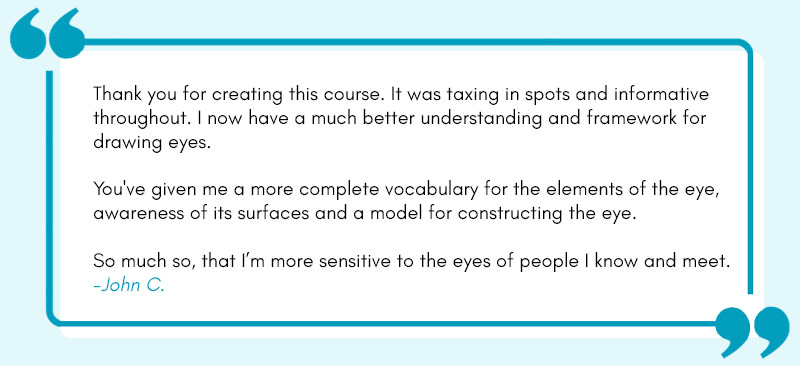
What students have said about Module 1 of the Eye Drawing Intensive:



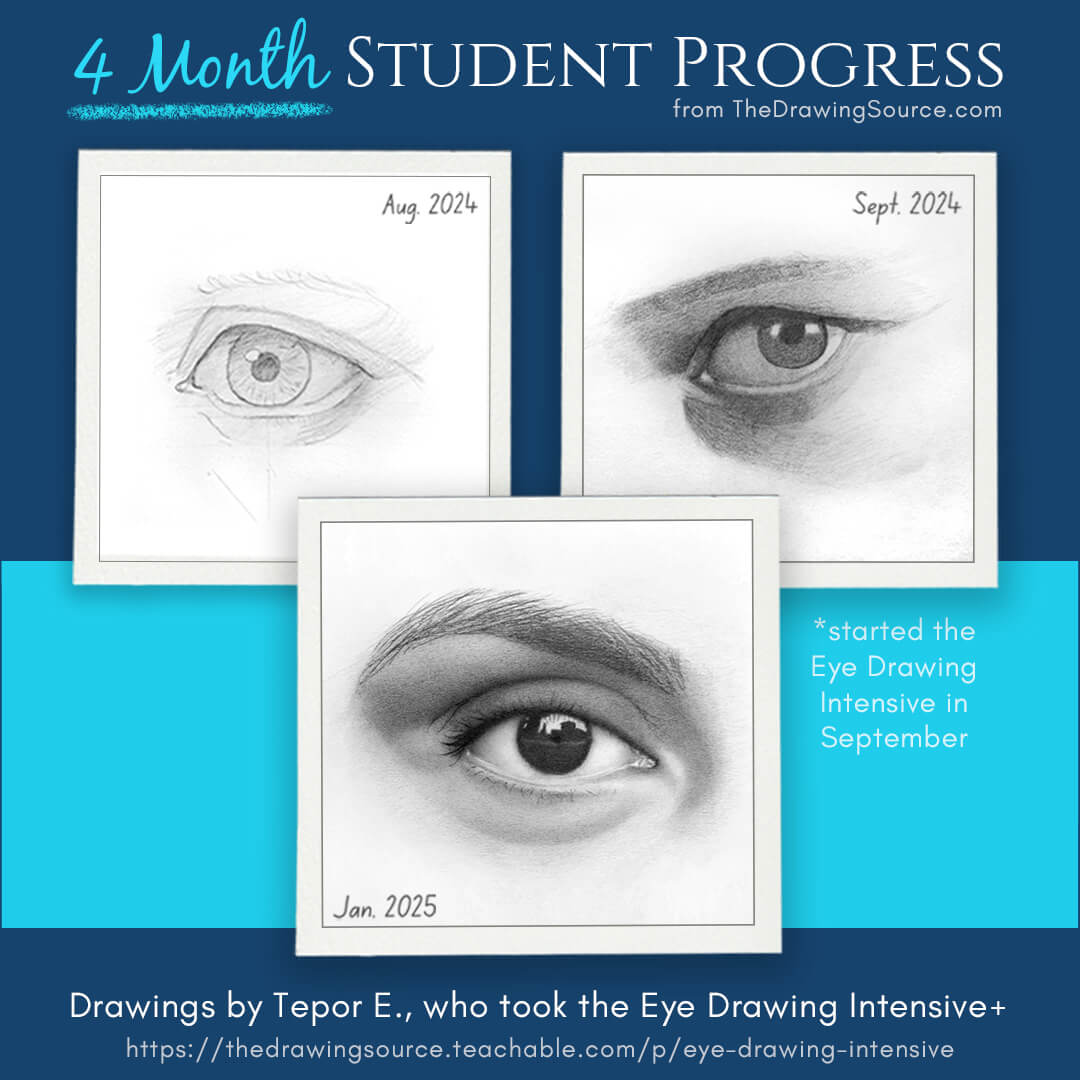
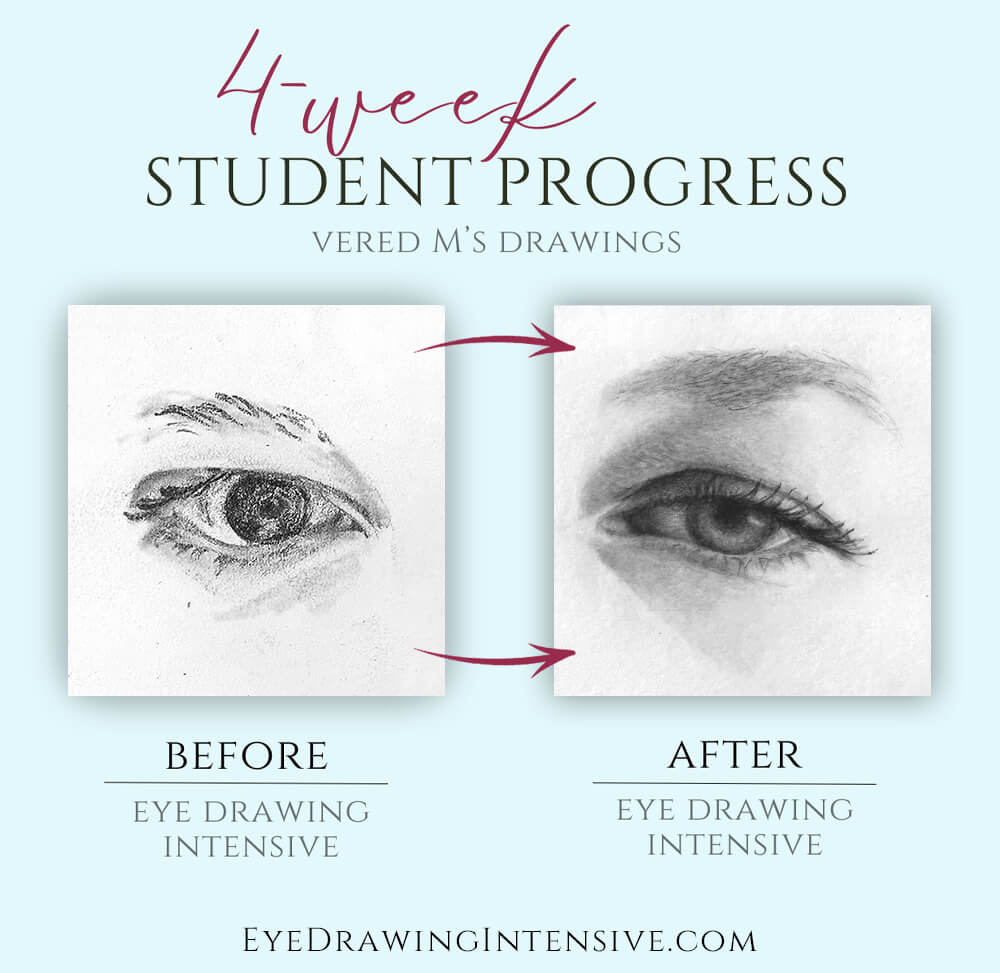
Don't miss the student eye drawing transformation at the bottom of this page!
Step 2) is
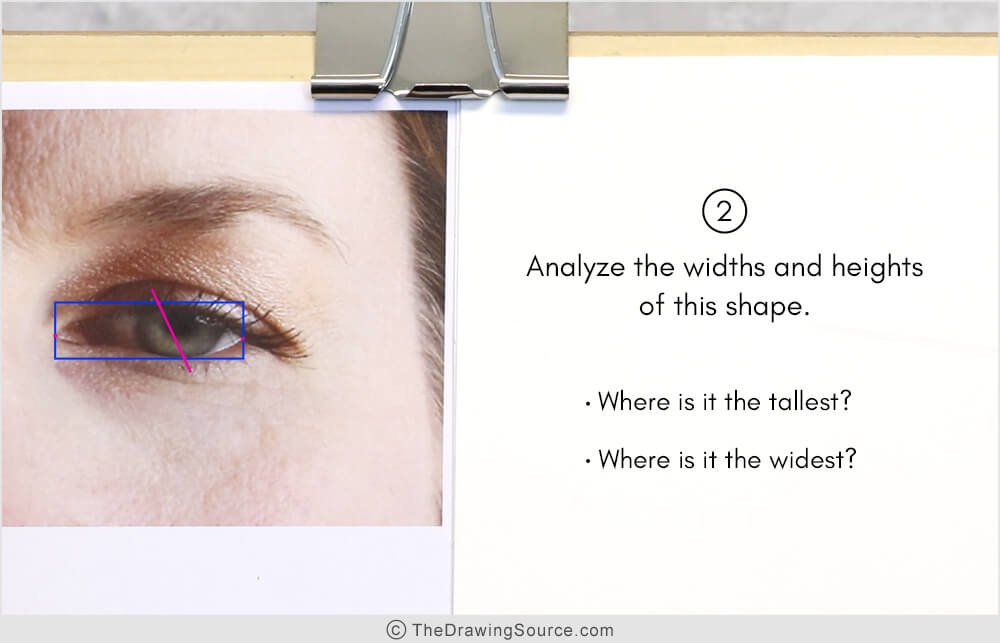
to analyze the widths and heights of the eye shape.
- Where is it the tallest?
- Where is it the widest?
An easy way to determine this is to imagine the eye shape fitting perfectly into a rectangle, where the rectangle touches the highest point, lowest point, right-most point and left most point of the shape.
Now we have 4 boundaries, or high points, of this shape, as well as the overall height and width. (Let’s mark the high points, because they will be important later.)
Notice that the highest and lowest points are at an angle to each other.
Once you’ve
found the general height and width, indicate it lightly on your drawing to give
this shape boundaries.
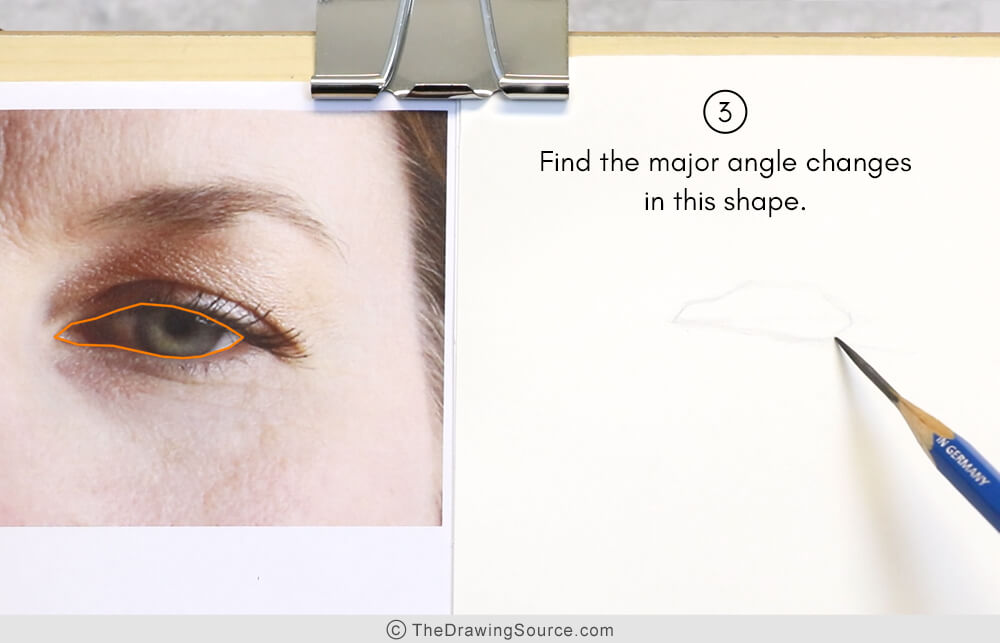
Step 3) Find
the major angle changes in this shape.
Finding angle changes is a skill that takes practice! Here are a few tips and ways to go about it.
We have
already found the high points, or boundaries, of this shape. Conveniently,
there are usually major angle changes at these high points. Can you see them? (Look for them in the video above!)
If you’re not quite seeing the angle changes, try asking yourself: "How would I draw this eye, using only straight lines, and as few lines as possible?"
No curving lines! This is important, because it will force you to decide where to end one line and where to start another one, and you will likely start and end your lines at angle changes. Curving your lines too early often results in generic shapes and generic drawings.
So, how would you draw this eye using as few lines as possible?
I started with the shape in the image above, and then I made it more specific by subdividing it with more angle changes. That left me with an excellent starting point, because I have identified the tilt of the eye, the widths and heights of the eye, and where the specific angle changes are.
This is
already not a generic almond shape or goldfish shape!
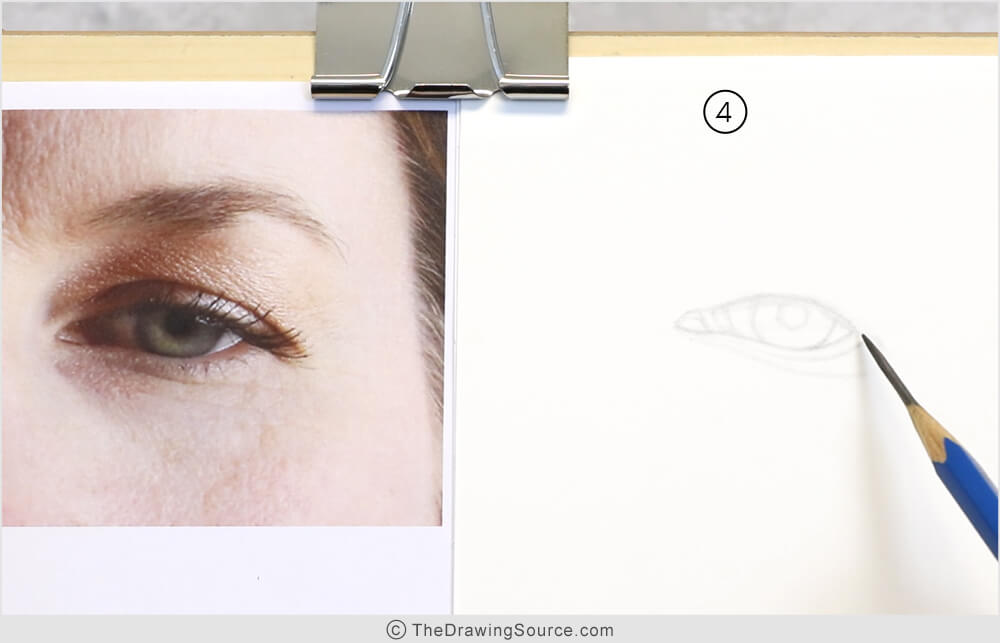
Step 4) is
to find and draw the even more subtle angle changes in this shape and to
finally start curving some lines, but I don’t do that until much later in the
drawing process, once I have added more information to my drawing.
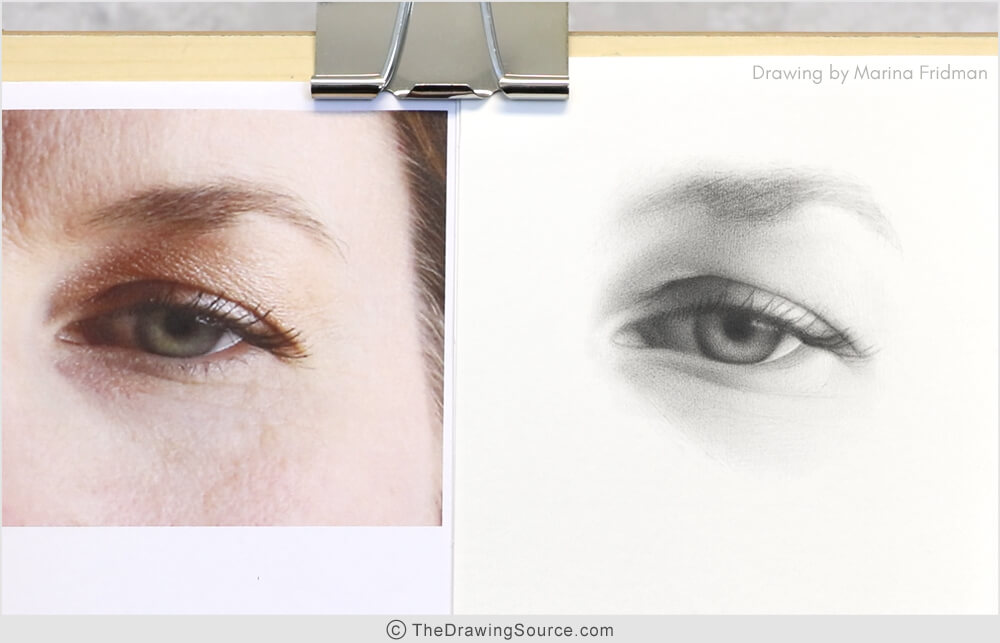 Learn to draw eyes in my Eye Drawing Intensive!
The almost-finished eye drawing - whoops, forgot the lower eyelashes.
Draw this eye with me in the Eye Drawing Intensive!
Mistake 2: Not noticing the 'thickness' of the upper and lower eyelids (not creating a front and top plane)
The second common mistake I see is not noticing or drawing the thickness of the upper and lower eyelids.
To make sure we’re on the same page, the eyelids are the upper and lower folds of skin that protect the eye, and keep the eye moist. Each eye has an upper eyelid and a lower eyelid.
Key Point: The eyelids have a thickness.
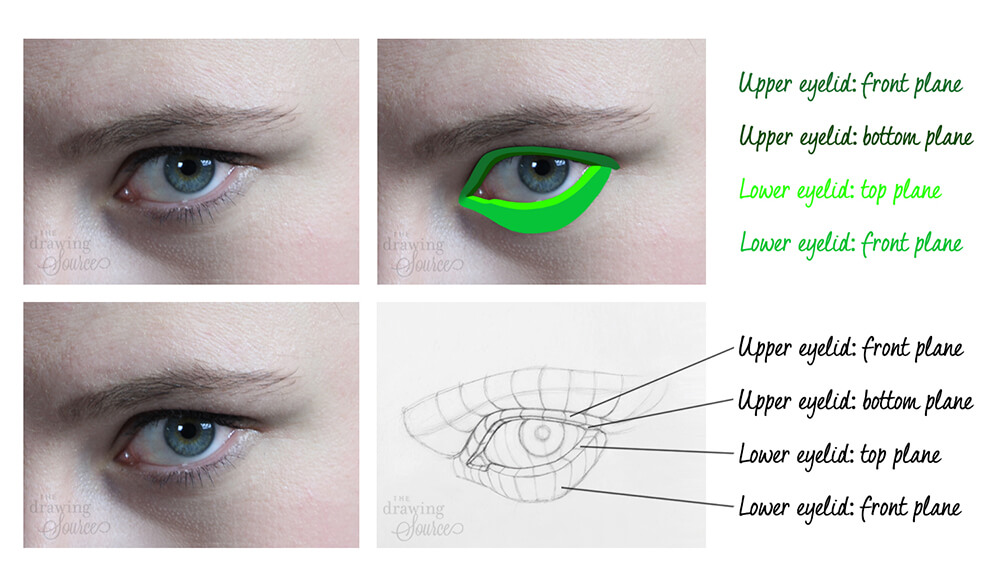
This gives each eyelid two planes, that we must notice and show in our drawings.
The upper
eyelid has a front plane and a bottom plane. The
lower eyelid has a front plane and a top plane.
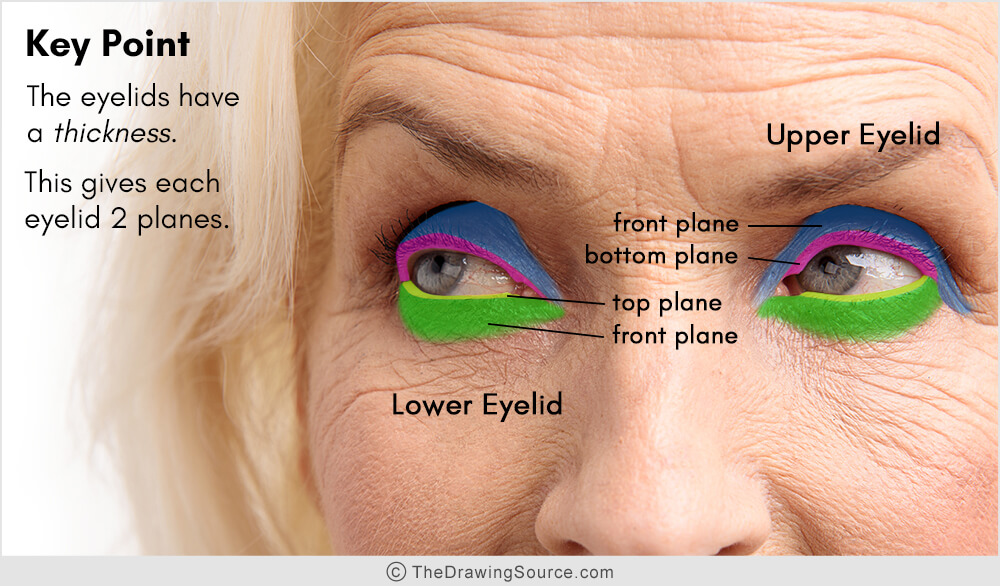
If we leave
these planes out of our eye drawing, it will not look believable or realistic,
because these planes create a sense of depth and dimension. They’re also
anatomically correct. Because we look each other in the eyes every day, we know
when something looks off or strange in a drawing, even if we’re not sure why.
So – this will not go unnoticed!
However, these
planes are often missed in eye drawings because they can be tricky to locate!
How much we see of each plane depends on many factors:
- On the position of the model’s head
- Where they’re looking
- On the type of eyelids we’re drawing
- How open the model’s eyes are
- The tautness of the skin
- Even eyelashes can often obscure the planes!
So, how do
we find them and avoid this common eye drawing mistake?
Let’s start with the upper eyelid.
Because it has
two planes, a front plane and a bottom plane, it can have up to three lines for
us to draw:
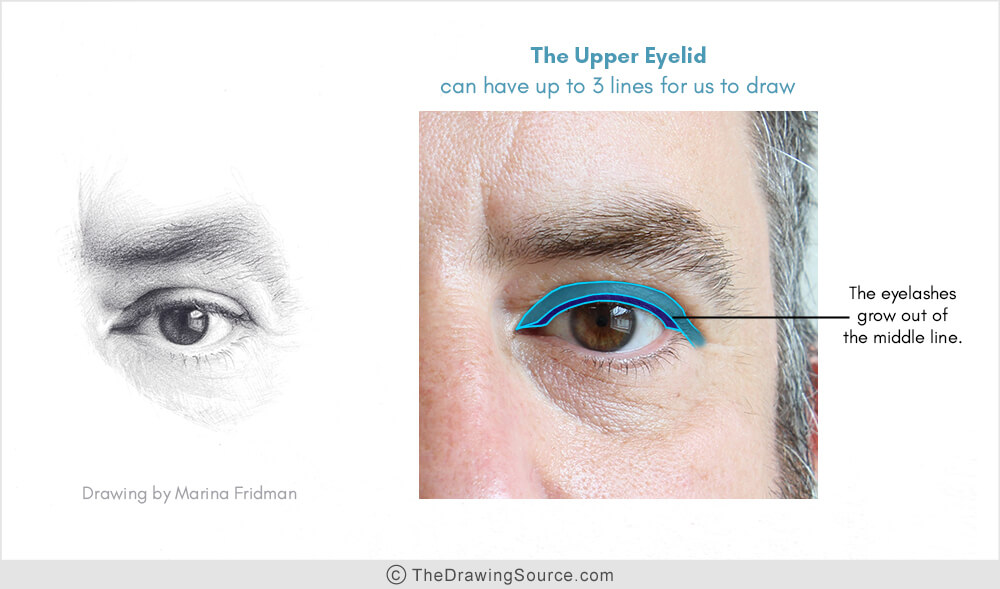
When we can
see both planes of the upper eyelid, often there will be:
- a top line
- a middle line, separating the front plane from the bottom plane, and
- a third line, where the bottom plane contacts the eyeball
The
eyelashes grow out of the middle line that separates the front plane from the
bottom plane. That’s often very helpful in locating that angle change. When
eyelashes are sparse or not very visible, we look for a value change instead:
a difference in lightness and darkness between the two planes.
The lower eyelid is similar. From a front view, it also has two planes, a front plane and a top plane.
When we can
see both planes, the lower eyelid will also have up to three lines for us to
draw:
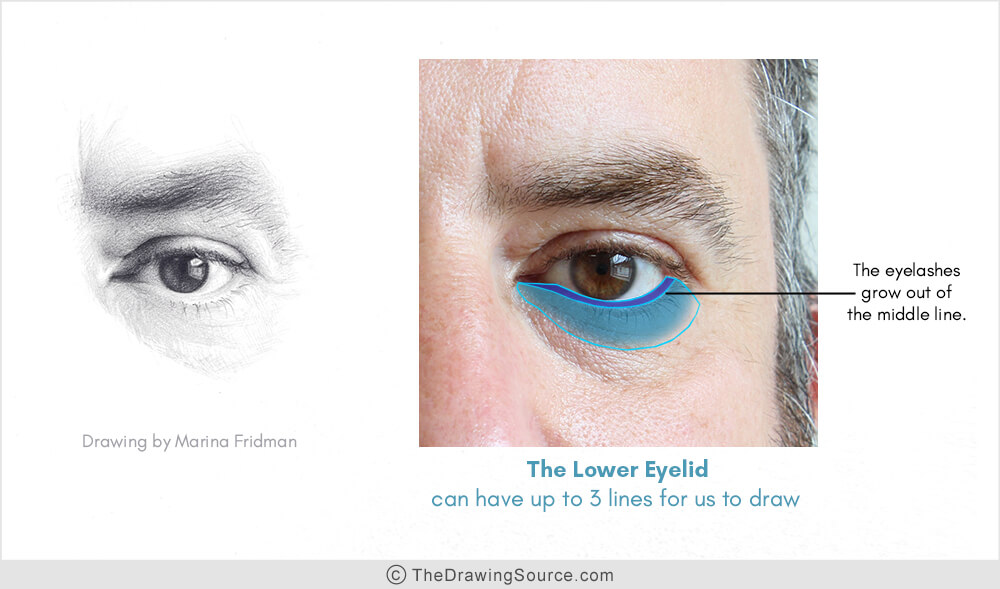
Here, the top line indicates where the eyelid contacts the eyeball. It’s right up against it. The middle line separates the top plane from the front plane, and the third line closes off the front plane. Often this line will trail off or fade out, it’s not usually defined the entire way around.
Again, the eyelashes grow out of the middle line separating the top plane from the bottom plane, which can greatly help us locate that angle change. When eyelashes are sparse or not very visible, again we look for a value shift – a difference in lightness and darkness – between the two planes.
We started
with this example because these lines are very clear on this individual in this
pose. But:
We will we not always see all 3 lines, or both planes of the upper and lower eyelid.
That depends on many factors! For example, on the type of eyelids our model has, and on the position of their eyes and head. Where the lines appear can also be dramatically different from one person to the next, because our eyes are all so unique.
So, we want
to use these 'three lines' as a starting point, to help us find the planes of the
eyelids.
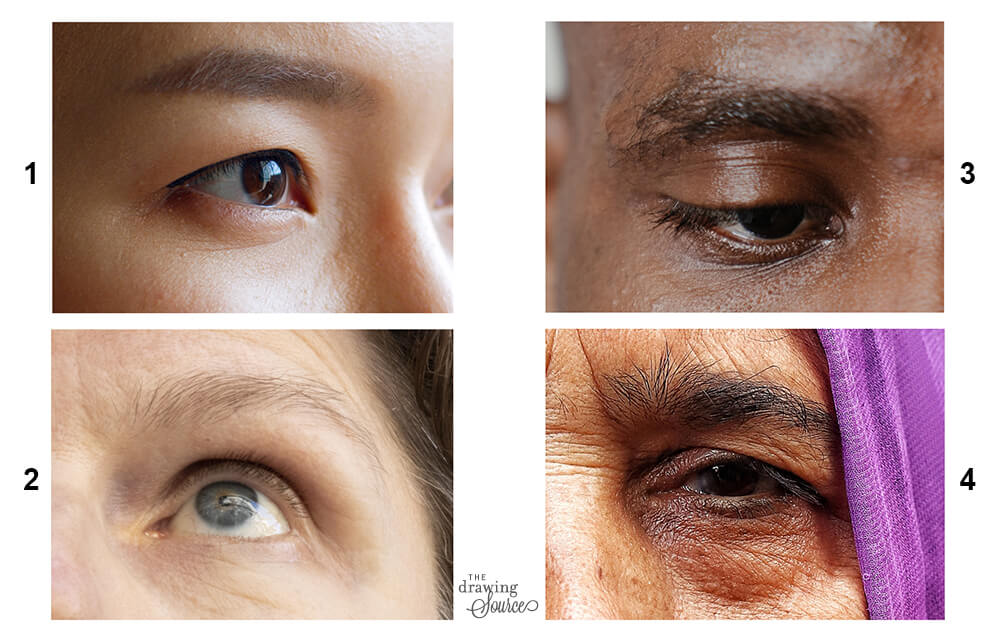
When
observing an eye, ask yourself:
- Can I see the three lines in the upper eyelid?
- If yes, where, specifically are they on this individual?
- If you can't see all three lines, why not? What’s happening in this scenario? For example, the head might be tilted up (as in image 2 above) or down (as in image 3 above), obscuring one of the planes.
- Which lines can you see?
- Finally,
based on what you discovered through the questions above, determine: where are the two
planes of the upper and lower eyelid?
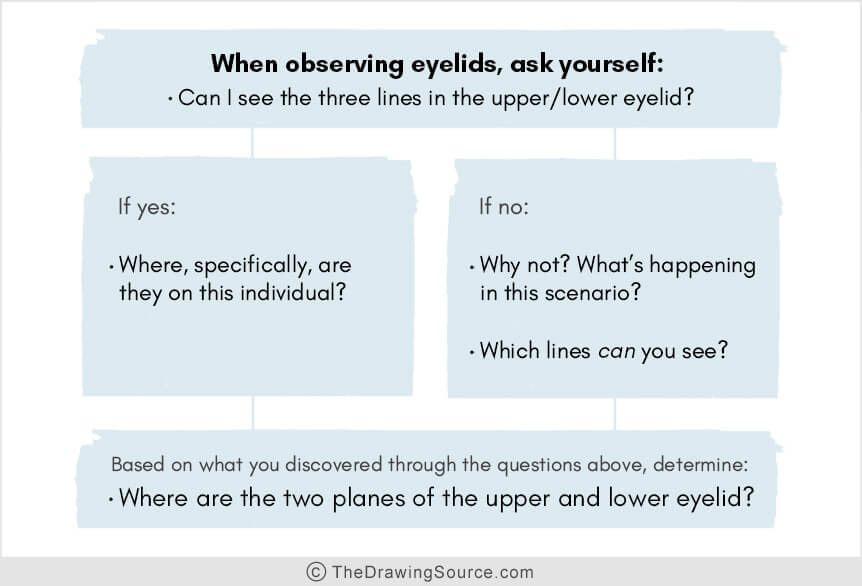
That should help you draw the two planes of each eyelid, adding depth, dimension and realism to your drawings. You can start by exploring your own eyelids in a mirror! Let me know if you can find those three lines, and can see the two planes of each eyelid.
Now
you know that to draw stunning, realistic eyes you must notice and draw:
- specific, not generic, shapes, and
- the planes of the eyelids
But
there are 4 more common eye drawing mistakes I see all the time, that I
strongly suggest that you avoid. We’ll cover them in Parts 2 and 3 of this
video series!
Next steps to learn to draw eyes:
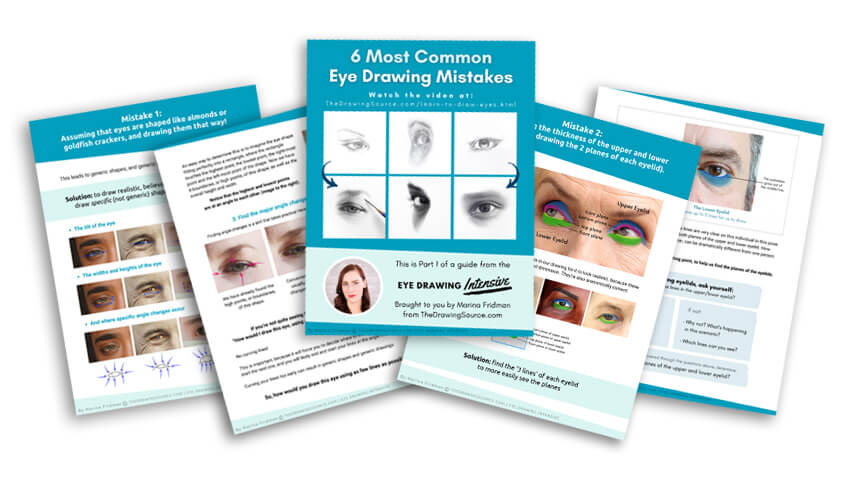
1) Download the free PDF guide summarizing this video below:
2) Don't miss:
- Part 2 of this video series
- Part 3 of this video series
- The Draw Better Eyes Toolkit & Eye Drawing Rescue Checklist!
3) Ready to transform your eye drawings? Learn more about my Eye Drawing Intensive:
I hope to see you there,
Enjoyed this page? Please share it!
Share buttons and pinnable image below:
To learn to draw eyes, you may also be interested in:
Related Pages
How to Draw Realistic Eyelashes [Video]
How to Draw Realistic Eyes (Step by Step Tutorial)
How to Draw Eyebrows (Step by Step)
Return from Learn to Draw Eyes to:
The
Eye Drawing Hub | Portrait
Drawing | Drawing
Tutorials | Home
