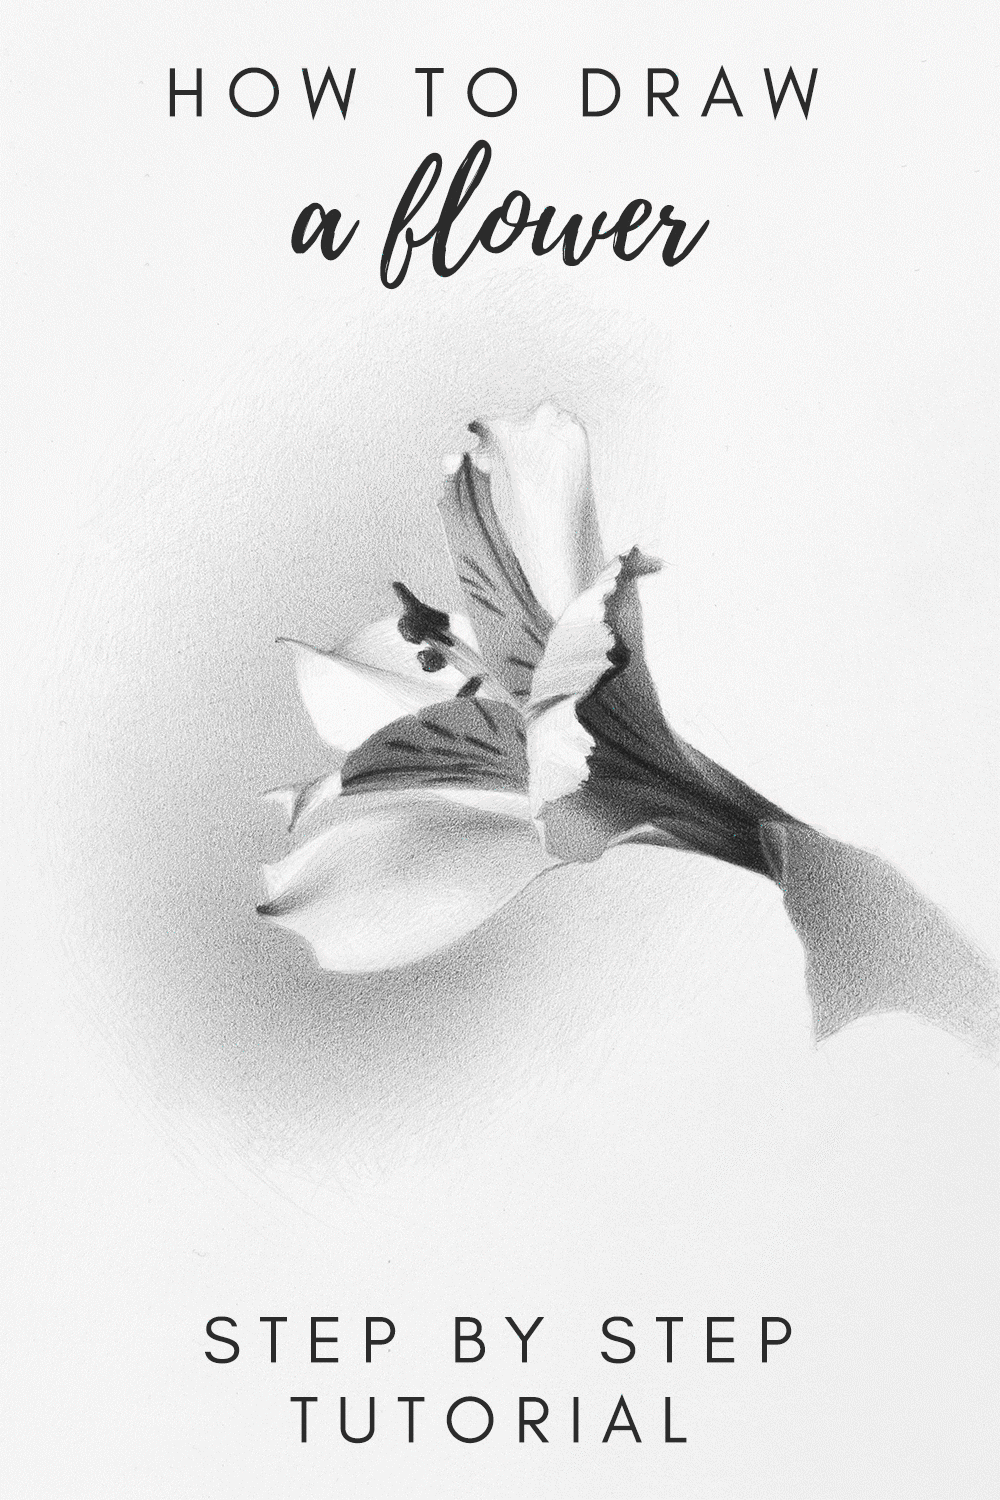
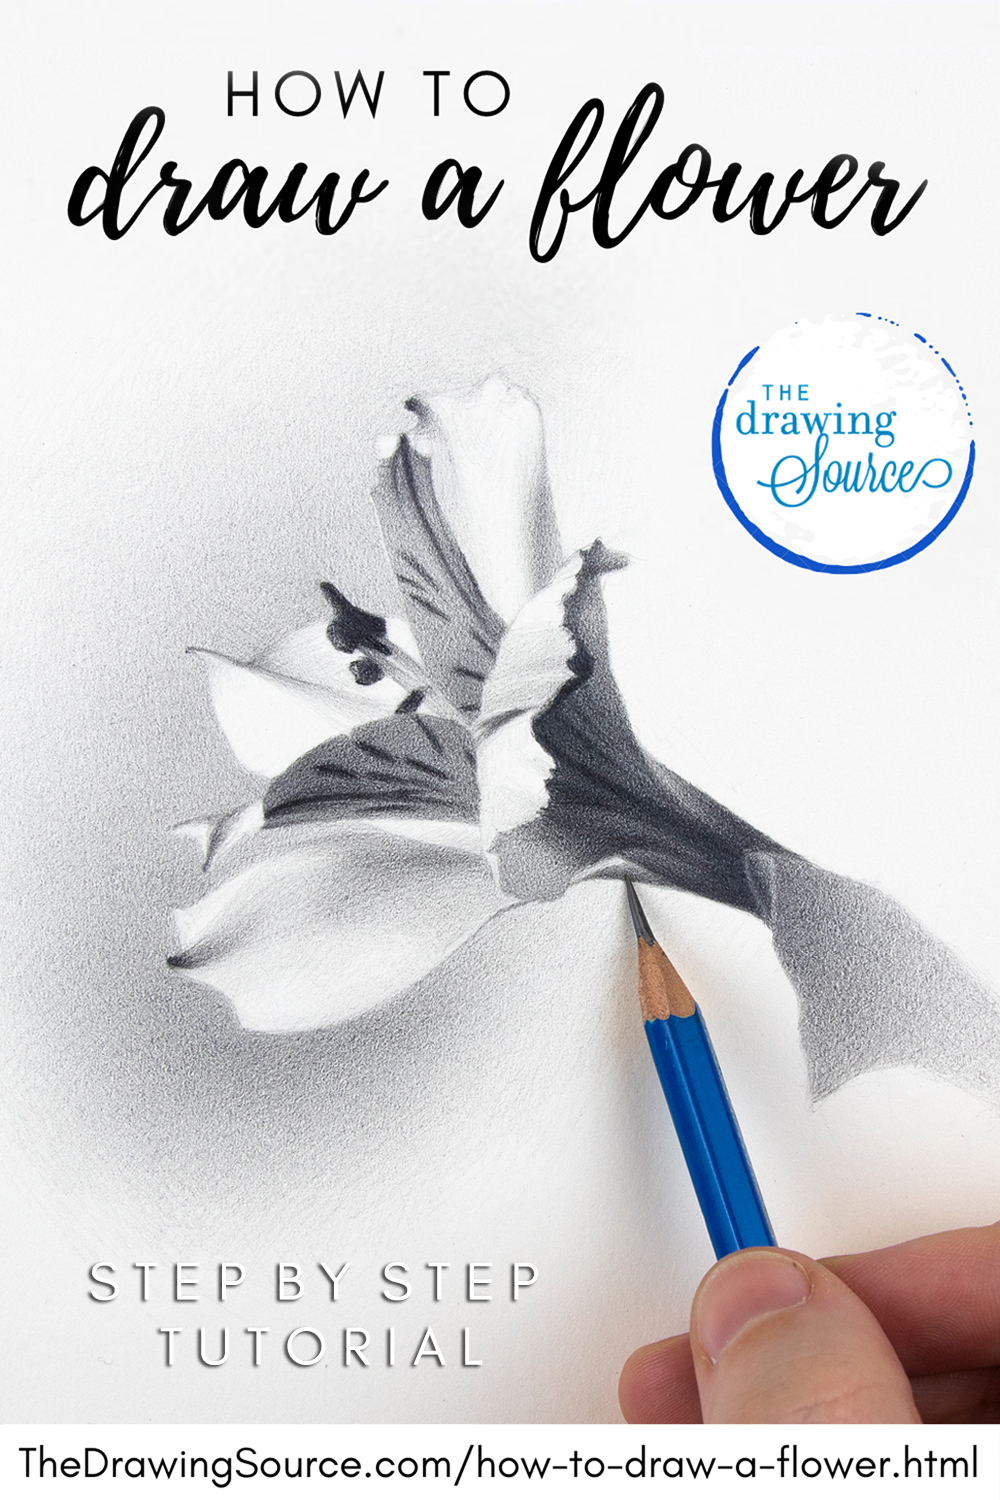
How to Draw a Flower
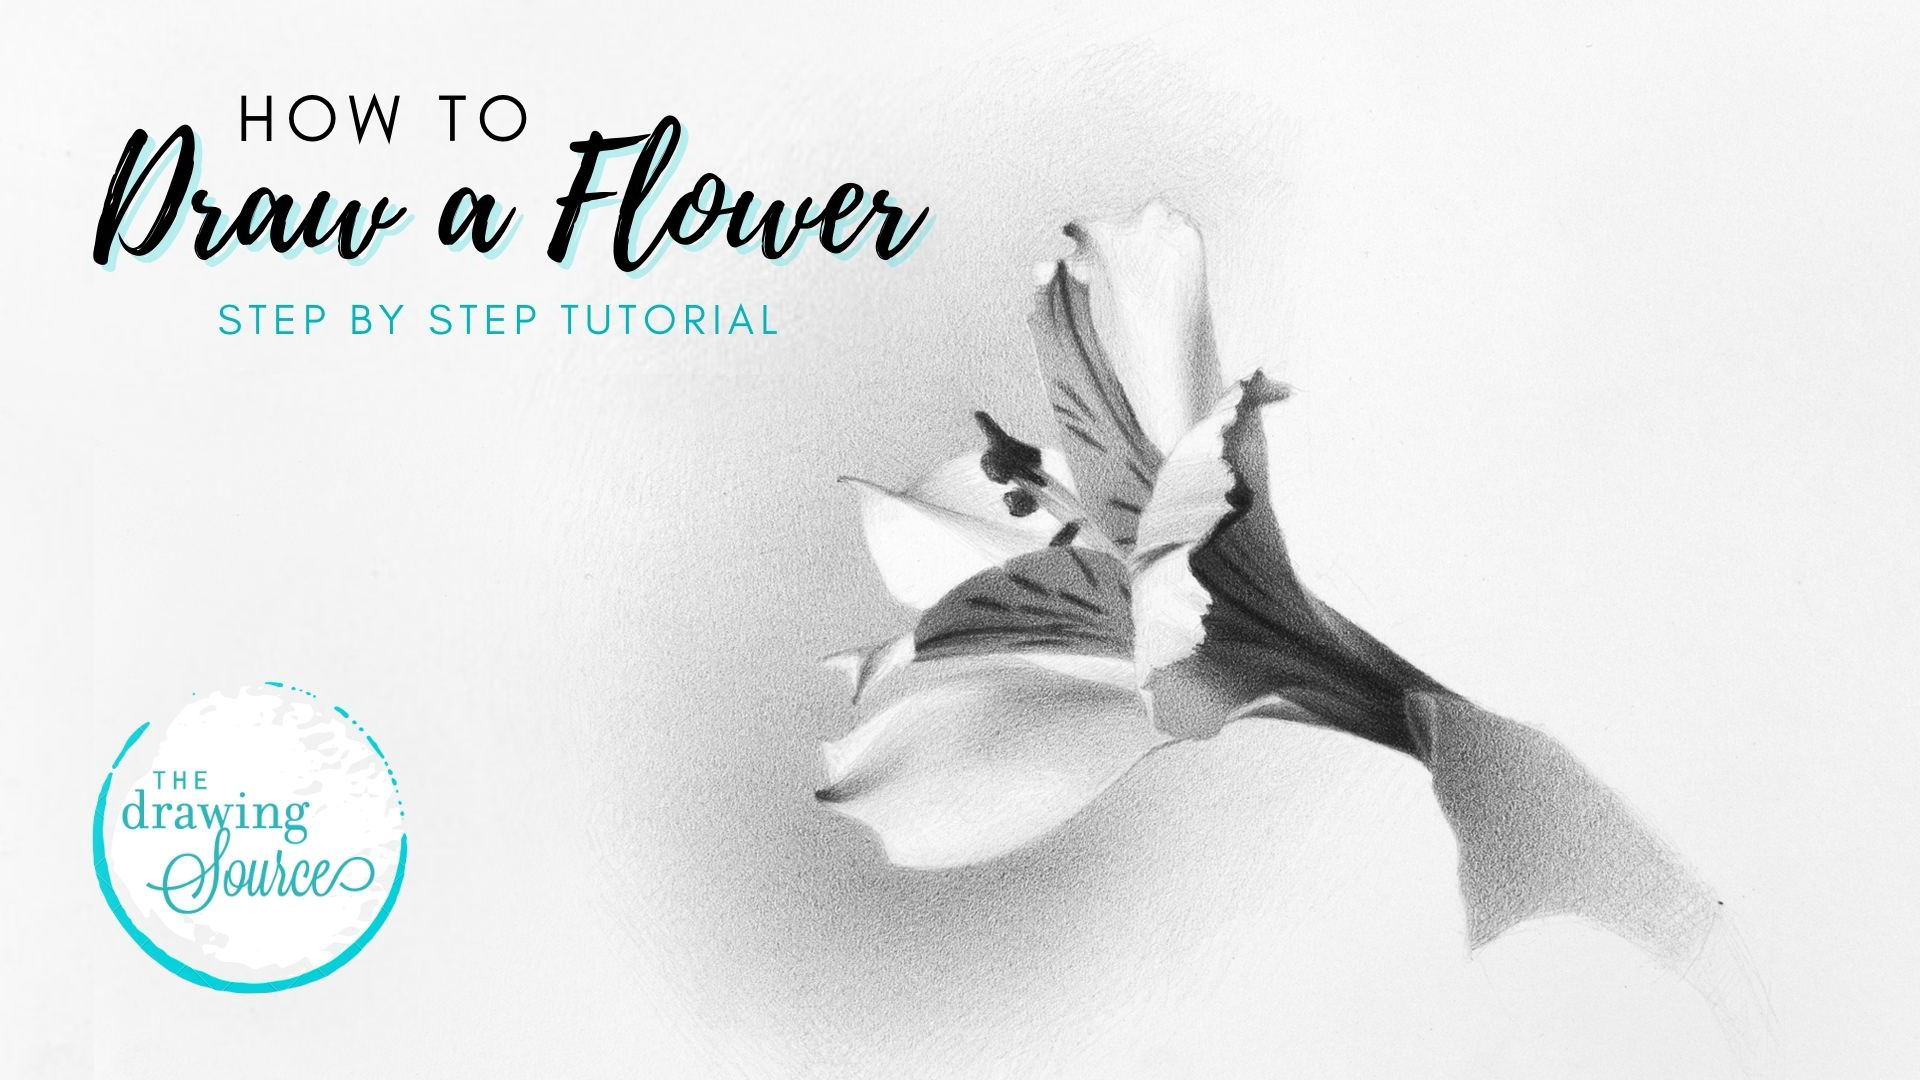
How to draw a flower - what a timeless subject! However, its timelessness doesn't make it easy to draw! Check
out the interesting challenges presented by this particular
subject, and the solutions that I offer to solve them, in the tutorial
below.
If you're looking for in-depth, step by step video instruction on how to draw a flower, you can also check out my Realistic Drawing 101 course, in which you can draw one along with me and receive my personalized suggestions!
 Animated GIF of the tutorial steps
Downloadable Resources
Get the reference photo of the flower I'm drawing here!
Get the How to Draw a Flower infographic here!
Materials Used in this Tutorial
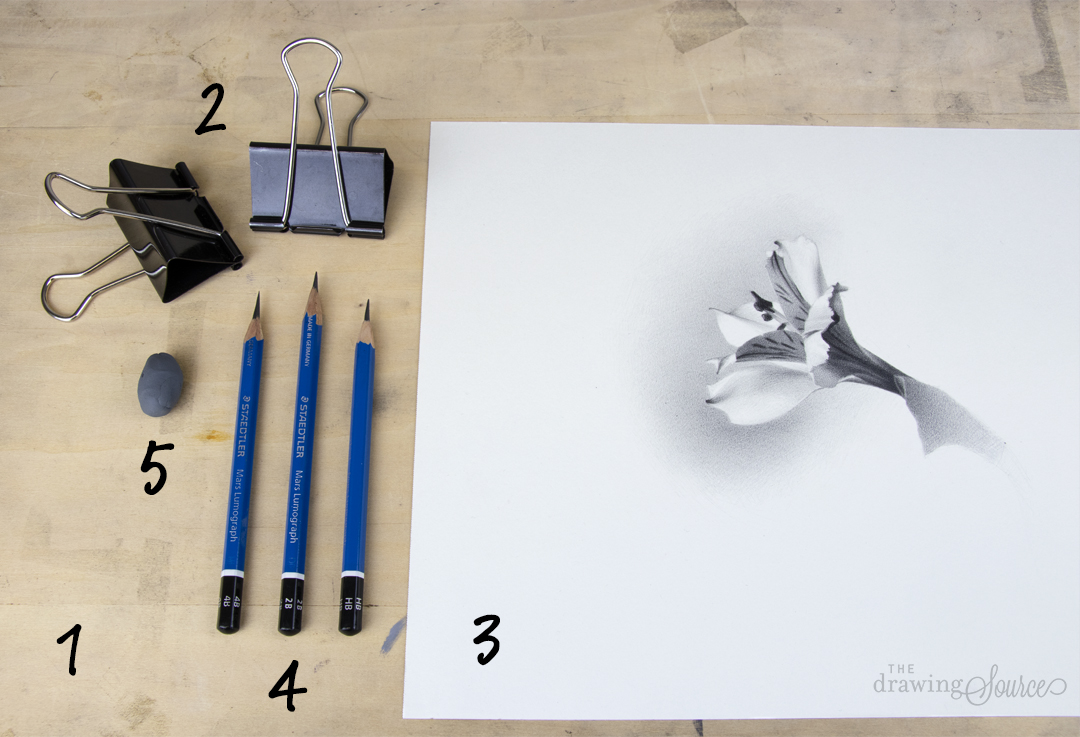
1. Drawing Board: This is a sturdy, yet lightweight drawing board made by Helix.
2. Bulldog Clips: A convenient way to attach a drawing to a drawing board, and preferable to using tape, which often leaves a residue or rips your paper!
3. Drawing Paper: I am using a sheet of Strathmore 400 Drawing Paper.
*Helpful Hint: Place a few extra sheets of paper underneath the one that you're drawing on. This creates a smoother, more pleasant drawing surface, and prevents the drawing board texture from appearing in your drawing!
4. Drawing Pencils: I am using HB, 2B and 4B Staedtler Mars Lumograph graphite pencils throughout this tutorial.
5. Kneaded Eraser: I usually use the General's Jumbo Kneaded Eraser. Check out my video tutorial on 3 ways to use a kneaded eraser here!
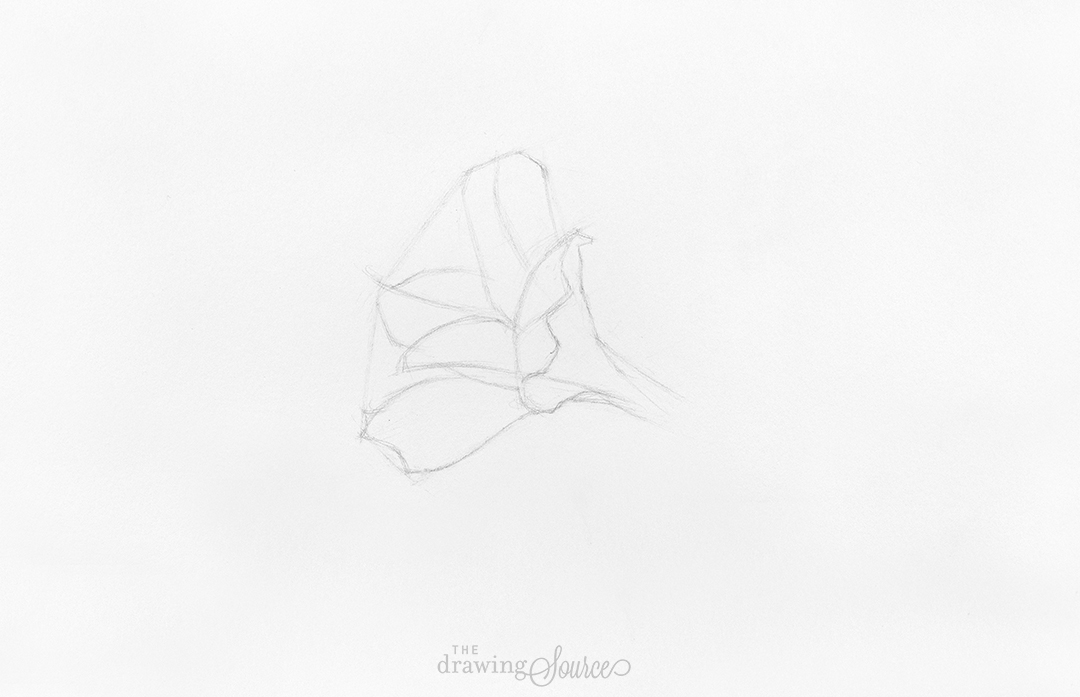
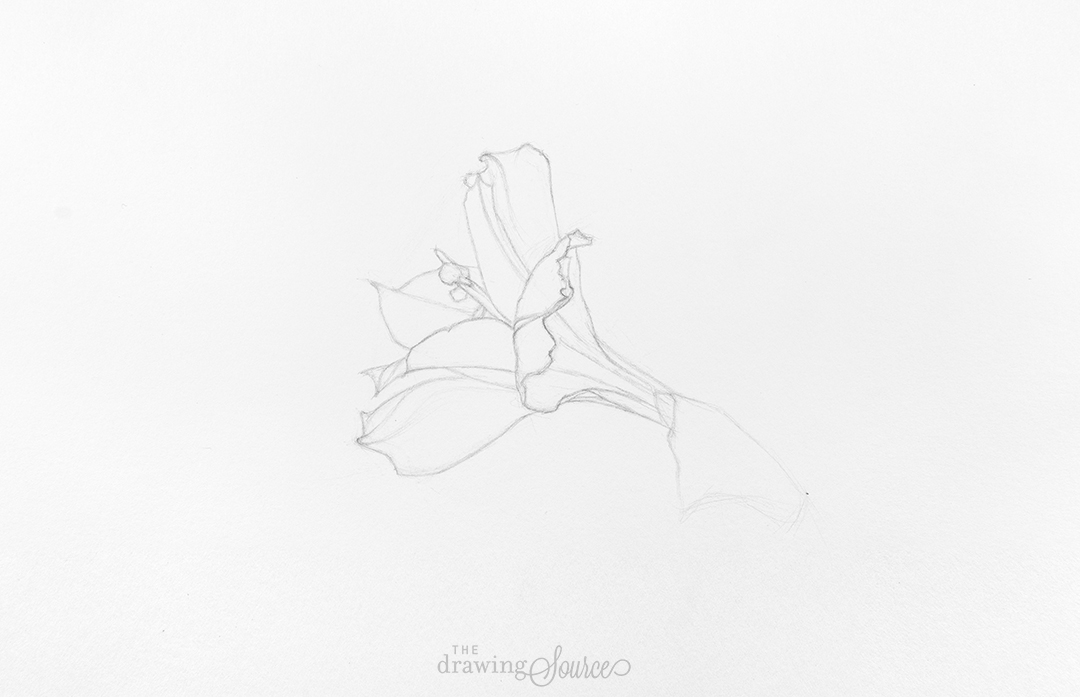
How to Draw a Flower: The Block-In
The first stage of any drawing is called a 'block-in'. It refers to the line drawing, or blueprint, that we create before adding values and shading to our image.
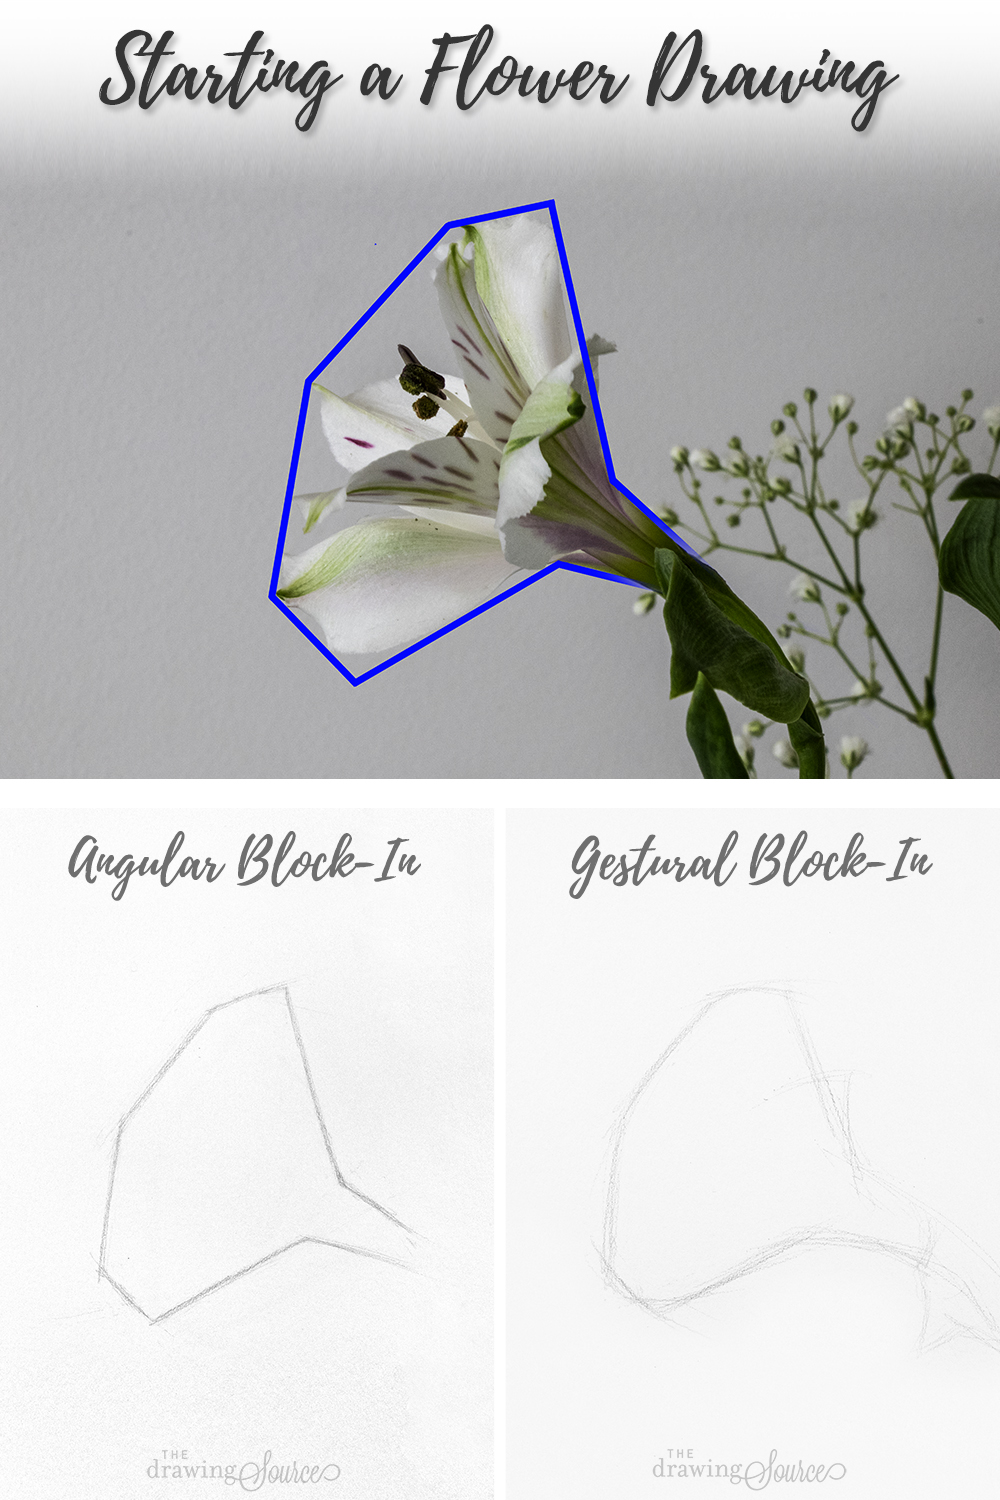
I begin my drawing with a general shape that envelops the entire flower. Though I usually recommend that students use straight lines for this initial stage, because the flower has so many curving lines and gestures, it may feel more natural to begin with more gestural lines (as in the top right image).
However! Notice that whether you choose the angular block-in or the more gestural block-in, both clearly indicate the major angle changes of the flower. To learn this method of efficiently starting a drawing in more depth, check out the Lesson 2 video of my free Mini-Course.
Once I have sketched in this approximate shape, I double-check the angles that I've drawn, as well as the general proportions of the flower, such as its height vs. its width. (Measuring and drawing accurate proportions is covered in Mini-Course Lesson 3!)
I am using an HB graphite pencil for these initial stages of my drawing.
In almost every tutorial on this website, I mention the importance of working 'from general to specific', meaning from the largest, most general elements of the subject to the smallest, most specific ones.
I began this drawing with the most general shape possible, simply indicating the major angle changes in the subject.
Next, I begin dividing up this general shape into slightly more specific segments: the petals of the flower, ignoring all detail for the time being.
We don't have to be 100% accurate from the beginning! We can take some pressure off of ourselves to 'draw perfectly', and instead build up to accuracy.
How to Draw a Flower:
Using Gestural Lines
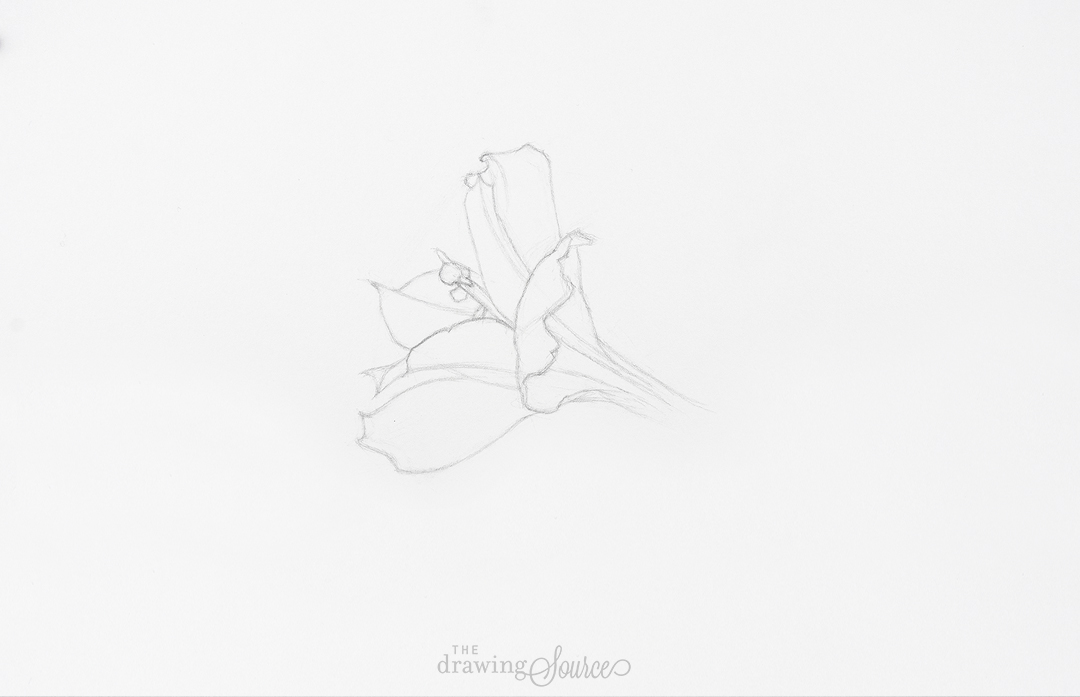
As I get more specific with my block-in, I pay close attention to the contour, drawing the overlapping lines in each petal and relating them to the interior information in the flower. (Learn how to create depth and dimension using overlapping lines in Lesson 4 of this free Mini-Course!)
As I mentioned earlier, this particular subject is very flowing and gestural. Because of this, one of my goals in this step is to achieve a balance of accuracy and movement. Paying attention solely to accuracy can result in a very stiff, static-feeling drawing. On the other hand, only paying attention to the movement within the subject can result in incorrect proportions, and the drawing not resembling the subject at all!
Too much accuracy = a static drawing
Too much movement = wonky proportions
The solution is quite simple and elegant. We can look for, and draw, specific gestures within the flower. Gestures are implied lines that flow from one element of a subject to another.
Examples of gestures:
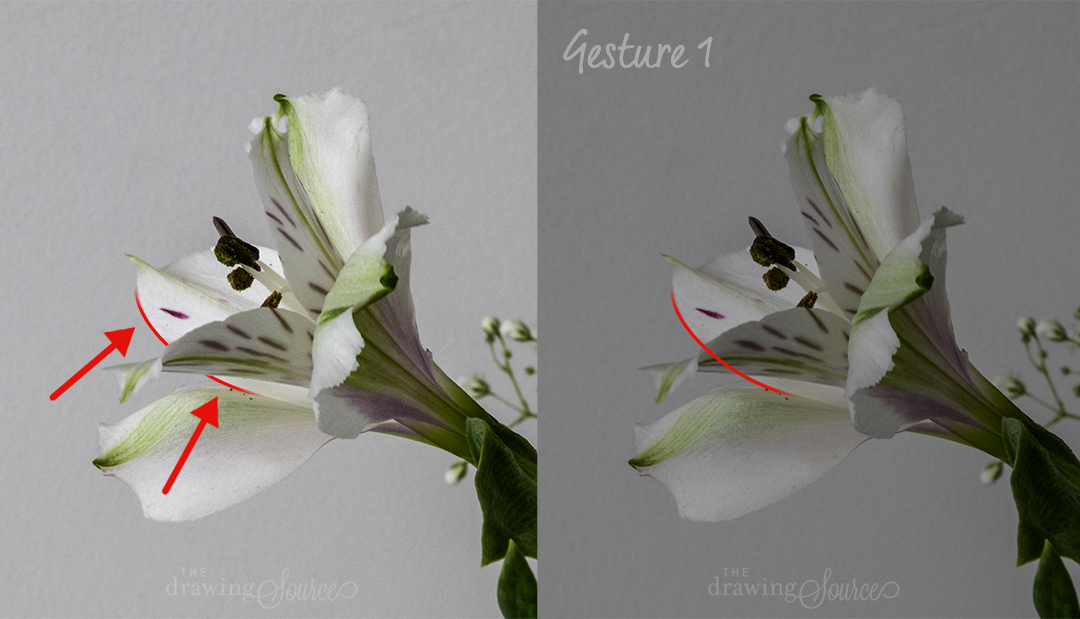
Gesture 1:
Some gestures are more evident than others. For example, in the image above, I point out how the contour of the central petal connects on both sides of an intersecting petal.
This may be something you realize without much thought. However, if you did miss this connection, do you see how easily this area could look disjointed?
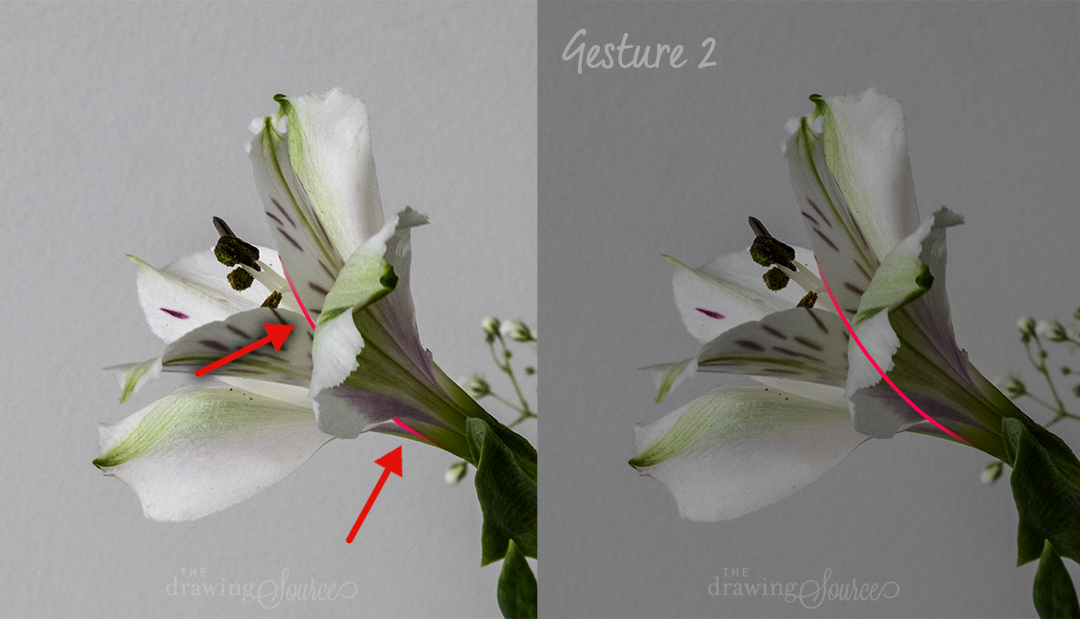
Gesture 2:
We can look for gestures that are farther away from each other as well. At first glance, you may not notice this gesture. However, actively seeking out and drawing these gestures can subtly but effectively link two elements that appear far from each other, creating an underlying unity and inter-connectivity.
Can you see how this strategy can also be just as useful as measuring proportions or using comparative measurement? When drawing subjects that consist mostly of curving lines, such as this one, I actually find gestures more effective than the aforementioned methods.
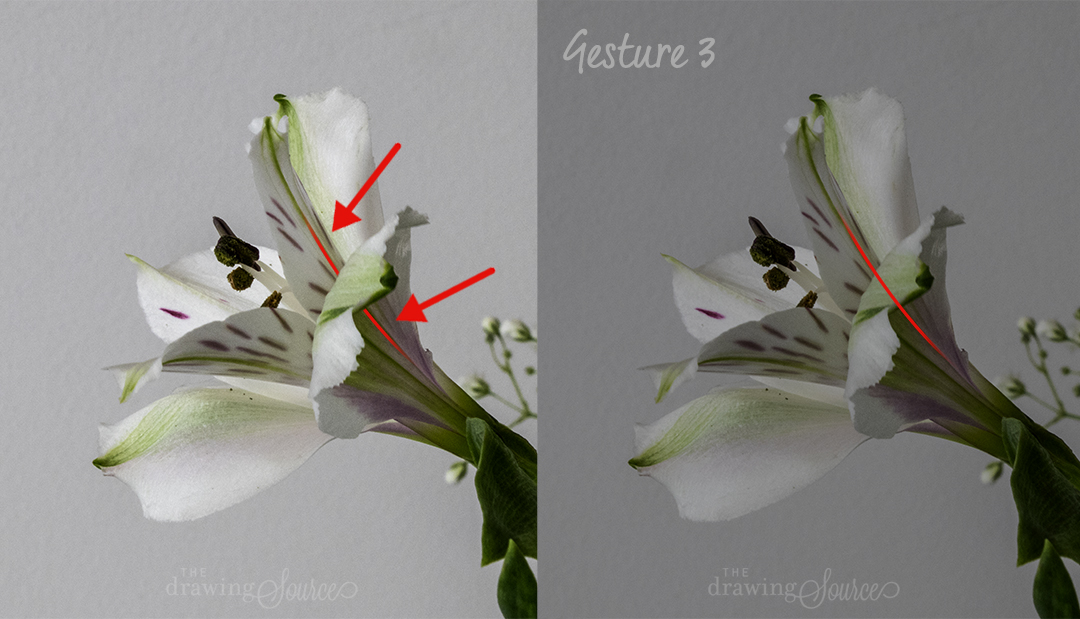
Gesture 3:
Gestures are not only found along contour lines - they can be interior lines as well, such as the one pictured above. Placing the 'veins' in the flower petal closest to us is much easier when we relate it to another element on the flower.
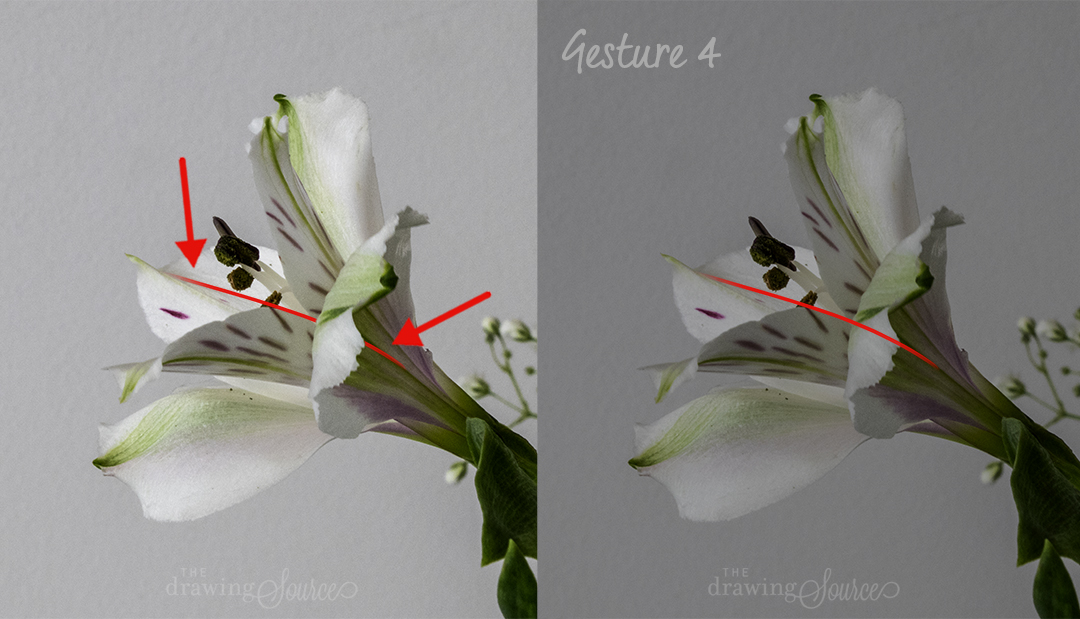
Gesture 4:
A gesture can connect multiple parts of a subject, and is certainly not limited to connecting two lines. For example, the gesture line above connects three petals of the flower.
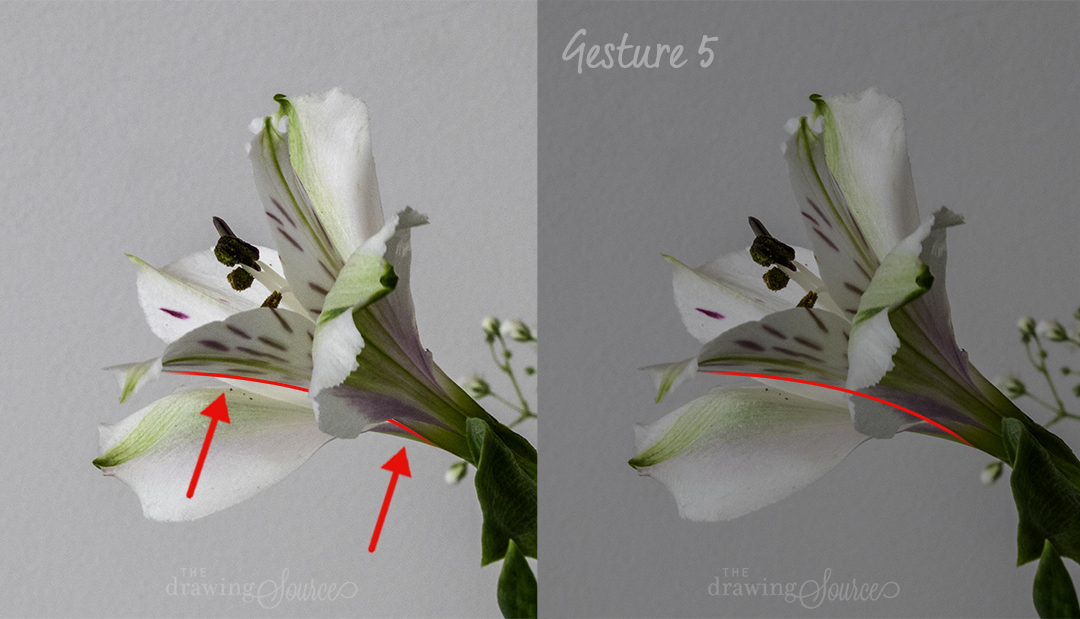
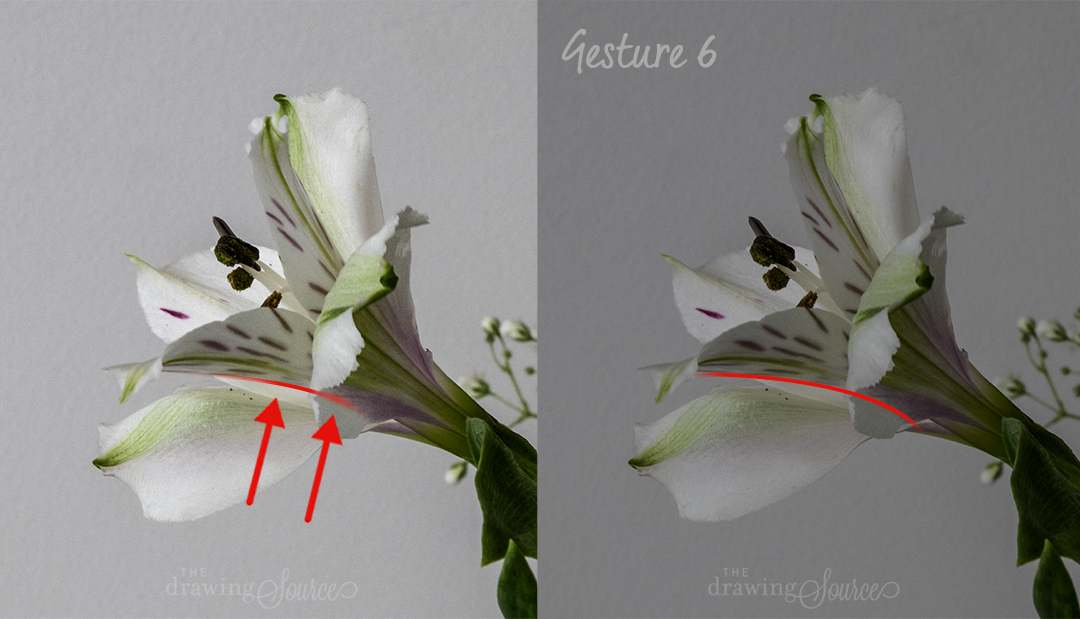
Gestures 5 and 6:
Finally, the same line can flow into two or more gestures, as is shown in the two diagrams above.
These are just a few of the gestures that can be found in this subject. Why not download a reference photo of the flower I'm drawing from (at the bottom of the page), and see how many more you can find!
How to Draw a Flower:
The Completed Block-In
Here is my completed block-in, or line drawing, of the flower. (I used an HB graphite pencil for the entire block-in process.)
I am confident in the proportions, I have carefully looked for gestures and used them to add movement, connection, and accuracy to my drawing, and I have indicated the overlapping lines that start creating depth in the image. (Learn how to create depth and dimension using line in Lesson 4 of my free Mini-Course!)
Now I can turn my attention to values and shading!
How to Draw a Flower:
The Value Stage
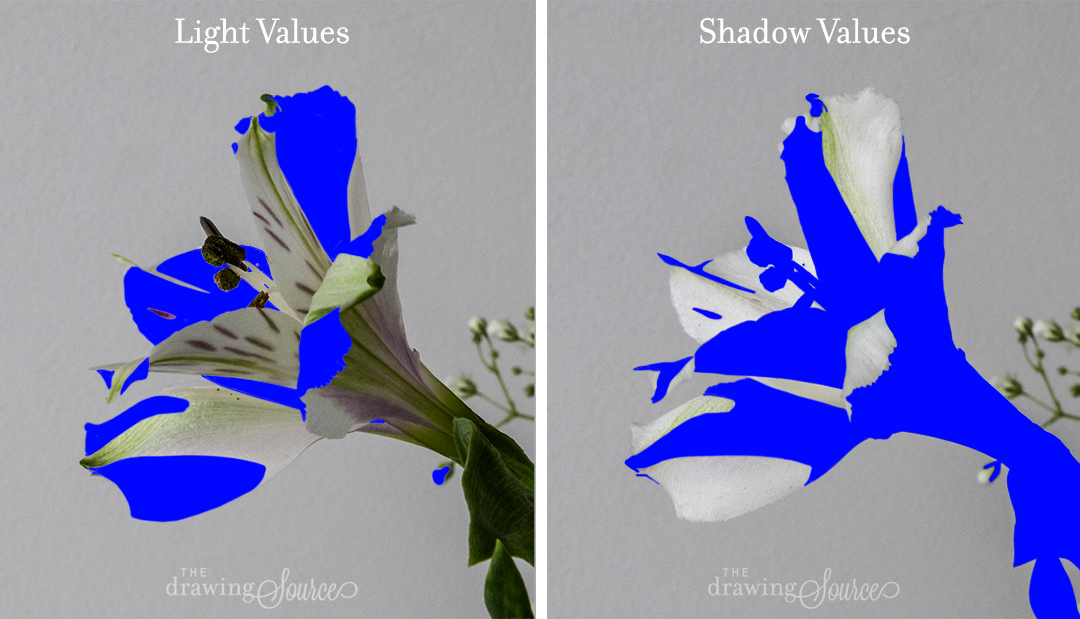
My first goal of the value stage is simply to organize the flower into two categories: light and shadow.
In this subject, which has so many subtle middle values, or half-tones, how do we determine which values fall into the 'light' category and which fall into the 'shadow' category? We squint at our subject! This heightens the contrast that we see, making it easier for us to decide how the half-tones should be grouped. Learn more about grouping values in this free Mini-Course.
In the image above, I have covered the white of the paper with a fairly flat, even value to indicate the portion of the flower that is in shadow. Notice that my values are not yet as dark as they need to be. Because the value shifts are subtle in this subject, I'm going to build them up incrementally so that I have many opportunities to compare them to each other, and make sure that the value relationships in my drawing are accurate and believable.
Though I'm still at the beginning of my drawing, I'm already making decisions about how I will finish it. How will certain shapes, such as the leaf at the bottom right, end? I decide to create a gradation in the leaf that fades into the white of the paper, and begin indicating it here.
I continued to use an HB graphite pencil in this step.
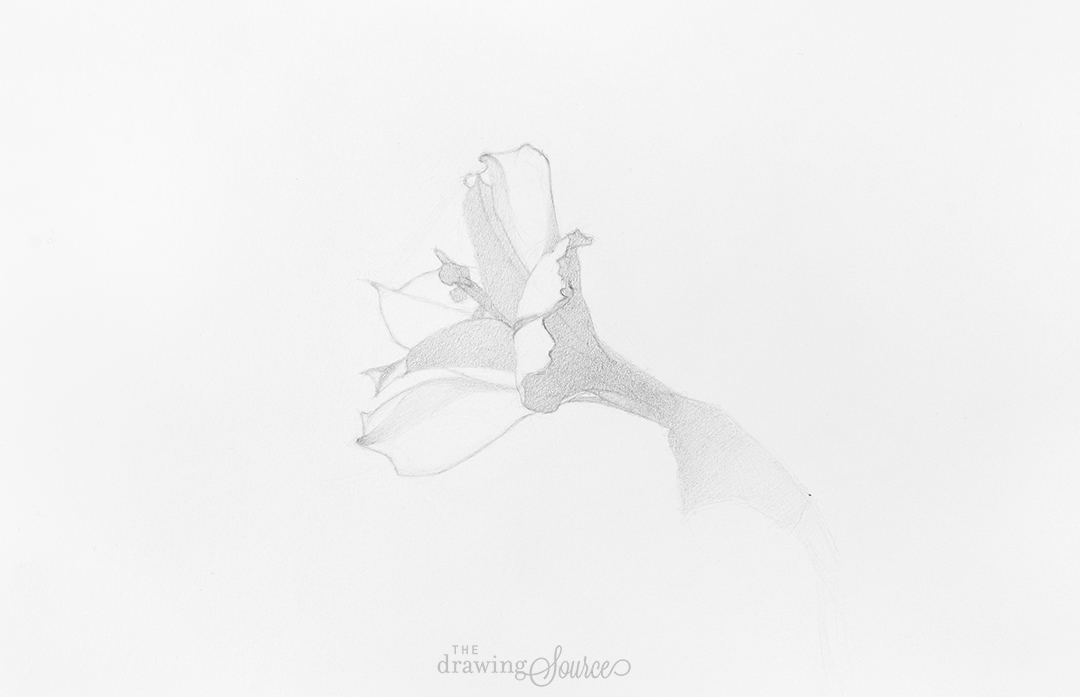
How to Draw a Flower:
Determining the Value Extremes
In the previous step I was looking at the flower as though it had
only two values: a light value and shadow value. Now I switch my 'mode
of seeing' to view the subject in three values: light, half-tone, and
shadow.
Another way to say this is that I'm looking to determine and draw my value extremes:
- Where are the darkest values in the subject?
- Where are the lightest values in the subject?
If I establish those two extremes, then the rest of the values are half-tone, or middle value, by default.
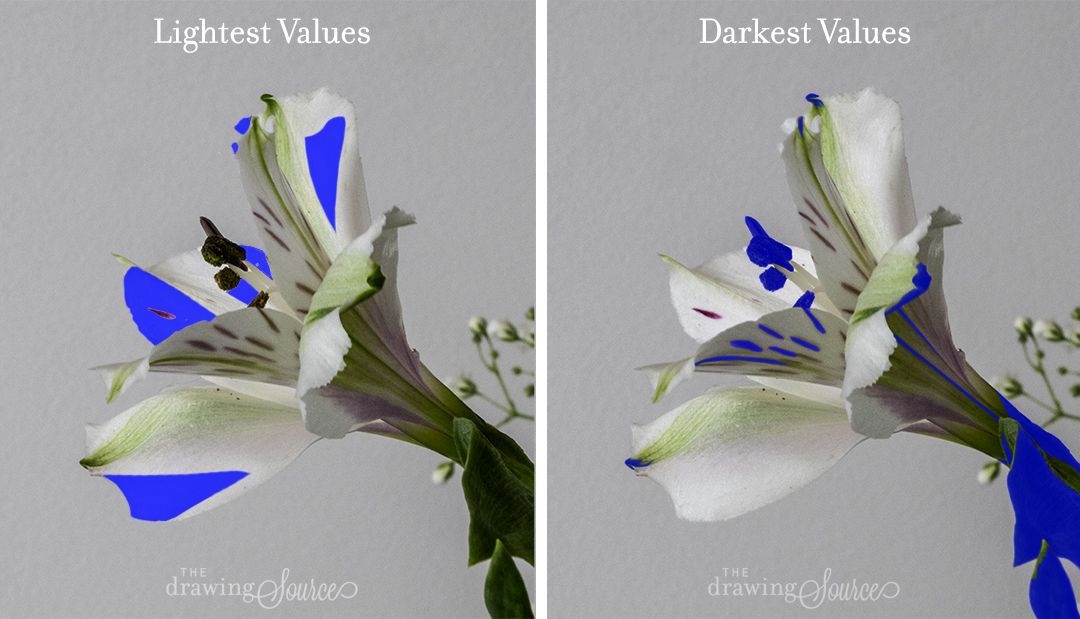
Here I have started indicating my value extremes. I leave the lightest values as the white of the paper, and I begin darkening the darkest values using a 2B graphite pencil.
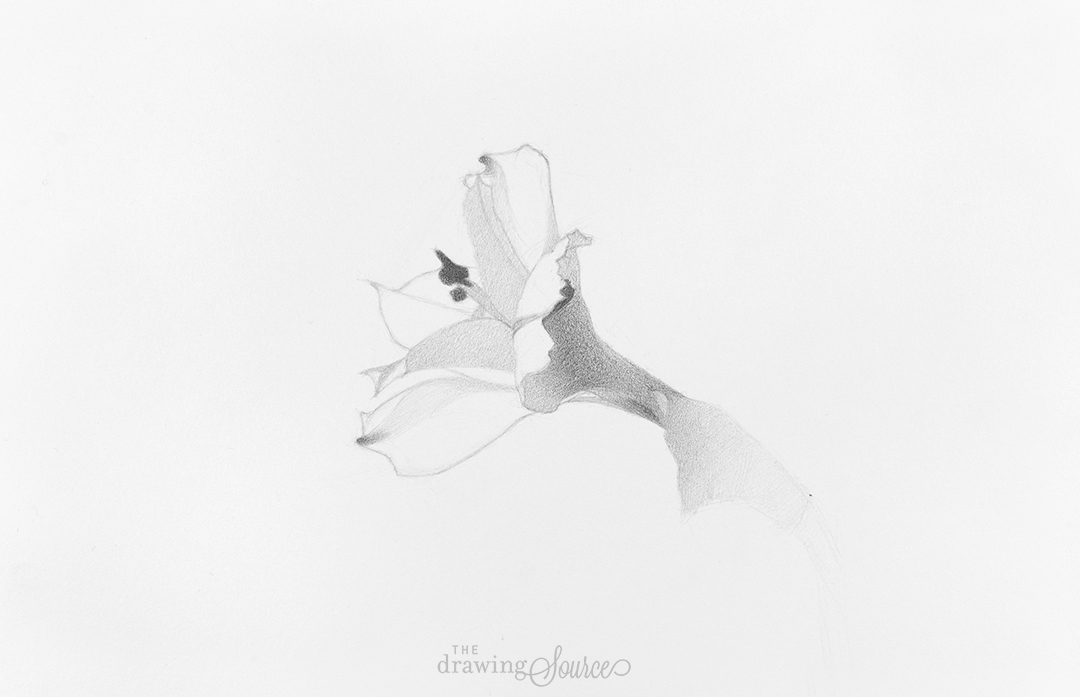
How to Draw a Flower:
Building up the Values
A creative decision you might notice that I've made in this step is to add a gradating background to the left side of the flower. This decision is completely based on my personal, aesthetic preferences.
Outlines, such as the ones that enveloped each petal in the previous step of my drawing, tend to appear more illustrative, and can slightly decrease the realism of a drawing. However, again - this is personal preference! You may love the illustrative look of the outlined flower, and choose to keep at least some of your contour lines in your drawing! Personally, I prefer a more realistic drawing, which is achieved by placing one value next to another, instead of leaving an outline around each form of the subject.
In this step I also continued building up my middle values. For example, look at the two darker petals in the center of the flower: I have started differentiating that the top central petal is very slightly lighter than the bottom one. Each of these petal also have gradations within them, but remember: work from general to specific! Differentiating the values between the two petals is more general than creating the gradations within each petal, so I address that first.
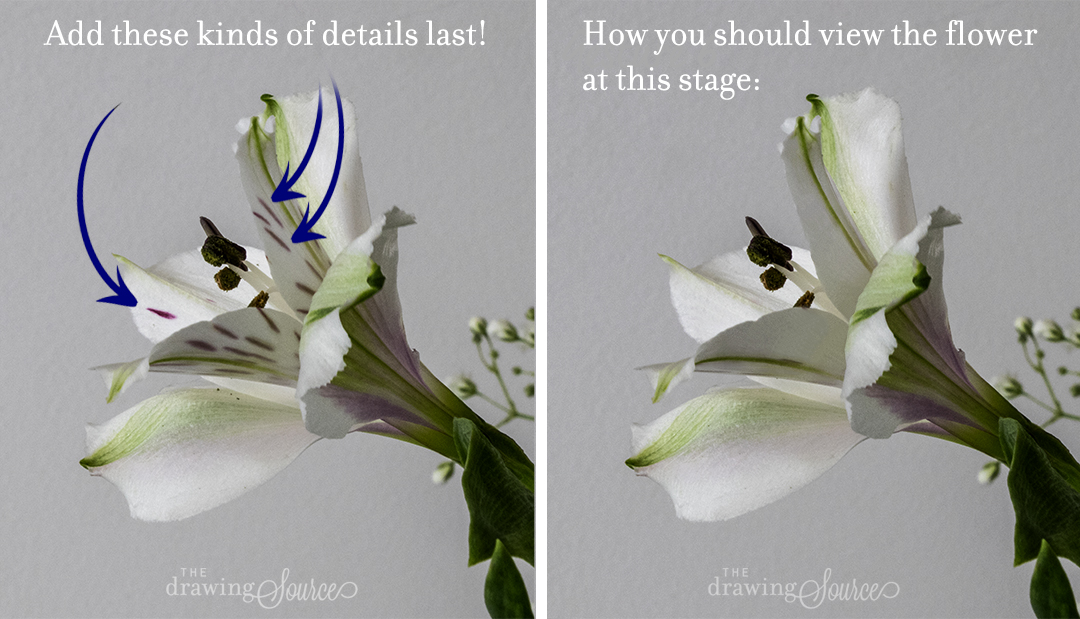
What about the detailed markings on the flower?
You may have noticed that I've been ignoring the obvious markings on the central petals of this flower. In an earlier step, I determined that some of them are within the category of 'darkest values of this subject', yet I still have not drawn them!
This is because it's infinitely more important to the realism of my drawing that I create convincingly 3D underlying forms first, and then add details and markings on top. This step is sometimes called 'modelling the big forms', or 'turning the larger forms'. (You can learn all about the stages of shading in my Realistic Drawing 101 course!)
Besides my HB and 2B graphite pencils, I also used a 4B for the dark accents in this step.
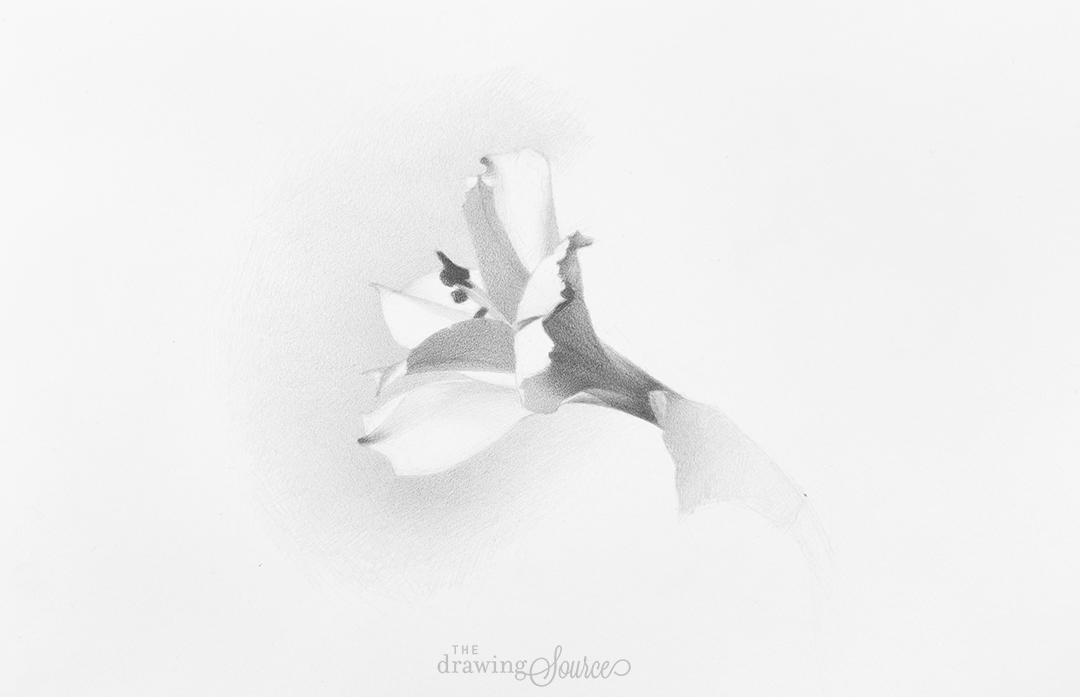
To draw the petals so that they look 'convincingly 3D', we need to
'see through' the details, and instead look for the general value of each petal, as shown in the above right image.
Speaking of the above right image, did removing the markings on the petals reduce their believability or realism? Not at all!
I could easily choose not to draw in those markings, and it wouldn't detract from the realism of my drawing. The overall form is always more important to the realism of a drawing than any superficial markings on the surface.

Still no markings on those central petals?!
Nope! However, look at the gradations within the central petals, and how much more convincingly three-dimensional and realistic they look.
Because there are so many extremely subtle tonal (or value) changes in this flower, throughout this step I have been actively comparing values.
What I mean by 'actively comparing values':
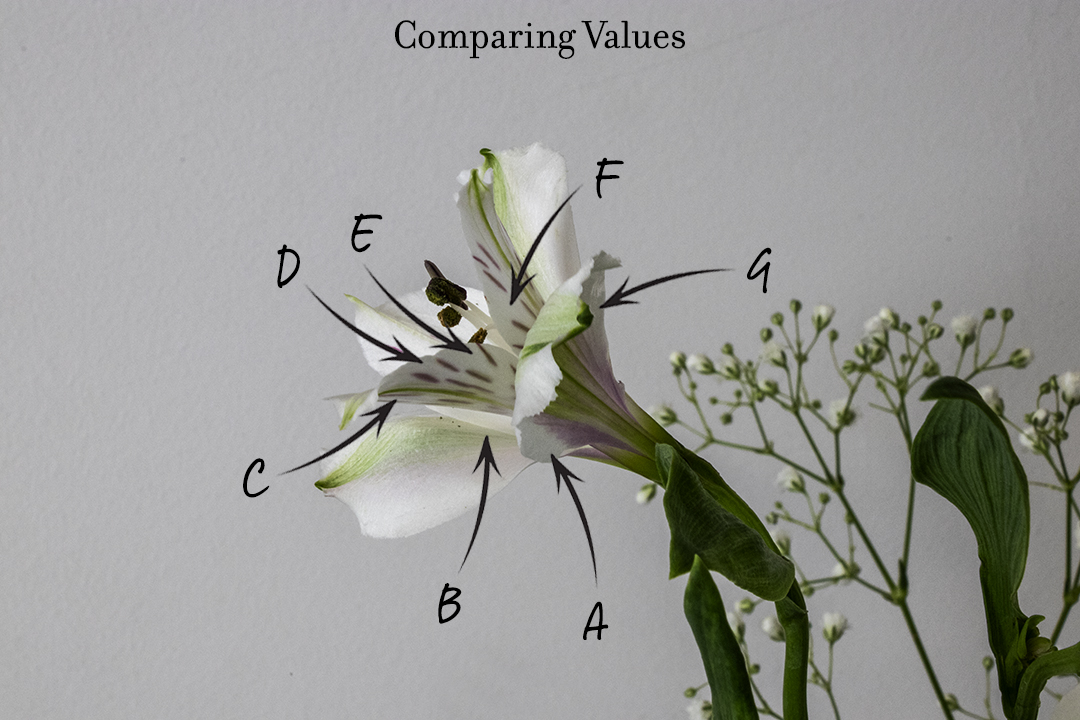
Value A is close in value to value B. The two are only separated by a sliver of lighter petal between them.
Value C is lighter than values D and E. Of the three values indicated on that particular petal, Value D is the darkest, value E is slightly lighter, and value C is the lightest.
Value F is approximately the same value as Value E, perhaps juuust barely lighter.
Value G is darker than Value F. Value G is similar in value to Value D.
These are just a few examples of my thought process while comparing values. Analyzing which values are similar and which are slightly different help me to notice and re-create these subtleties in my drawing.
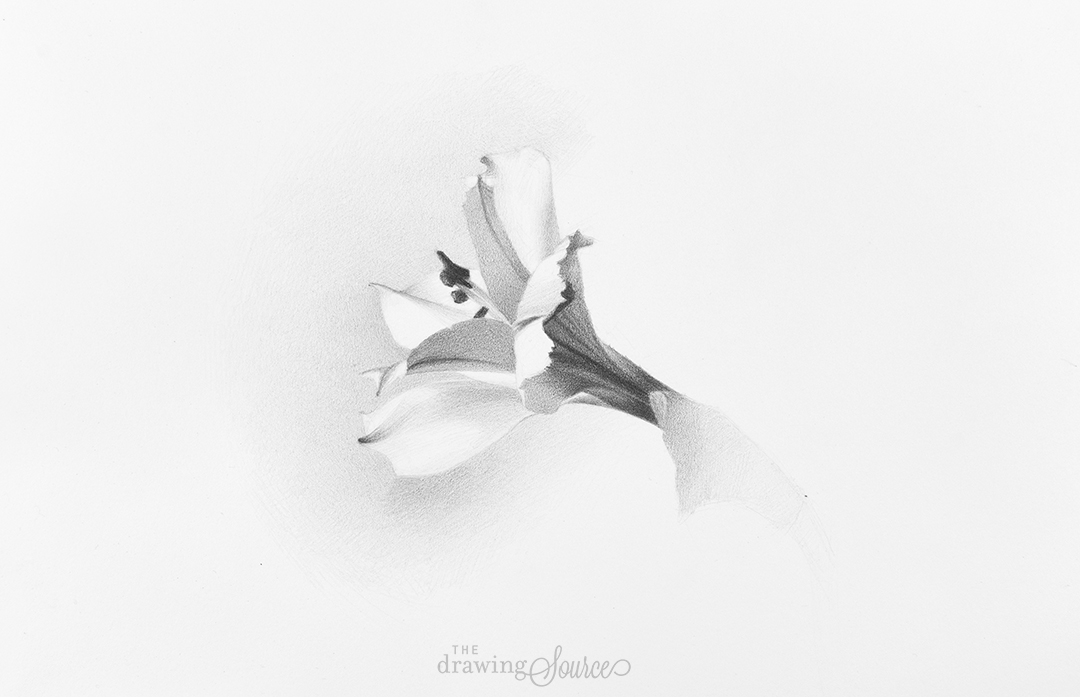
How to Draw a Flower:
The Finished Flower Drawing
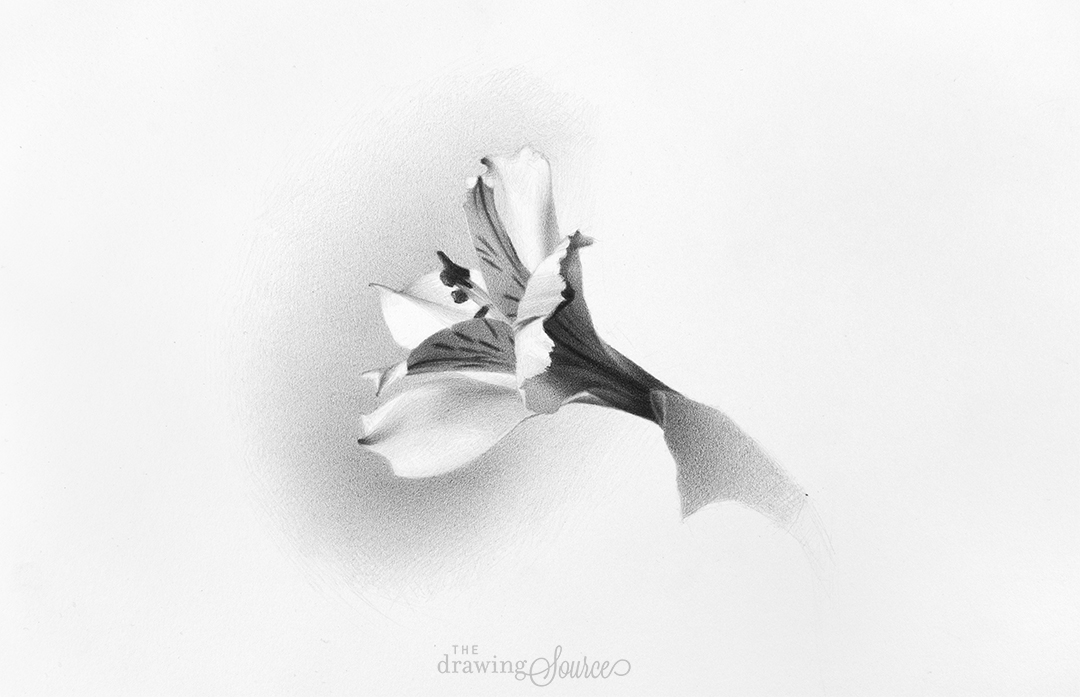
My very last step in this 'how to draw a flower' tutorial was to finally draw in the details that I ignored for so long! Notice that the markings on the petals seem to radiate out from the center of the flower.
Also notice that they are not evenly spaced!! Drawing this 'unevenness', or the 'imperfections' of a subject, for lack of a better word, adds tremendous realism to it. The more specific our drawing is to our subject, the more believable and natural it will seem.
This concludes the tutorial, but don't miss the bonuses below!
Downloadable Resources
I hope you enjoyed learning how to draw a flower!
What next?
Why not download the reference photo of the flower, along with an infographic to remind you of the steps, and draw it yourself! Or, if you're ready for detailed video instruction, check out my Realistic Drawing 101 course, in which you can learn how to draw a flower along with me, step by step.
Happy Drawing!
Your drawing prof,

Enjoyed this page? Please share it!
Share buttons and pinnable image below:
Pages Related to 'How to Draw a Flower'
3 Ways to Use a Kneaded Eraser
How to Draw Glass Using White Charcoal on Black Paper
How to Combine Black and White Charcoal
Value Drawing: The Key to Realism
Return to Drawing Tutorials from How to Draw a Flower
Return to the Homepage from How to Draw a Flower
Search the site above


